
Ombre Fabric Dyeing: Step-by-Step for Beginners

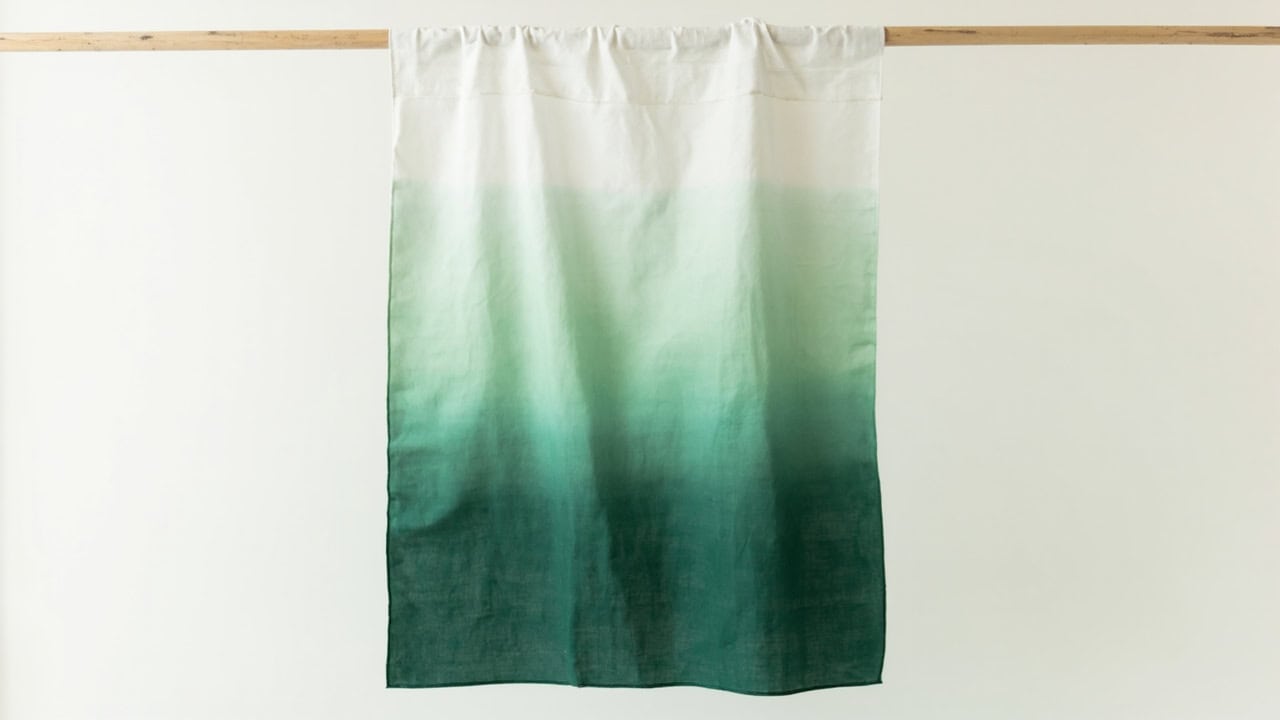
Ombre fabric dyeing is a technique that produces a smooth vertical gradient of color on fabric — fading from light at the top to deep saturation at the lower edge — by repeatedly dipping fabric into a dye bath at progressively deeper depths. The technique works best on natural fibers like cotton, linen, and silk using fiber-reactive dyes, where each 5–10 minute immersion step builds approximately one shade depth, allowing 4–6 distinct gradient bands to be layered for a professional-looking result.
What Is Ombre Dyeing and What Results Can You Achieve?
Ombre (French for “shaded”) creates a tonal gradient from light to dark within a single fabric piece. The gradient runs vertically — lightest at the top, darkest at the bottom — and the effect can range from subtle two-tone transitions to dramatic multi-shade fades depending on how many immersion steps you perform.
The technique works on natural and semi-synthetic fibers including cotton, linen, rayon, silk (with acid dye), and hemp. It does NOT work well on polyester, nylon, or other synthetic fibers without special treatment, because standard dye types cannot bond effectively to these materials without heat-setting at temperatures above 200°F (93°C) — conditions that are impractical for home ombre projects.
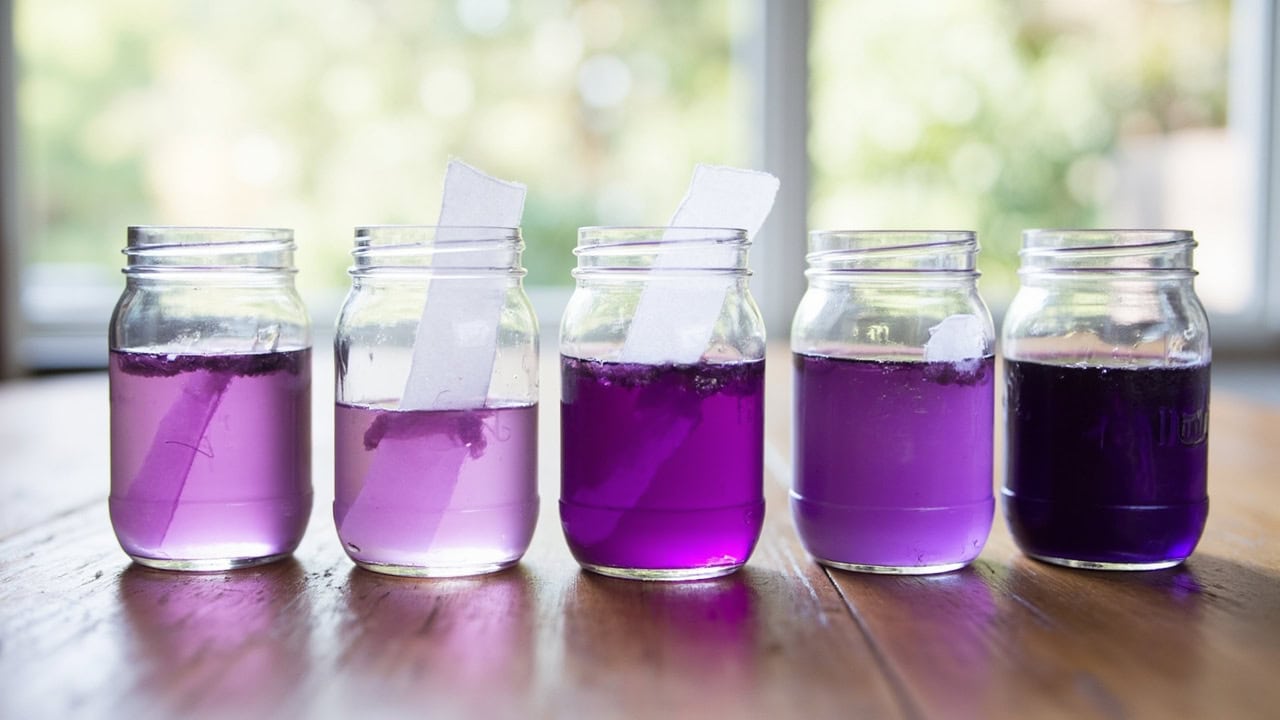
One key advantage of ombre dyeing is that no special equipment is required beyond containers deep enough to fully submerge your fabric. A household bucket, a large plastic storage bin, or even several glass jars all work perfectly well for building a gradient bath sequence.
Materials and Equipment Needed
- Fiber-reactive dye (Procion MX recommended for cotton and linen) or acid dye for silk
- Soda ash fixative (for fiber-reactive dyes) or citric acid (for acid dyes)
- Large plastic containers or buckets (2–3, for multi-shade ombre)
- Rubber gloves
- Measuring cups and spoons
- Plastic wrap or shower cap (to keep fabric damp between dips)
- Clothesline or wooden dowel for hanging
- Salt (for cotton/linen) or white vinegar (for silk)
- Old towels for workstation protection
Preparing Your Fabric for Ombre Dyeing
Proper fabric preparation is the foundation of a successful ombre project. Begin by pre-washing your fabric in hot water with Synthrapol or a mild detergent to remove oils, sizing, and any finishing treatments that could prevent the dye from bonding evenly to the fibers.
For cotton and linen, the mordanting process involves soaking the fabric in a soda ash solution (1 cup of soda ash per gallon of water) for 20 minutes before dyeing. For silk, soak in warm water with a few tablespoons of white vinegar for 30 minutes instead. A mordant — or fixative — chemically bonds to the fiber and creates sites where the dye molecules can attach, which is essential for achieving colorfastness.
Do NOT wring out the fabric after mordanting — it should remain damp but not dripping. Excessively dry fabric will absorb dye unevenly, while fabric that is too wet will dilute the dye bath too quickly. If you want a more organic, texture-influenced gradient, loosely fold or gather the fabric before immersion rather than keeping it perfectly flat.
Step-by-Step: Classic Vertical Ombre Technique
Building an ombre gradient follows a predictable, repeatable process. Each immersion represents one shade band in the final gradient, so planning the number of steps you want determines how smooth your result will be.
Step 1: Prepare Dye Bath
Mix your lightest shade first in a container deep enough to submerge fabric to approximately 25% of its total length. Use warm water at around 100°F (38°C) — this temperature is optimal for Procion MX fiber-reactive dyes, which are the most common choice for home ombre dyeing on cotton and linen. At this temperature, the dye molecules remain active and bond efficiently with the soda-ash-treated fibers.
Step 2: First Immersion — Lightest Shade
Submerge the entire bottom portion of fabric (up to your first target line, approximately 25% from the bottom) for 5–10 minutes. Lift the fabric out slowly, letting excess dye drip back into the bath. The upper portion of fabric — above the waterline — remains undyed and will become the lightest part of your ombre gradient.
Step 3: Second Immersion — Medium Shade
Dilute the remaining dye bath by 30–40% with a salt water solution (1 cup salt per gallon of water for cotton/linen). Lower the fabric deeper — to approximately 50% of its length — for another 5–10 minute immersion. The already-dyed upper portion will not absorb significantly more color during subsequent dips, which is why building from light to dark works for gradient layering.
Step 4: Third and Subsequent Dips
Continue diluting the dye bath and dipping progressively deeper sections of fabric for the same 5–10 minutes each time. Aim for 4–6 distinct depth zones — each additional immersion step smooths the transition between shades. After each dip, wrap the fabric loosely in plastic wrap or cover it with a shower cap to prevent it from drying out, which would cause harsh lines between shade bands.
Step 5: Final Deep Shade
For the darkest section at the very bottom of your fabric, either add more concentrated dye to the bath or use an undiluted dye solution for the final 5–10 minute immersion. This is where the most intense color saturation occurs, and it is the section most prone to dye bleeding if not properly fixed.
Step 6: Rinse and Fix
Rinse the finished ombre fabric in cold water until the water runs completely clear — this may take 5–10 minutes of running water. Then wash in hot water (for cotton) or warm water (for silk) with a mild detergent. Fiber-reactive dyes reach their maximum bond strength when allowed to cure for a full 24 hours after the final rinse. Do not tumble dry until after the first three washes.
Step 7: Air Dry
Air dry the fabric flat or hang it to dry. Initial tumble drying can stress the dye-fiber bond before it has fully cured. After the first three washes, the ombre effect will have stabilized and the fabric can be treated like any other colored garment.
Common Mistakes and Troubleshooting
Problem: Harsh Line Between Shades Instead of Smooth Gradient
This is the most common ombre dyeing issue. The root causes are waiting too long between dips (allowing the fabric to cool or partially dry), a dye bath that has cooled below the optimal 100°F (38°C) range, or the fabric drying out between immersion steps. Keep fabric wrapped in plastic between each dip, maintain warmer dye baths by placing containers in a warm area or using a slow cooker as a water bath, and reduce the time between immersions to under 5 minutes.
Problem: Uneven Color Distribution (Lighter Spots)
Light spots or blotchy areas typically result from fabric that was folded, wrinkled, or creased during immersion — these areas resist dye penetration. Air bubbles trapped against the fabric surface also prevent dye from contacting the fibers at those points. Gently agitate the fabric while it is submerged, and use a clean wooden spoon to smooth and press fabric below the water surface throughout each immersion.
Problem: Top Section Absorbing Too Much Color
If your lightest shade band is darker than intended, the fabric was not held vertically during immersion — dye splashed or wicked up the sides during removal. Lower the fabric into the bath at a controlled, vertical pace and do not agitate or swish the fabric when pulling it out. Cap the containers between dips to prevent splashing.
Problem: Dye Bleeding or Running After Cure
Dye exhaustion must be complete before the fabric is exposed to water. Insufficient rinsing leaves unbound dye molecules in the fabric that will release during washing. Letting the fabric rest for 24 hours after the final rinse is critical — this cure time allows the dye to fully bond with the fiber molecules. Always wash in cool to warm water (not hot) for the first three washes, and use a mild detergent designed for colored fabrics.
Fiber Compatibility for Ombre Dyeing
Different fiber types require different dye chemistries and produce different quality ombre results. The table below summarizes compatibility, recommended dye types, and expected outcome quality.
| Fiber Type | Dye Type | Mordant/Fixative | Ombre Suitability |
|---|---|---|---|
| Cotton | Fiber-reactive (Procion MX) | Soda ash | Excellent |
| Linen | Fiber-reactive (Procion MX) | Soda ash | Excellent |
| Rayon/Viscose | Fiber-reactive (Procion MX) | Soda ash | Good |
| Silk | Acid dye | White vinegar | Good (softer gradient) |
| Wool | Acid dye | White vinegar | Fair — fiber scales may affect gradient uniformity |
| Polyester | Disperse dye | Heat set required (200°F+) | Poor — impractical for home ombre |
| Nylon | Acid dye | White vinegar | Fair |
Cotton and linen produce the cleanest, most controllable ombre gradients because their cellulosic structure responds predictably to fiber-reactive dyes when properly mordanted with soda ash. The hydroxyl groups (-OH) on cellulose fibers readily form covalent bonds with the reactive dye molecules, creating durable, wash-resistant color.
How Ombre Differs From Other Gradient Dyeing Techniques
Ombre is often confused with related dyeing techniques, but there are important distinctions that affect which method to choose for a given project.
Tie-dye creates radial or circular patterns from points where fabric is tied or scrunched — the dye penetrates from multiple directions to form geometric shapes. Ombre, by contrast, is a linear vertical gradient applied in bands. Shibori uses resist techniques such as folding, pleating, and binding to create patterns by preventing dye from reaching certain areas of the fabric — the results are structural and patterned, not gradient-based.
Dip-dyeing involves a single immersion at one depth, producing a hard line between two colors rather than a gradient. A gradient dip-dye uses 2–3 depth zones and represents a simplified version of the ombre technique, but still lacks the smooth, multi-band transition that 4–6 progressive immersions create. True ombre dyeing with its multiple incremental steps is what separates a professional-looking gradient from a basic two-tone effect.
Understanding these distinctions helps you choose the right technique for your desired outcome — and explains why ombre requires more time and more dye baths than simple dip-dyeing.
Frequently Asked Questions
Q: Can you ombre dye synthetic fabrics like polyester?
A: Polyester requires disperse dye and heat-setting at 200°F (93°C) or higher to bond properly — this makes ombre techniques impractical at home. Nylon can be ombre-dyed with acid dye but results are less predictable than with natural fibers. Cotton, linen, rayon, and silk produce the cleanest, most controllable ombre gradients.
Q: How many dye baths do you need for a good ombre effect?
A: A minimum of 3–4 progressively deeper dye immersions creates a visible gradient, with 4–6 distinct shade bands being ideal for a smooth, professional-looking ombre. Each immersion step represents one shade depth — the more steps, the smoother the transition.
Q: How long should each dye immersion last?
A: Each immersion should be 5–10 minutes for fiber-reactive dyes at around 100°F (38°C). Shorter times produce lighter shades; longer times do not significantly deepen color after the 10-minute mark due to dye exhaustion. Keep fabric between dips wrapped in plastic to prevent drying.
Q: How do you fix ombre dye so it does not fade?
A: For cotton and linen, soak in a soda ash solution before dyeing and let the finished ombre rest 24 hours before washing to allow the dye to fully bond. Rinse in cold water until clear, then wash in warm (not hot) water with a mild detergent for the first three washes.
References
- ASTM International. (2024). ASTM D6701-16: Standard Test Method for Determining the Hydrolytic Stability of Fiber-Reactive Dyes on Cellulosic Substrates. ASTM International.
- AATCC. (2020). AATCC TM107-2017: Colorfastness to Water. American Association of Textile Chemists and Colorists.
- Broadbent, B. (2001). Principles of Textile Dyeing. CRC Press.
- Cotton Incorporated. (2023). Dyeing Fundamentals for Cotton. cottoninc.com
- Gulbinska, M. (2014). Fiber-Reactive Dye Systems. Coloration Technology, 130(3), 147–156.
- ISO. (2010). ISO 105-C06: Textiles — Tests for Color Fastness — Part C06: Colour Fastness to Domestic and Commercial Laundering. International Organization for Standardization.
- Textile Exchange. (2023). Preferred Fiber & Materials Market Report. textileexchange.org


