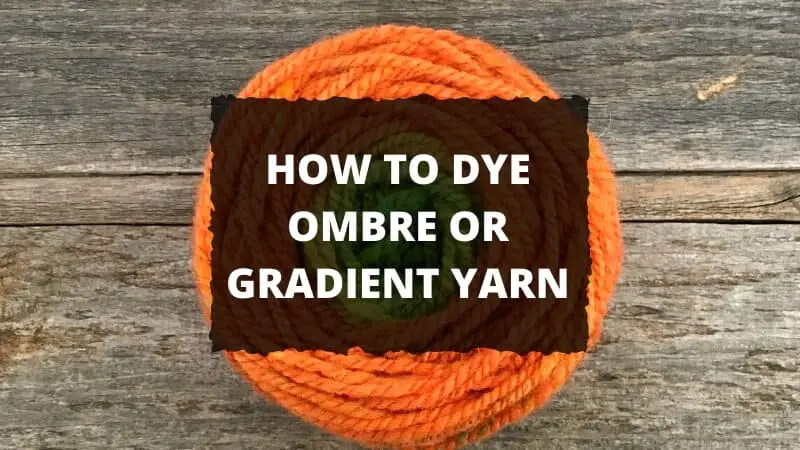
How to Dye Slow Color Changing Yarn – Ombre or Gradient Yarn Dyeing
You can hand dye yarn into a gradient or ombre pattern at home using wool or protein-based fiber (70%+ wool content), white vinegar as an acid mordant, and food coloring or fabric dye. The gradient forms as the outer yarn layers absorb more dye while the core remains lighter, creating the signature dark-to-light transition that defines ombre yarn.
If you haven’t yet tried hand dyeing, check out my hand dyeing yarn guide for beginners first. This guide builds on those fundamentals to achieve the slow color-changing effect.
Here is how to transition yarn through color ranges using slow color changing techniques at home.
Yarn Fiber Types for Ombre Dyeing
| Fiber Type | Dye Compatibility | Ombre Result | Notes |
|---|---|---|---|
| Wool (70%+ protein fiber) | Excellent | Sharp, clean gradients | Acid bath opens fiber structure for even dye absorption |
| Mohair, Angora | Excellent | Soft, blended gradients | Similar protein structure to wool |
| Cotton, Linen (plant-based) | Poor | Opaque, hazy appearance | Requires different dye type (fiber reactive); ombre effect does not develop |
| Acrylic, Nylon (synthetic) | Poor to Moderate | Uneven, patchy color | Requires specialized disperse dyes; results are inconsistent |
Key Specifications at a Glance
| Parameter | Value | Details |
|---|---|---|
| Yarn composition | 70%+ wool or protein fiber | Higher wool content = better gradient transitions |
| Water-to-yarn ratio | 20:1 by weight | Allows adequate water circulation for even simmering |
| Acid mordant | White vinegar, 60ml (1/4 cup) per 450g yarn | Lowers pH to 4–5 for dye absorption |
| Dye amount | 1 teaspoon per 100g yarn | Produces medium saturation; adjust for lighter or deeper color |
| Simmering temperature | 180–200°F (82–93°C) | Do not boil; gentle simmer prevents fiber damage |
| Simmering time | 20–30 minutes per bath | Longer for deeper saturation; inspect periodically |
Things You Will Need
Start with wool or protein-based yarn. Use yarn that is approximately 70% wool or higher for optimal results.
Wool and protein-based fibers require an acid bath to absorb color permanently. The acid opens the fiber structure for dye penetration at a pH of 4-5.
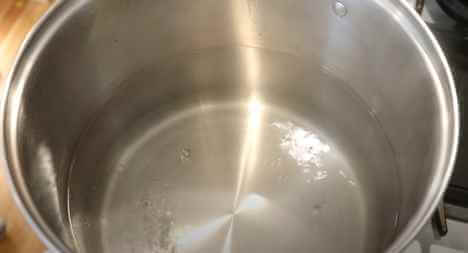
Use a large dishpan or bowl that accommodates the yarn fully with room for water circulation. A stovetop or heating element is required to bring the solution to a simmer.
Food dye, food coloring, or icing color provides the colorants for this project. Gather gloves, a mixing spoon, and tongs for handling the yarn.
The quantity of dye, water, and vinegar scales based on the amount of yarn and desired color saturation.

Quick and Easy Method to Hand Dye Slow Color Changing Yarn
White vinegar acts as the acid mordant at approximately 60ml (1/4 cup) per 450g (1 pound) of yarn. Use a water-to-yarn ratio of 20:1 by weight for adequate movement during simmering.
STEP 1 – Prep for Soaking
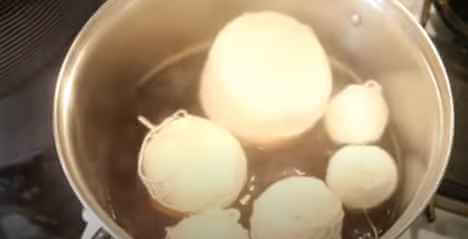
Place the dishpan on the stovetop. Select a bowl spacious enough to submerge the yarn completely and allow room to rotate the yarn ball when needed.

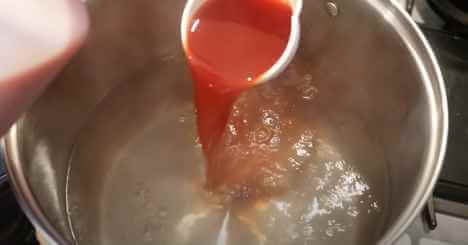
STEP 2 – Mix Dye Colors
Add dye colors incrementally. Adding too much dye results in excessive saturation with no visible gradient transition from dark to light.
Balance hue and saturation by adding colors one spoonful at a time rather than pouring all dye in at once.
Add 1 teaspoon of dye, blend it with the boiling water, then assess the saturation level before adding more. This method prevents over-saturation and ensures proper gradient development.
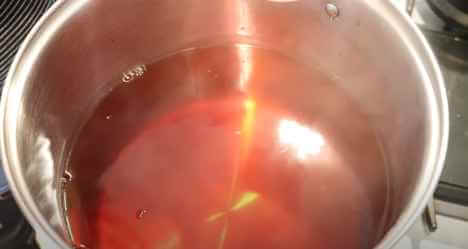
Monitor the color emergence to gauge whether additional dye is needed for the desired depth.
Allow the dye to disperse fully through the water and vinegar solution for several seconds before proceeding.
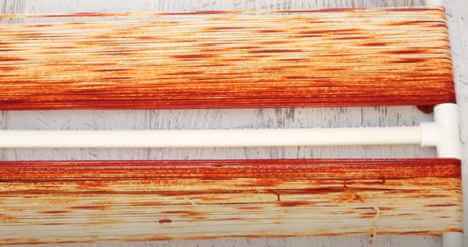
STEP 3 – Dyeing the Yarn
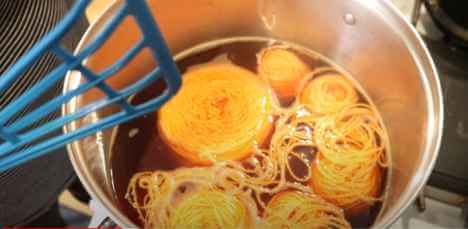
Submerge the yarn roll in the dye bath once the color is fully blended with the water and vinegar solution. Simmer the yarn at 180-200°F (82-93°C) for proper dye absorption.
Allow the yarn to absorb the color while rotating it with tongs to ensure all sections contact the dye evenly.
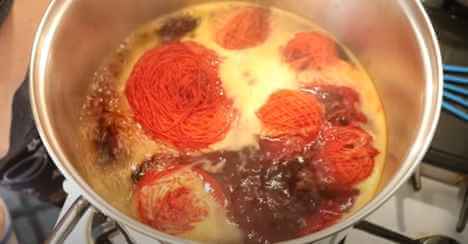
After 20-30 minutes of simmering, remove the yarn with tongs and inspect the inner sections for uniform color coverage.
Wool fibers have a tenacity of 15-20 cN/tex and can stretch up to 35% (dry) to 45% (wet) before breaking, making them durable enough for vigorous stirring during dyeing.
If white spots remain or the color appears foggy, return the yarn to the bath and focus agitation on the uneven areas.
If color absorption is poor, add more vinegar (approximately 30ml more) to lower the pH and improve dye uptake.
After another 20-30 minutes, remove the yarn and prepare for the next step.
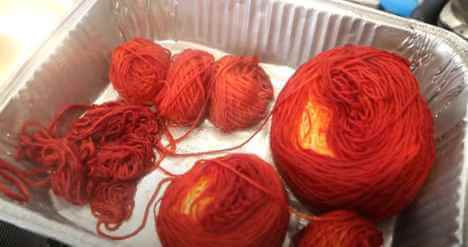
STEP 4 – Squeeze Out All the Excess Water
Strain all water from the yarn by twisting and squeezing with firm pressure. Repeat until the yarn ball is completely free of standing water.
Rinse the yarn thoroughly with cold water to remove excess dye residue.
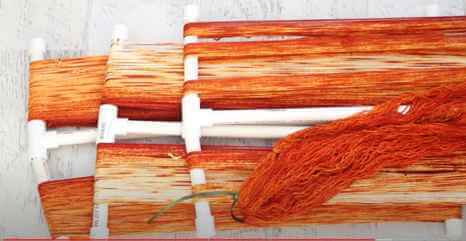
STEP 5 – Inspect the Color Saturation
Allow the yarn to dry completely. Once dry, examine the layers and color transitions by unwinding the skein.
The deepest color appears on the outer layers while the core displays the lightest shade, creating the desired gradient effect.
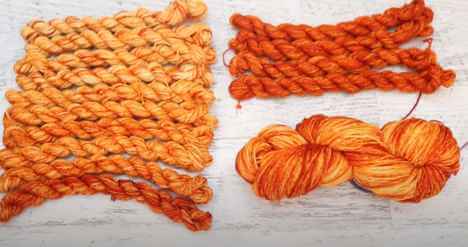
STEP 6 – Windup the Yarn
Wind the yarn into a new skein, rolling and unwinding as needed to create a uniform ombre patterned hank.
The lightest color occupies the outer layers while the deepest color remains at the center.
The first color section is now complete. For a second color, select a complementary shade such as teal transitioning to blue or orange to purple.
For more complex gradients, use two different saturation levels of the same hue such as a mild orange paired with a dark orange. The yarn absorbs both shades simultaneously, producing a richer gradient.
The Yarn Mixing
Prepare a work surface where you will lay all the yarn sections to dry. Unwind the skeins so the yarn lies in separate lengths rather than remaining coiled.
Arrange the yarn lengths head to head, then allow them to dry completely. The result is a blend of two gradient colors such as blue and orange combined into one ombre hank.
Wind the dried blended yarn into a single ball for storage or projects.

End Quote
Gradient ombre dyeing requires protein-based fibers and acid mordanting. Plant-based fibers and standard fabric paints cannot achieve this effect.
Ombre effects are impossible to achieve even with the best fabric paint for clothes.
Use white vinegar as the acid mordant rather than stronger acids. Residential use of concentrated acids poses safety risks.
If the final result does not match your expectations, use fabric dye remover to correct the shade and redo the process.
This guide on dyeing slow changing yarn is complete. Good luck with your next ombre dyeing project.
References
- ScienceDirect. (2024). Wool Fiber Properties. Elsevier.


