
Dip Dyeing Fabric: How to Create Gradient and Ombre Effects

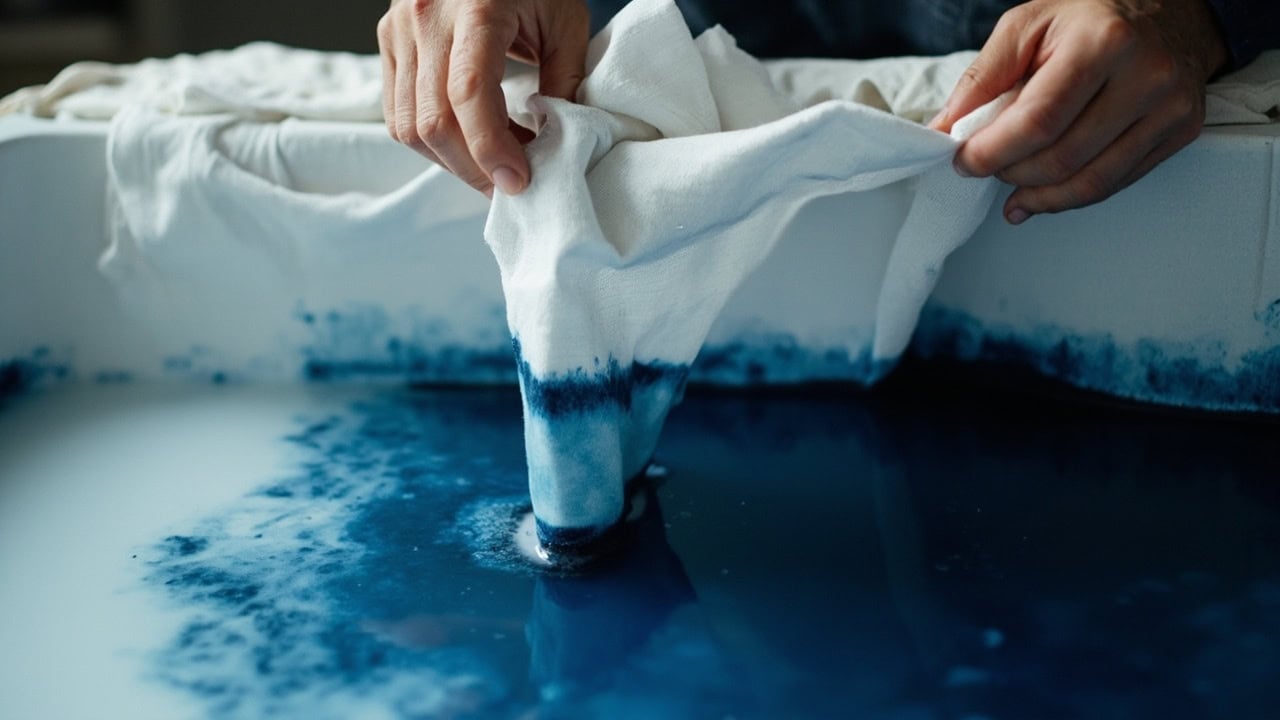
Dip dyeing fabric produces gradient and ombre effects by lowering fabric into dye solution at a controlled rate — the depth and speed of immersion determine where colors transition and how gradual the blend appears. This technique works on all natural fibers, with cotton and linen producing the most vibrant results due to their high cellulose content and superior dye uptake.
Fiber-reactive dyes — the gold standard for cellulose fibers — form strong covalent bonds with cotton, linen, and rayon, delivering wash fastness that lasts the lifetime of the garment when properly fixed. Unlike disperse dyes for polyester, which require heat-setting at temperatures exceeding 200°F (93°C), fiber-reactive dyes bond at room temperature when the proper alkaline environment is maintained with soda ash (sodium carbonate).
What Is Dip Dyeing and What Results Does It Create?
Dip dyeing is a fabric dyeing technique where fabric is immersed into dye at varying depths to create color gradients. Unlike surface decoration techniques such as tie-dye or shibori, dip dyeing produces predictable, repeatable results every time — provided you control the key variables of dye concentration, immersion time, fabric preparation, and immersion speed.
The technique dates back centuries but remains widely used in contemporary fashion and home décor for its elegant, modern aesthetic. Two primary effects define dip dyeing:
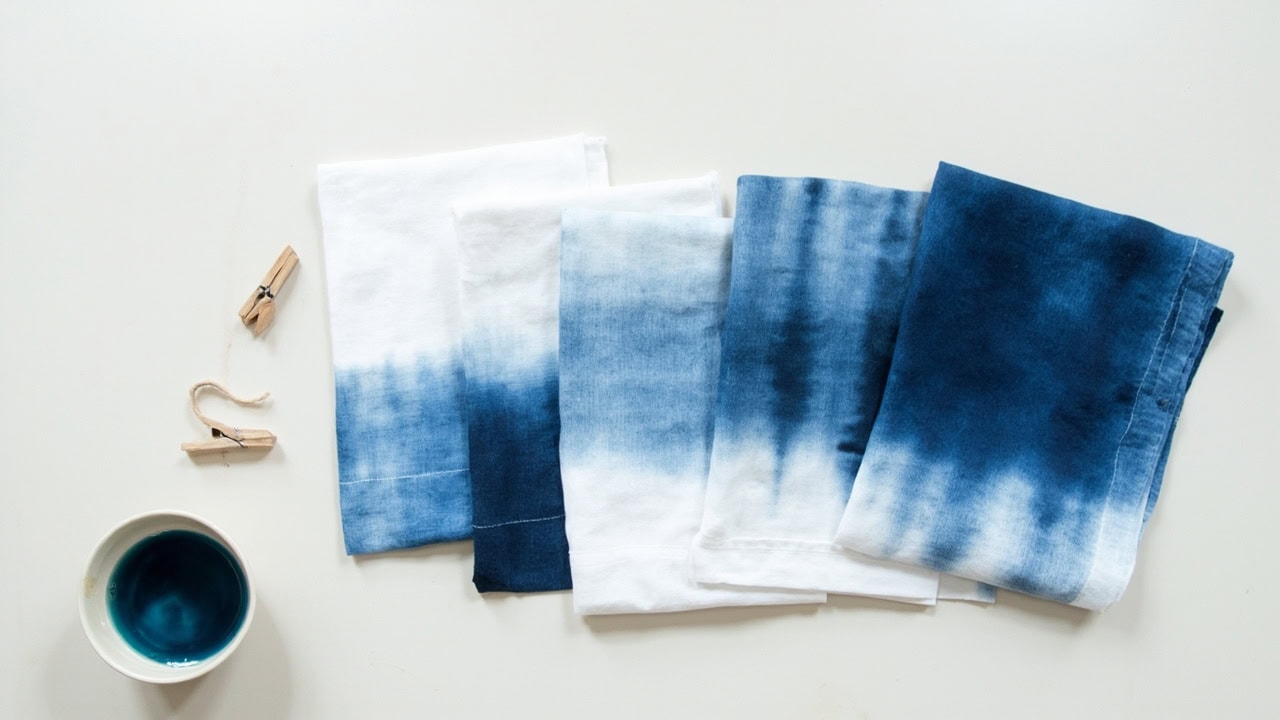
- Gradient effects — a gradual, seamless transition from one color intensity to another across the fabric length
- Ombre effects — more defined color bands with sharper transitions between dyed and undyed areas
The difference between a smooth gradient and a harsh color break comes down almost entirely to immersion speed. Slow, controlled lowering produces soft transitions; rapid immersion creates sharp demarcation lines.
Dip dyeing achieves results that are impossible with tie-dye or shibori because the color placement is mathematically predictable. If you lower fabric to the same depth at the same rate into the same dye concentration, you get the same result — making it ideal for matching pieces across multiple garments or creating coordinated home décor sets.
Materials and Equipment Needed
Successful dip dyeing requires specific materials matched to your fiber type. Using the wrong dye on a fiber produces poor results — fiber-reactive dyes on cotton deliver excellent color fastness, while the same dye on wool or silk yields nothing without acid modification.
For Cellulose Fibers (Cotton, Linen, Rayon)
- Fabric: 100% cotton, linen, or rayon — natural cellulose fibers with high dye uptake. Avoid blends with polyester, which will not absorb fiber-reactive dyes
- Fiber-reactive dye: Procion MX, Jacquard Fiber Reactive, or similar — forms covalent bonds with cellulose molecules
- Soda ash fixative: Sodium carbonate — essential for raising pH to approximately 10.5–11, which activates the dye’s reactive sites. Typical ratio: 1 cup (240 mL) per gallon (3.8 L) of water
- Dye vessel: Large plastic tub, bucket, or stainless steel pot — must be large enough to accommodate full fabric width
- Rubber gloves and plastic apron: Protect skin and clothing from dye stains
- Stirring stick: For mixing dye solution thoroughly
- Clips, clothesline, or drying rack: For controlled fabric handling and drying
- Optional: Rope, weights, or C-clamps to control fabric immersion depth precisely
For Protein Fibers (Silk, Wool)
- Acid dye: Such as Jacquard Acid Dye, Dharma Trading Acid Dye, or similar — requires acidic pH (4.5–7) for proper bonding with protein molecules
- White vinegar or citric acid: 1 cup white vinegar per gallon of water raises the pH into the acidic range needed for dye fixation
- Heat source: Protein fibers require gentle heating to 185–205°F (85–96°C) during dyeing — use a stainless steel pot on a low burner
- Stainless steel or enamel pot: Do not use aluminum or copper — acid dye reacts with these metals
- Rubber gloves, plastic apron, stirring stick: Same protection as cellulose dyeing
Step-by-Step Dip Dyeing Process
The dip dyeing process requires meticulous attention to preparation. According to textile industry standards, fiber-reactive dye forms strong covalent bonds with cellulosic fibers, producing good wash fastness — but this bonding is subject to hydrolysis if the dye reacts with water before contacting the fiber. Proper technique prevents this and maximizes color yield.
- Prepare the fabric: Wash fabric in hot water (minimum 140°F/60°C) with mild detergent to remove all sizing, oils, waxes, and chemical finishes. Any residual processing chemicals block dye penetration and cause uneven color. Do not use fabric softener. Allow fabric to dry completely before dyeing.
- Prepare the dye bath: Dissolve 1 cup (240 mL) of soda ash in 1 gallon (3.8 L) of warm water (approximately 95°F/35°C) — stir until fully dissolved. Add fiber-reactive dye powder to the solution, typically 1–3 tablespoons per gallon depending on desired color depth. More dye produces deeper saturation; less produces lighter pastels. Stir thoroughly until dye is completely dissolved and uniformly mixed.
- Set immersion depth: Mark your target depth on the dye vessel using tape, a waterproof marker, or clothespins as visual guides. For ombre effects, mark the exact transition line. Use clips or weights to keep fabric taut and prevent bunching, which creates uneven dye distribution.
- Lower fabric gradually: Immerse fabric at a controlled rate — slow for soft gradients (5–10 minutes full immersion), faster for more defined transitions (1–2 minutes). Use two hands to lower fabric evenly, maintaining horizontal alignment. The immersion rate directly controls gradient softness.
- Hold and allow dye to penetrate: Keep fabric in dye bath for 5–30 minutes depending on desired saturation depth. Longer immersion produces deeper, more saturated color in the immersed section. Agitate gently every 3–5 minutes by slowly lifting and lowering fabric to ensure even dye distribution.
- Remove and rinse: Carefully lift fabric from dye bath. Begin rinsing with warm water (approximately 105°F/40°C), gradually cooling to cold. Never rinse with cold water immediately — the rapid temperature change can cause uneven fixation. Continue rinsing until water runs nearly clear, typically 5–10 minutes of running water.
- Wash and dry: Machine wash cold (maximum 86°F/30°C) with mild detergent, separately from other laundry for the first three washes. Air dry or tumble dry on low heat. High heat can set any remaining unfixed dye, causing it to bleed in future washes.
Common Mistakes and Troubleshooting
Dip dyeing failures are almost always traceable to one of five root causes. Identifying the problem correctly allows rapid correction on subsequent attempts.
Uneven Color or Patchy Results
Cause: Fabric was not clean before dyeing. Oils, sizing, fabric softener residues, and chemical finishes all block dye absorption sites on the fiber. The dye cannot bond where residue is present, resulting in light spots and inconsistent color.
Fix: Rewash fabric with hot water and strong detergent (not fabric softener). For heavily treated fabrics, add soda ash directly to the wash water. For commercial fabrics labeled “machine dry clean only,” expect poor results without professional treatment to remove finishing chemicals.
Color Too Dark, Muddy, or Over-Saturated
Cause: Dye concentration was too high. Over-agitation during rinsing also releases excess dye, which can redeposit onto lighter areas creating muddy intermediate tones rather than clean transitions.
Fix: Reduce dye concentration by 25–50% on the next attempt. Rinse more gently with slower temperature transitions, and always rinse in a separate vessel before machine washing to prevent loose dye from redepositing.
Sharp Transition Instead of Gradient
Cause: Immersion was too fast. If fabric enters the dye bath rapidly, the transition line between wet and dry is abrupt, producing a hard line rather than a gradual ombre.
Fix: Slow the immersion rate. For soft gradients, lower fabric over 8–10 minutes, pausing at intermediate depths for 30–60 seconds before continuing. Use two people if needed — one to hold each edge of wide fabric.
Faded Results on Cotton
Cause: Insufficient soda ash fixative or inadequate fixation time. Fiber-reactive dyes require an alkaline environment (pH 10.5–11) to activate the reactive dye molecules. Without sufficient soda ash, the dye bonds weakly and washes out rapidly.
Fix: Verify soda ash ratio is 1 cup per gallon of water. Ensure fabric remains in dye bath for minimum 20 minutes for light colors, 30+ minutes for deep colors. Consider adding a second soda ash application mid-dye for very dark shades.
Dye Bleeding After Washing
Cause: Rinse was insufficient. Any unfixed dye remaining in the fabric will release during washing. This is particularly common when fixation time was too short or soda ash concentration was too low.
Fix: Rinse until water runs completely clear — no visible color whatsoever. If bleeding occurs after washing, the fabric requires re-rinsing. Machine wash cold with color-safe detergent and an added cup of white vinegar to help set remaining dye.
Fiber Compatibility for Dip Dyeing
Not all fabrics accept dip dyeing equally. Fiber type determines which dye chemistry is required and what quality of result you can expect. Using the wrong dye on a fiber is the single most common cause of disappointing results.
| Fiber Type | Dye Required | Result Quality | Notes |
|---|---|---|---|
| Cotton | Fiber reactive | Excellent | Best results — high cellulose content provides maximum dye uptake. Wash fastness rated excellent (Grade 4–5 on AATCC scale) when properly fixed. |
| Linen | Fiber reactive | Excellent | Similar to cotton with slightly coarser texture. May absorb dye slightly faster, requiring shorter immersion times for equivalent depth. |
| Rayon | Fiber reactive | Very Good | Takes dye well but has lower wet strength — handle gently during rinsing to avoid damage. May bleed more in first washes. |
| Silk | Acid dye | Very Good | Produces rich, deep colors with excellent luminosity. Requires gentle handling — no harsh agitation. Dye at 185°F (85°C) with vinegar. |
| Wool | Acid dye | Good | Can felt if agitated roughly or if temperature changes too rapidly. Keep water temperature consistent and avoid sudden agitation. |
| Polyester | Disperse dye | Poor | Requires heat-setting at minimum 200°F (93°C) — difficult to achieve at home. Results are often inconsistent and fade faster. Not recommended for home dip dyeing. |
For blends — such as 60% cotton/40% polyester — expect muted results. The polyester component will not accept fiber-reactive dye, resulting in heathered or muted tones where the undyed polyester shows through.
Creating Different Gradient Effects
The same dip dyeing technique produces radically different visual effects depending on how you manipulate dye concentration, immersion depth, immersion speed, and the number of color layers. Understanding these variables lets you create intentional results rather than hoping for the best.
Soft Ombre (Most Common)
- Dye concentration: 50–75% of full strength (50% if aiming for pastels, 75% for medium saturation)
- Immersion speed: Slow — lower fabric over 5–10 minutes continuously
- Immersion time at depth: 15–20 minutes after full immersion
- Result: Dreamy, subtle transition with no visible hard lines. The undyed portion blends gradually into the dyed section through a smooth 6–12 inch (15–30 cm) transition zone.
High-Contrast Ombre
- Dye concentration: 100% full strength
- Immersion speed: Moderate — lower fabric over 2–3 minutes
- Immersion time at depth: 20–30 minutes for maximum saturation
- Result: Sharp color break between dyed and undyed areas. The demarcation line is crisp — ideal for garments where a distinct color change is a design feature rather than an incidental effect.
Multi-Color Dip Dye
- Method: Start with the lightest color, dip to shallow depth first
- Progression: Add progressively darker colors at deeper depths
- Fixation between layers: Allow each color to set for minimum 20 minutes before adding the next layer — apply additional soda ash between layers to refresh fixation
- Result: Multiple distinct color bands transitioning from light to dark. Common combinations: pale yellow to coral to deep red; light aqua to teal to navy; cream to pale pink to burgundy.
Reverse Dip Dye
- Method: Tie off the section you want dyed using rubber bands, twine, or C-clamps
- Immersion: Dip only the tied portion into the dye bath
- Result: Color appears only on the immersed end, with a clean transition to white on the remainder. Useful for creating two-tone garments where only a hem or cuff is colored.
Frequently Asked Questions
Q: Can you dip dye synthetic fabrics like polyester?
A: Polyester requires disperse dye and heat-setting at 200°F+ for proper bonding — this is difficult to achieve at home and results are often inconsistent. Natural fibers (cotton, linen, silk, rayon) are recommended for successful dip dyeing.
Q: How long does dip dye last on fabric?
A: Properly fixed dip-dyed fabric maintains color through 20–50 washes without significant fading when washed in cold water with mild detergent. Fiber reactive dyes on cotton can last the lifetime of the garment with proper care.
Q: Can you dip dye fabric that’s already been dyed?
A: Yes, but the existing dye affects results — overdyeing with a darker color works well, but lightening previously dyed fabric requires bleach removal first. Dark-to-light transitions are difficult and may produce muddy colors.
Q: What’s the difference between dip dyeing and ombre?
A: Dip dyeing is the technique; ombre is the effect. Dip dyeing refers to lowering fabric into dye at controlled rates. Ombre describes the visual result — a graduation of color from light to dark. All ombre effects can be achieved through dip dyeing techniques.
References
- CottonWorks. (n.d.). Dyeing Basics. https://www.cottonworks.com/learning-hub/dyeing/dyeing-basics/
- Jacquard Products. (n.d.). Fiber Reactive Dyes — Technical Documentation. Retrieved from https://www.jacquardproducts.com
- AATCC International. (n.d.). Textile Dyeing and Color Standards. https://www.aatcc.org
- ProChem & Dharma Trading Co. (n.d.). Fiber Reactive Dye Process Guides. Retrieved from https://www.prochemical.com and https://www.dharmatrading.com
- PBurch.net. (n.d.). Fabric Dyeing Overview and Technical Guides. Retrieved from https://www.pburch.net/dyeing


