
How to Overdye Clothes: Changing and Refreshing Faded Colors

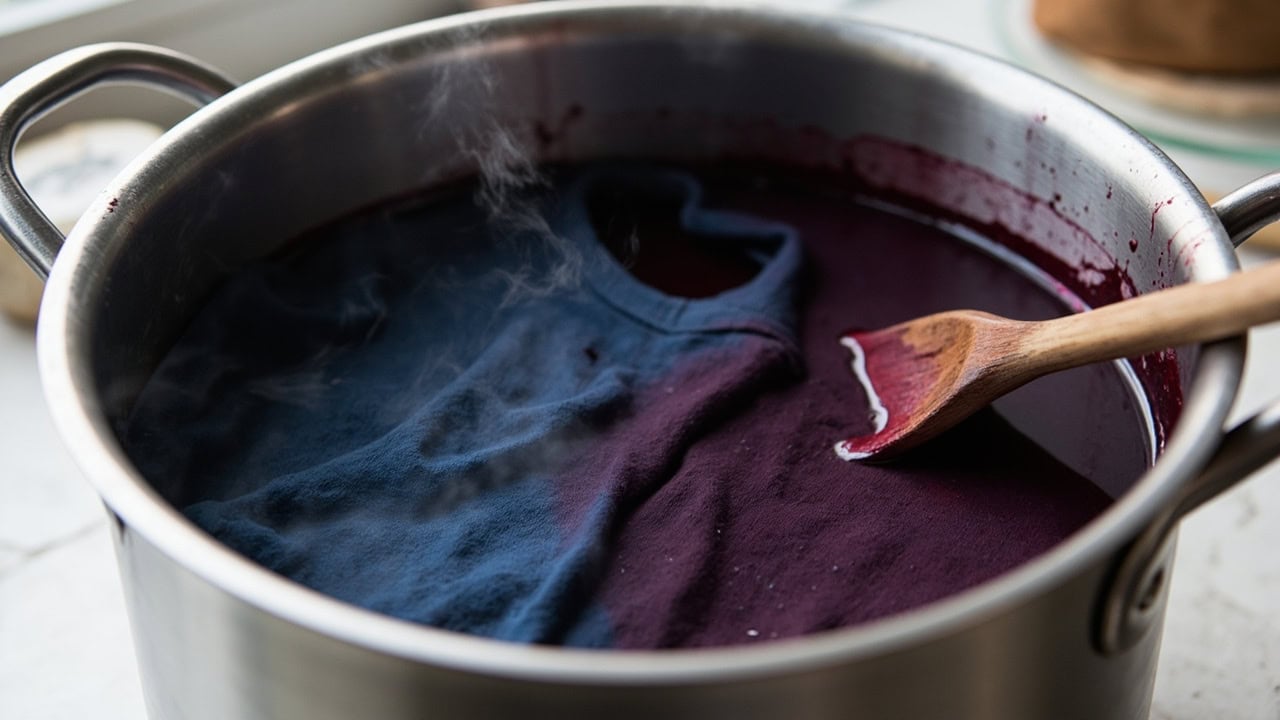
Overdyeing is the process of dyeing existing clothes in a new color to refresh faded fabric or completely change its hue — synthetic fibers require disperse dye at temperatures above 200°F (93°C) for proper absorption, while natural fibers accept fiber-reactive dye or direct dyes at lower temperatures around 140°F (60°C). The key to successful overdyeing is matching the dye type to the fiber composition and allowing sufficient time for the dye to fully exhaust into the fabric.
What Is Overdyeing and When Should You Do It?
Overdyeing restores color to faded clothes without purchasing new items, making it one of the most cost-effective and sustainable methods for extending the life of your wardrobe. The technique works by immersing fabric in a dye bath where the dye molecules form a bond with the fiber — fiber-reactive dyes form covalent bonds with the functional groups of natural fibers like cotton, while acid dyes form salt-like bonds with the ammonium groups in protein fibers like wool and silk.
Overdyeing is most effective for restoring faded blacks, reds, and blues — the colors that lose vibrancy fastest with repeated washing. According to AATCC (American Association of Textile Chemists and Colorists), garment color loss occurs primarily through repeated laundering at elevated temperatures, with dark shades showing visible degradation after as few as 10–15 wash cycles.
The technique works best on solid-color garments without patterns, though pattern preservation is limited — overdyeing will darken existing prints but not remove them. Critically, overdyeing cannot lighten fabric; it can only add darker or equally saturated tones. This means choosing a color equal to or darker than the original is essential for predictable results.
Overdyeing is ideal for reviving everyday wear, matching outdated items to new wardrobes, and pursuing sustainable fashion by extending garment lifespan rather than discarding and replacing faded pieces.
Materials and Equipment Needed
Gathering the right materials before starting ensures the overdyeing process runs smoothly without interruptions. Each item serves a specific function in achieving even, lasting color.
- Fabric dye — must be matched to fiber type: fiber-reactive dye for cotton/linen/rayon, disperse dye for polyester, acid dye for wool/nylon/silk
- Large stainless steel pot or dedicated dyeing vessel — minimum 4–6 quart capacity to fully submerge the garment
- Wooden spoon — dedicated for dyeing only, never for food use after contact with dye chemicals
- Salt — 1 cup (240ml) for cotton/linen dye baths; improves dye exhaustion by driving dye molecules onto the fiber
- White vinegar — 1 cup for acid dye baths on wool/nylon; lowers bath pH to the 4–6 range required for acid dye uptake
- Rubber gloves — chemical-resistant, to protect hands from dye and to handle hot garments safely
- Kitchen timer — for tracking immersion intervals accurately
- Plastic trash bag or old towels — for protecting workspace from dye splashes
- Dye fixative — optional, depending on dye type; helps lock color into the fiber for improved colorfastness
Step-by-Step Overdyeing Process
Step 1: Prepare the Garment
Proper preparation is the foundation of successful overdyeing. Begin by washing the garment thoroughly in the hottest water safe for the fabric with a heavy-duty detergent. This removes fabric softeners, chemical finishes, body oils, and residual soils that act as barriers between the dye and the fiber. Fabric softener residues — which contain cationic surfactants — can reduce dye absorption by up to 40% in some fiber types, making this step non-negotiable for professional-quality results.
After washing, remove the garment while it is damp but not dripping wet. Fabric that is too wet dilutes the dye bath excessively, resulting in lighter-than-expected color. Fabric that is too dry may absorb the dye unevenly. The ideal state is damp — similar to how fabric feels after removing it from a spin cycle. Do not use fabric softener in the wash, as it creates a waxy barrier that prevents dye from bonding with the fiber.
Step 2: Set Up the Dye Bath
Fill your stainless steel pot with enough water to fully submerge the garment — typically 3–4 gallons (11–15 liters) for a single shirt or similar-sized garment. The water temperature and chemical additives must be set before adding the garment.
Heat the water to the appropriate temperature for your fiber type: 140°F (60°C) for natural fibers (cotton, linen, rayon) using fiber-reactive or direct dyes; 200°F (93°C) for polyester using disperse dyes; 185°F (85°C) for wool, silk, and nylon using acid dyes. Polyester requires temperatures above 200°F because disperse dyes are almost insoluble in water — they must be finely ground with dispersing agents and then molecularly dissolve at high temperatures to diffuse into the hydrophobic polyester fiber and form a solid solution within it.
Add the dye powder or liquid to the water first, stirring thoroughly until fully dissolved. For cotton and linen: add 1 cup of salt to the bath, which promotes dye exhaustion by increasing the affinity between the negatively charged dye molecules and the fiber. For wool and nylon: add 1 cup of white vinegar to lower the pH into the 4–6 range required for acid dyes to form stable salt-like bonds with the fiber’s ammonium groups.
Step 3: Add Garment and Begin Dyeing
Before submerging the garment in the dye bath, wet it thoroughly in warm water — this ensures the fiber pores open evenly and accepts dye uniformly from the first minute of immersion. Wring out excess water gently and then fully submerge the garment in the prepared dye bath.
Stir the garment continuously for the first 10 minutes. This prevents uneven dye pooling and patchy results. Uneven agitation is the primary cause of color patches in home overdyeing — dye molecules settle quickly in still water, so consistent movement keeps them in contact with all fabric surfaces equally. Maintain the bath at your target temperature throughout this phase using your stovetop’s heat setting.
Step 4: Monitor and Maintain
After the initial 10-minute continuous stirring period, reduce agitation to stirring every 5 minutes. Keep the garment fully submerged for a total of 30–60 minutes. The exact time depends on the depth of color desired — darker results require the full 60 minutes. Fabric appears significantly darker when wet than it will appear when dry, so check development by lifting a corner above the bath surface.
Do not rush this phase. Dye exhaustion — the process by which dye molecules transfer from the water onto the fiber — follows an asymptotic curve. Most color transfer occurs in the first 20 minutes, but the final 20–40 minutes are critical for achieving colorfastness standards. Insufficient immersion time produces color that fades rapidly after the first wash.
Step 5: Rinse and Finish
Wearing rubber gloves, remove the garment from the dye bath and rinse it in warm water, gradually reducing the temperature to cold. This gradual temperature reduction helps close the fiber pores and sets the dye. Continue rinsing until the water runs completely clear — any colored runoff indicates unfixed dye that would bleed during future laundering.
After rinsing thoroughly, wash the garment alone in cold water with a mild detergent. This final wash removes any residual dye from the fiber surface while confirming that the color is properly fixed. Air drying is preferred to prevent heat shock that can release improperly fixed dye molecules. If tumble drying is necessary, use the lowest heat setting.
Common Mistakes and Troubleshooting
Understanding what goes wrong in home overdyeing — and why — is as important as knowing the correct process. The table below covers the most frequent issues and their solutions.
| Mistake | Why It Happens | How to Fix |
|---|---|---|
| Uneven color patches | Insufficient stirring during the first 10 minutes allows dye to settle unevenly on fabric surfaces | Always stir continuously for the first 10 minutes; re-dye if patches are severe |
| Color too light | Not enough dye powder or insufficient bath time — dye exhaustion never reached saturation point | Use a higher dye concentration (more powder/liquid); extend bath time to 90 minutes |
| Color darker than expected | Excessive dye concentration relative to the weight of fabric being dyed | Use less dye next time; test on a scrap of the same fabric before full garment treatment |
| Dye bleeds when washing | Dye did not fully exhaust into the fiber — excess dye remains on the surface rather than bonded within | Rinse more thoroughly; apply a commercial dye fixative; repeat rinsing cycle before first launder |
| Fabric feels stiff | Excess dye residue and chemical buildup on fiber surfaces from inadequate rinsing | Perform multiple cold rinses; add fabric softener in the final wash cycle only |
Fiber Compatibility for Overdyeing
Not all fabrics accept dye equally, and matching the right dye type to the fiber composition is the single most critical factor in overdyeing success. The table below provides specific technical parameters for each major fiber category.
| Fiber Type | Best Dye Type | Temperature | Chemical Additive | Notes |
|---|---|---|---|---|
| Cotton, linen, rayon | Fiber-reactive or direct dye | 140°F (60°C) | 1 cup salt | Highest dye uptake among common home-dyed fibers; salt drives dye exhaustion |
| Polyester, acetate | Disperse dye | 200°F (93°C) | None (high heat alone) | Requires dedicated pot; use only stainless steel or enamel-coated vessels |
| Wool, silk, nylon | Acid dye | 185°F (85°C) | 1 cup white vinegar | Do not boil aggressively — pH 4–6 range must be maintained; boiling damages protein fibers |
| Acrylic | Basic cationic dye | 185°F (85°C) | Acetic acid | Difficult to dye at home; results are often uneven and fugitive; professional treatment recommended |
| Blends (e.g., 65/35 polyester/cotton) | Determined by dominant fiber | Match dominant % | Varies | 50/50 blends typically produce muted, non-uniform results as each fiber accepts dye differently |
Polyester deserves special mention: because disperse dyes are hydrophobic and almost insoluble in water, they require molecular diffusion at temperatures above 200°F (93°C) to penetrate the polyester fiber. This is why pure polyester cannot be reliably dyed at home without professional equipment — home stovetops often cannot maintain 200°F+ consistently, and pure polyester requires carrier agents and pressurized equipment that professional dyers use to achieve uniform results.
How Overdyeing Differs from Tie-Dyeing and Ombré Dyeing
While all three techniques involve applying color to fabric, the methods, preparation, and results are fundamentally different. Understanding these distinctions helps you choose the right approach for your goal.
- Overdyeing uses single-color immersion in a dye bath to achieve uniform coverage across the entire garment. It is designed to revitalize existing color or uniformly change a garment’s hue without creating patterns. The result is a solid, even color throughout.
- Tie-dyeing employs multi-color application with resist techniques — rubber bands, string, or folding create barrier zones that prevent dye from reaching certain areas. This produces distinctive patterns such as spirals, stripes, and polka dots. Each technique requires its own preparation and produces results that cannot be replicated by overdyeing.
- Ombré dyeing creates a gradient effect from light to dark on a single garment by varying the garment’s immersion depth in the dye bath over time. The top portion spends less time in the dye and absorbs less color, while the submerged bottom section develops the deepest shade.
These three techniques cannot be substituted for one another — each requires different preparation, equipment, and dye application methods. For a comprehensive guide to selecting the right technique for your project, refer to the complete fabric dyeing guide.
Frequently Asked Questions
Q: Can you overdye black clothes to make them black again?
A: Yes — overdyeing is the most effective method for restoring faded black clothes. Use black fabric dye specifically formulated for the garment’s fiber type. Faded black typically shows brown or gray areas first; a fresh black dye bath at proper temperature will restore uniform black coloration. For best results with black overdyeing, use approximately 50% more dye than the standard package recommendation to achieve deep, even black coverage on heavily faded garments.
Q: Will overdyeing work on polyester blend clothes?
A: Polyester blends with less than 65% polyester can be overdyed with disperse dye at high temperatures (200°F+). Results may be muted compared to natural fibers because the natural fiber component accepts the dye while the polyester component resists it, creating a diluted overall effect. Pure polyester cannot be reliably dyed at home — it requires professional dyeing with carrier agents and pressurized equipment. For detailed disperse dye techniques for synthetic garments, see how to dye polyester at home.
Q: How long does overdyeing take from start to finish?
A: The complete overdyeing process takes approximately 2–3 hours, including preparation (30 minutes), dye bath (45–60 minutes), and rinsing/finishing (30–60 minutes). The garment should then air dry completely before wearing. Note that some disperse dyes for polyester may require extended bath times of up to 90 minutes at temperature to achieve adequate exhaustion — budget additional time for synthetic fiber overdyeing.
Q: Can you overdye patterned clothes without losing the pattern?
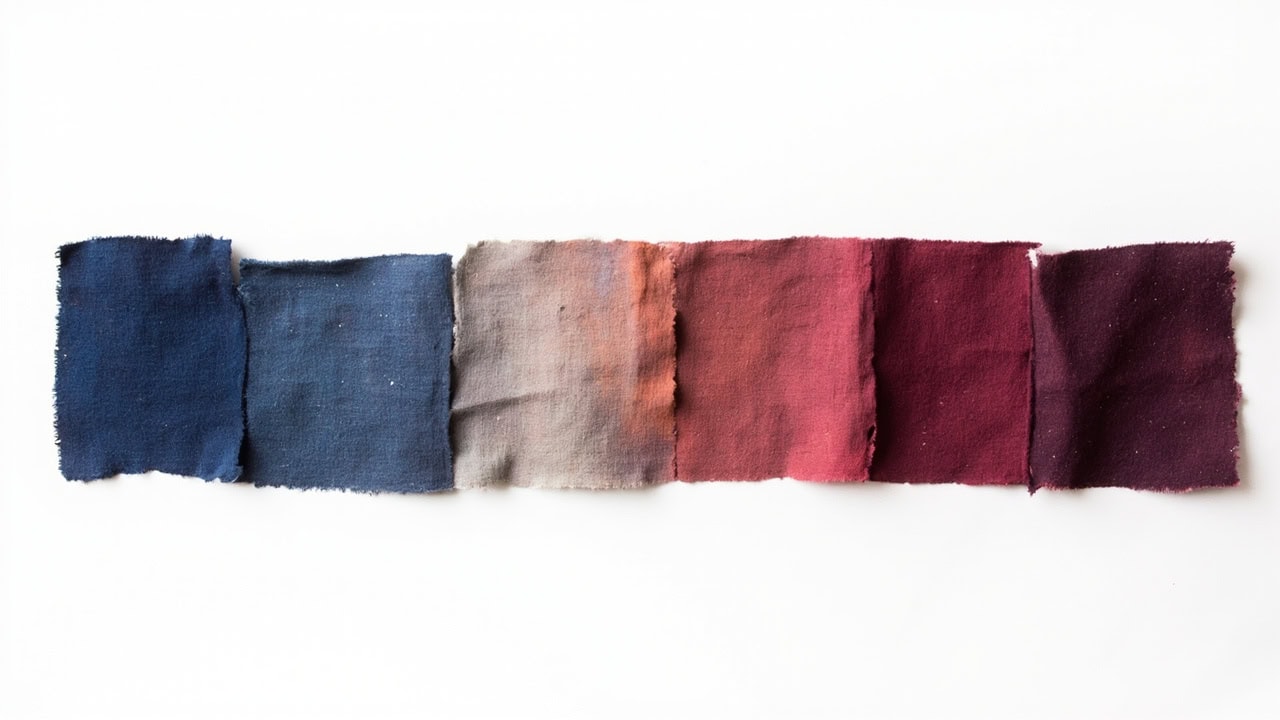
A: Overdyeing will change the base fabric color but will not remove existing prints or patterns — they will appear in a darker shade of the original pattern color against the new background. For example, a white floral print on a faded blue shirt will become a dark burgundy floral print on a burgundy background after overdyeing. For complete pattern removal, the garment must be bleached first (which may damage fibers through oxidative degradation) before overdyeing. For methods to restore color without bleaching, see how to fix faded clothes.
References
- American Association of Textile Chemists and Colorists (AATCC). (n.d.). Test Methods and Procedures for Textile Colorfastness. https://www.aatcc.org/
- Korea Dyeing and Finishing Technology Research Institute. (n.d.). Disperse Dyes: Properties and Polyester Dyeing Mechanisms. Textile Research Journal.
- Lewis, D. M. (n.d.). Reactive Dyes for Cellulose Fibers: Covalent Bond Formation and Exhaustion Efficiency. Journal of the Society of Dyers and Colourists.
- Textile Exchange. (n.d.). Fiber-Reactive Dye Processes and Salt Addition Standards for Cotton Dyeing. https://textileexchange.org/
- Cotton Incorporated. (n.d.). Cotton Dyeing: Fiber-Reactive Dye Application and Colorfastness Guidelines. https://www.cottonworks.com/en/topics/fiber/dyeing/
- International Wool Textile Organisation (IWTO). (n.d.). Acid Dyeing of Wool and Protein Fibers: pH Control and Temperature Management. https://www.iwto.org/


