
How to Dye Fabric with Indigo: Traditional and Modern Methods

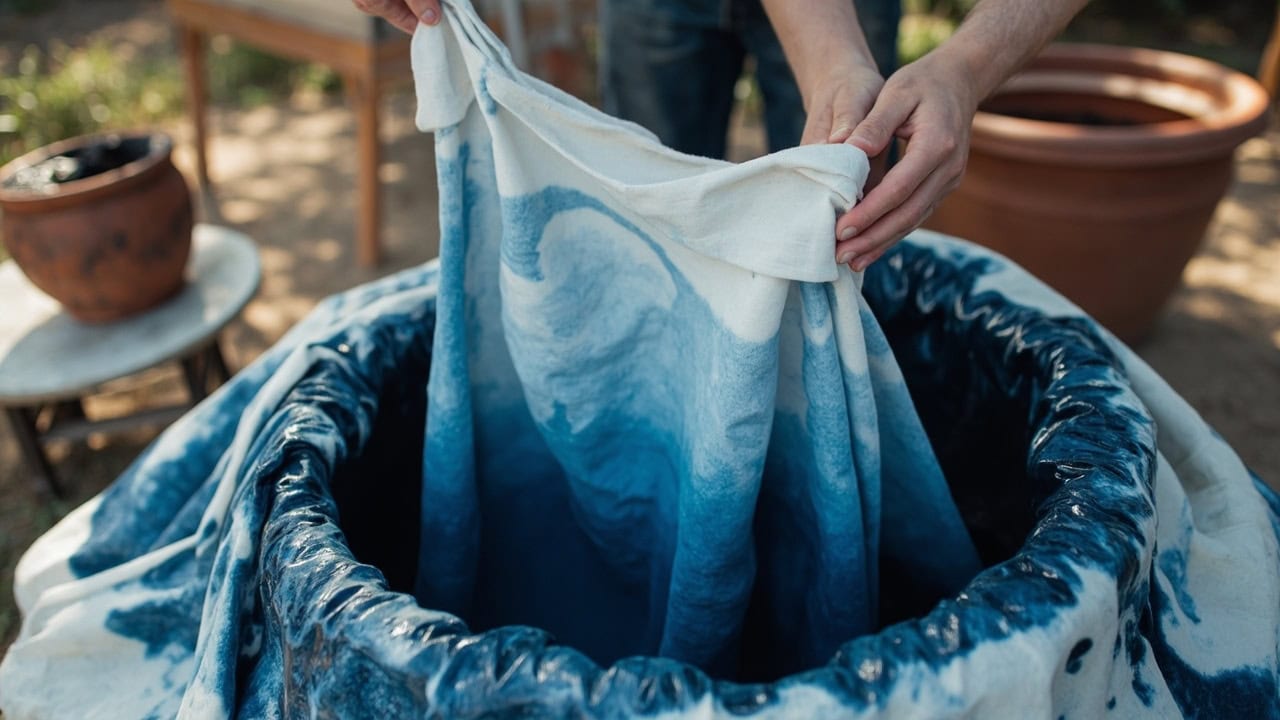
Indigo dye bonds to fabric through a unique oxidation process — the indigo molecule is insoluble in water until reduced in an alkaline vat, then it attaches to fibers during immersion and oxidizes to its signature blue color when exposed to air. Traditional natural indigo requires a living fermentation vat maintained at 15–30°C for 3–14 days, while modern synthetic indigo and instant dye kits replicate the effect in hours by using sodium hydrosulfite or erythorbic acid as reducing agents.
What Is Indigo Dye and Why It Produces Blue
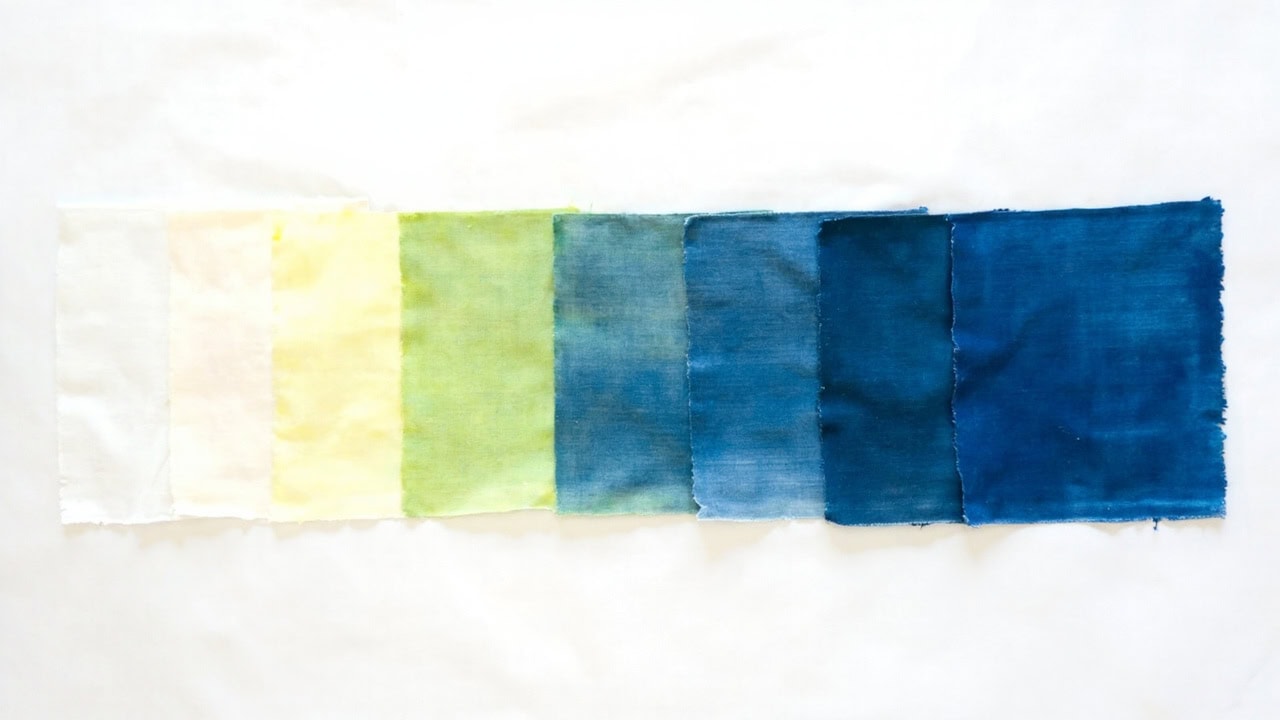
Indigo is the oldest known dye pigment in human history — it has been used for more than 5,000 years in Egypt, India, China, and West Africa to color textiles. Unlike most dyes that are applied directly to fabric, indigo must be chemically reduced to a water-soluble form before it can bond with textile fibers. This reduction process converts indigo into leuco-indigo (sometimes called “white indigo”), which is yellow-green in solution and can penetrate fiber structures. When the dyed fabric is removed from the dyebath and exposed to air, the leuco-indigo absorbs oxygen and re-oxidizes back into insoluble indigo — and it is this oxidation that produces the distinctive deep blue color. The fabric appears pale green or yellow when first removed; the blue deepens only as oxidation progresses over 5–30 minutes.
Natural indigo is derived from the leaves of the Indigofera plant species, which contain the colorless precursor indican. The leaves are harvested, pressed, and fermented in water, a process that hydrolyzes indican and releases indoxyl — the compound that, when oxidized, becomes indigo blue. Synthetic indigo, first produced commercially in 1897, is chemically identical to natural indigo and has largely replaced it in industrial textile production. Today, approximately 80,000 tonnes of synthetic indigo are produced annually, the majority used for dyeing cotton yarn for denim.
The characteristic depth of blue seen in raw denim is achieved through repeated indigo dips. Each layer of indigo oxidizes to a slightly lighter shade than the previous layer, creating a cumulative depth that gives denim its signature look. A single pair of blue jeans requires approximately 3–12 grams of indigo dye, applied across multiple immersion cycles rather than one heavy dip.
Traditional Indigo Vat Methods
The Fermentation Vat (Living Indigo)
The fermentation vat is the oldest and most traditional method for dyeing with natural indigo. A living vat is established by combining natural indigo flakes (50–100g), wheat bran (100g), pickling lime (50g), and water in a large vessel. The bran serves as food for anaerobic bacteria — specifically Clostridium species — that thrive in the alkaline environment and produce hydrogen as a metabolic byproduct. This hydrogen gas strips oxygen from the dyebath, naturally reducing indigo to its soluble leuco form.
The vat must be maintained within a temperature range of 15–30°C and a pH of 10–11 for the bacteria to remain active. A healthy, well-balanced fermentation vat produces a characteristic creamy foam on the surface and emits a sweet, fermented smell. A simple test to check vat health involves floating cloth strips on the surface — they should develop coppery blue edges within minutes, indicating active reduction. Vats can remain productive for months with daily feeding: small additions of bran and lime keep the bacterial culture thriving.
The dyeing process with a fermentation vat involves submerging pre-wetted fabric for 3–5 minutes, then removing it and hanging it to oxidize in the air for 5–20 minutes before re-dipping. Deeper colors require multiple dips — each immersion-oxidation cycle builds another layer of indigo onto the fibers. The patience required for this method is rewarded by exceptionally rich, complex blues that are difficult to replicate with chemical reduction alone.
The Sodium Hydrosulfite Vat (Modern Traditional)
The sodium hydrosulfite vat is the standard modern method used by textile artists and small-scale dyers who want reliable results without maintaining a living fermentation culture. Synthetic indigo (20–30g per liter of water) is dissolved in warm water (40–50°C), then sodium hydrosulfite (the reducing agent) and washing soda (sodium carbonate, the alkali) are added to initiate reduction. The vat becomes ready for use within approximately 30 minutes.
The chemical reaction at work is straightforward: sodium hydrosulfite (Na₂S₂O₄) binds to oxygen in the dyebath, removing it from the solution. Without dissolved oxygen present, indigo is forced into its reduced leuco form, which dissolves and becomes available to bond with textile fibers. The vat remains viable for 4–6 hours before the reducing agent is exhausted; adding fresh indigo and sodium hydrosulfite rebalances an exhausted vat.
Temperature control is critical in a sodium hydrosulfite vat. If the bath exceeds 70°C, the hydrosulfite decomposes rapidly and loses its reducing capacity. If it falls below 40°C, indigo reduction slows significantly or stops entirely. The optimal operating range is 50–60°C. Dyers typically use a thermometer to monitor the vat throughout a dyeing session. When the vat develops a sulfurous smell or the surface turns yellow-green, the reducing agent has been exhausted — fresh hydrosulfite and indigo must be added to restore the vat.
Modern Indigo Dye Kits (Instant/Pre-Reduced)
Pre-reduced indigo dye kits represent the most accessible entry point into indigo dyeing for beginners. As of 2004, freeze-dried (instant) indigo has been available commercially — this is indigo that has already undergone reduction and is freeze-dried into crystalline form. To use, you simply dissolve the crystals in warm water (25–30°C, which is comfortable room temperature), and the vat is ready immediately with no additional reducing agent required.
Kits typically include indigo dye, salt (which helps drive the dye into the fiber), a commercial fixative, rubber gloves, and detailed step-by-step instructions. The simplicity of the process — add water, add dye, stir, begin dyeing — makes instant kits ideal for workshops, classrooms, and first-time dyers. The tradeoff is reduced control: the dyer cannot easily adjust vat depth or reduction strength the way they can with a custom-formulated sodium hydrosulfite vat.
Pre-reduced indigo kits work best on cellulose fibers — cotton, linen, and rayon absorb the dye readily and produce reliable results. Wool and silk are not recommended for standard pre-reduced kits without modification, as the alkaline conditions and salt content can damage these protein fibers. For protein fibers, an acidified vat with a lower pH is preferable.
Materials and Equipment Needed
- Indigo dye (natural flakes, synthetic powder, or pre-reduced kit)
- Alkali agent: pickling lime / calcium hydroxide (traditional vat), washing soda / sodium carbonate (modern vat), or included in kit
- Reducing agent: wheat bran (fermentation), sodium hydrosulfite (chemical reduction), or pre-reduced (kits)
- Large stainless steel or food-grade plastic container (never aluminum — it reacts with alkali)
- Wooden spoons or plastic stirrers (no metal tools that may react with the vat)
- Rubber gloves (mandatory — indigo permanently stains skin)
- String, clips, or clothespins for hanging fabric to oxidize
- Cotton or other natural fabric, pre-washed in hot water with detergent (no fabric softener)
Step-by-Step: How to Dye Cotton with Indigo
- Prepare the fabric — Wash fabric thoroughly in hot water with detergent to remove any oils, sizing agents, or fabric softener residues. These contaminants block fiber pores and prevent even dye uptake. Do not use fabric softener. Allow the fabric to dry completely before proceeding.
- Prepare the dyebath — Dissolve indigo in warm water (40–50°C) in your vessel. Add the dissolved alkali agent (washing soda or pickling lime) and the reducing agent (sodium hydrosulfite or bran culture). Stir gently to combine without introducing excess air. Maintain temperature at 50–60°C for a sodium hydrosulfite vat, or 20–25°C for a fermentation vat or pre-reduced kit.
- Check the vat — A healthy indigo vat will display a coppery surface film, and test cloth strips floated on the surface should develop blue edges within minutes. If the vat emits a strong sulfurous odor or the surface turns yellow-green, the reducing agent has been exhausted and the vat needs fresh additions of indigo and hydrosulfite to be rebalanced.
- Wet the fabric — Fully submerge the fabric in clean water before entering the indigo vat. This ensures the fiber pores are open and ready to accept dye. Wring out excess water so the fabric is damp but not dripping.
- First immersion — Submerge the fabric in the indigo vat for 3–5 minutes, moving it gently throughout to ensure even contact with the dye solution. Keep the fabric fully submerged at all times — any portion that breaks the surface will not receive color.
- Remove and oxidize — Lift the fabric from the vat, squeeze out excess dye gently (do not wring hard), and hang or lay flat. At this stage the fabric appears pale green or yellow — this is the reduced leuco-indigo form and is completely normal. Allow 5–20 minutes for full oxidation. As oxygen from the air converts leuco-indigo back to insoluble indigo, the fabric progressively deepens to blue.
- Second immersion (for deeper color) — For richer color, repeat the immersion and oxidation process. Each dip adds another molecular layer of indigo, building depth with each cycle. Three to five dips produce a medium denim-like blue; eight to ten dips yield a deep, dark navy.
- Rinse and wash — After the final oxidation period (allow at least 30 minutes total oxidation time), rinse the fabric in cold running water until the water runs completely clear. Then wash in warm water (40°C) with a mild detergent to remove any unfixed indigo from the fiber surface.
- Air dry — Hang the fabric to dry away from direct sunlight, which can cause uneven fading. The first machine wash should be done separately in case any excess dye remains unfixed and releases into the wash water.
Common Mistakes and Troubleshooting
| Problem | Cause | Solution |
|---|---|---|
| Uneven color / blotchy patches | Fabric not thoroughly wet before dyeing; air bubbles trapped in fibers | Fully saturate fabric and squeeze out air bubbles before immersion; work fabric gently to release trapped air |
| Faded or weak color | Insufficient number of dips; indigo concentration too low; fabric not properly prepared | Additional dips to build depth; strengthen vat with fresh indigo; rewash fabric in hot water to open pores |
| Fabric appears green instead of blue | Oxidation incomplete; insufficient air exposure time | Allow longer oxidation time — up to 1 hour in well-circulated air; expose both sides of fabric to air |
| Vat smells sulfurous / surface turns yellow-green | Reducing agent exhausted; vat is over-oxidized | Add fresh sodium hydrosulfite and indigo to rebalance; avoid splashing or rapid object insertion which introduces oxygen |
| Color rubs off / not colorfast | Indigo not properly fixed; oxidation was insufficient | Longer oxidation between each dip; proper rinsing and washing; use commercial dye fixative after final rinse |
| Orange or purple tint instead of blue | Wrong pH — bath is too acidic; iron contamination from tools or container | Check vat pH (should be 10–11 for traditional/modern vats); use only stainless steel, plastic, or wooden tools; avoid iron containers |
Fiber Compatibility for Indigo Dyeing
| Fiber Type | Indigo Compatibility | Notes |
|---|---|---|
| Cotton | Excellent | Best results of all natural fibers; absorbs indigo deeply with proper preparation and pre-washing |
| Linen | Very Good | Behaves similarly to cotton; may require additional dips to achieve the same color depth |
| Rayon / Viscose | Good | Cellulose fiber with good absorbency; results similar to cotton |
| Hemp | Good | Cellulose fiber; absorbs indigo well, though the natural texture of hemp may affect the final matte appearance |
| Wool | Moderate | Protein fiber; standard high-alkali indigo vat can damage wool. Use an acidified vat (pH lowered with white vinegar) or a specialist indigo acid dye formulation. Keep temperature below 40°C to prevent felting. |
| Silk | Moderate | Takes indigo dye but strong alkali can degrade silk fibers. Use milder alkaline conditions (lower pH) and keep temperature below 40°C. |
| Polyester | Poor | Synthetic fiber; does not absorb indigo under normal dyeing conditions without carrier agents and high heat (110°C+), which is not practical for home dyers |
| Nylon | Moderate | Takes some indigo with heat assist and modified vat conditions, but results are less vibrant than on cellulose fibers |
For detailed guidance on caring for dyed fabrics after the dyeing process, including washing instructions that preserve both color and fabric integrity, refer to our complete guide to fabric care.
If you are interested in exploring other natural dyes, our guide to dyeing fabric with turmeric covers a completely different category of natural dyes using the same mordanting principles that apply to indigo.
For alternative approaches to fabric coloration, our tutorial on tie-dyeing with synthetic dyes demonstrates resist and pattern techniques that complement the solid-depth approach of indigo vat dyeing.
Frequently Asked Questions
Q: Can you dye wool or silk with indigo?
A: Yes, but with modifications — wool and silk are protein fibers that can be damaged by the high alkalinity of a standard indigo vat. Use an acidified vat (lower pH with white vinegar) or an indigo acid dye formulation specifically designed for protein fibers. Temperature should be kept below 40°C to prevent wool felting or silk fiber degradation.
Q: How many times should you dip fabric in indigo for a dark blue?
A: For a medium denim-like blue, 3–5 dips are typically sufficient. For a deep, dark navy indigo, 8–10 dips are needed. Each dip adds a thinner layer of indigo molecules; the cumulative effect creates depth. Allow full oxidation between dips (5–20 minutes). More dips with lighter concentration produces better, more even results than fewer dips with heavy concentration.
Q: Why does indigo fabric look green when first removed from the vat?
A: The green appearance is normal — it is the reduced leuco-indigo form, which is yellow-green in solution. When exposed to air (oxygen), the leuco-indigo oxidizes and converts back to insoluble indigo, which is the signature deep blue. This oxidation process takes 5–30 minutes depending on air circulation and temperature. The fabric is not ruined if it looks green initially.
Q: How do you make indigo dye colorfast and prevent fading?
A: Indigo is inherently colorfast when properly fixed through oxidation and washing. After dyeing, rinse until water runs clear, then wash in warm water with a mild detergent. The mechanical action of washing removes any unfixed indigo. For extra security, commercial dye fixatives can be used. Avoid harsh detergents or bleach in future washes. Indigo naturally fades over many washes — this is expected and part of its character, especially in denim.
References
- Wikipedia. (2025). Indigo dye. Wikimedia Foundation.
- Jacquard. (2024). Indigo Dye Product Information. Jacquard.
- CottonWorks. (2024). Learning Hub: Dyeing. Cotton Incorporated.
- Black. (2018). The Art and Craft of Natural Dyeing: A Practical Guide. University of Georgia Press.


