
Complete Guide to Clothing Alterations: DIY and Professional Options

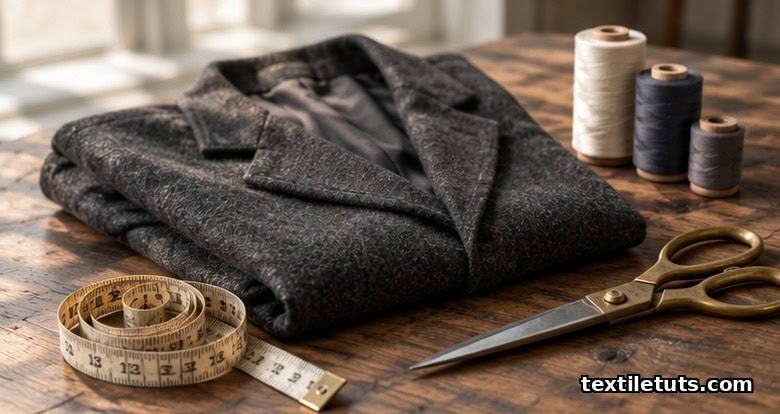
Clothing alterations encompass any modifications to existing garments that adjust their fit, style, or function — ranging from simple DIY fixes like hemming pants with a needle and thread (costing under $5 in materials) to complex professional restructuring such as letting out a waist or restructuring shoulder seams (costing $75–$150 at a tailor). The primary decision between DIY and professional alterations depends on three factors: the complexity of the adjustment, the fabric type, and the equipment required — simple adjustments under 2.5 cm (1 inch) can be DIY; anything affecting structural seams or delicate fabrics requires a professional.
What Are Clothing Alterations?
Clothing alterations are modifications to existing garments that adjust fit, resize, or change style. This distinguishes alterations from repairs, which fix damage — though both fall under the broader umbrella of garment maintenance. The distinction matters: a repair fixes something broken (a torn seam, a lost button), while an alteration changes something that was never broken but doesn’t fit or suit you as well as it could.
Alterations are one of the most cost-effective ways to build a better wardrobe. A $200 dress altered for a perfect fit will outlast and out-perform a new $75 dress that fits poorly from the rack. The math is straightforward: professional alterations on quality garments typically cost $15–$150, yet a well-executed alteration can add years of wear to clothing that would otherwise sit unworn in the closet. For garments priced above $150, the cost-to-benefit ratio almost always favors alteration over replacement.
People seek clothing alterations for many reasons. Weight changes — whether gain or loss — are the most common trigger, as bodies shift over time and off-the-rack sizing rarely matches individual proportions. Vintage clothing frequently requires alteration to fit modern body expectations and sizing conventions. Specialty sizing beyond standard plus or minus ranges often needs adjustment. And many people simply want garments customized to their unique body geometry: longer torsos, broader shoulders, narrower waists, or longer legs that ready-to-wear sizing doesn’t accommodate.
Common Types of Clothing Alterations
The clothing alteration spectrum ranges from simple to highly complex, and understanding the categories helps you make informed decisions about what you can tackle yourself and what demands professional expertise.
Hemming Adjustments
Hemming — shortening or lengthening a garment’s edge — is the most common alteration performed on pants, dresses, and even curtains. Standard hem adjustment removes excess fabric at the bottom of a garment and reseals the edge. Hemming is considered entry-level for DIY alteration, particularly for straight hems on woven fabrics. The hem allowance (the extra fabric folded up inside the hem) is typically 2.5 cm for standard garments, which sets the maximum a garment can be shortened by without adding fabric.
Waist Intake or Letting Out
Adding or removing 2.5–5 cm at the waist seam restructures the overall silhouette of a garment, making it more or less fitted through the midsection. This alteration affects how pants, skirts, and dresses sit on the body and has downstream effects on drape through the hip and seat. Taking in a waist on fitted garments typically requires adjusting the darts at the waist to maintain a properly shaped bust or torso. Letting out a waist requires available seam allowance inside the garment — most modern clothing has 1.5–2.5 cm of additional seam allowance at side seams and waist.
Shoulder Adjustments
Narrowing or widening across the shoulder width affects arm mobility, sleeve hang, and overall garment drape. Shoulder alterations are among the most structurally complex because the shoulder seam anchors the entire sleeve assembly. Even a 1 cm adjustment at the shoulder cascades through the sleeve cap and can affect armhole depth and sleeve ease. These alterations require basting and multiple fittings to ensure proper placement before any permanent stitching.
Dart Adjustments
Darts are the folded, stitched triangular folds in fabric that create 3D shaping over curves such as the bust, back, and elbow. Adding, removing, or repositioning darts dramatically affects how a garment fits over the torso. A well-executed dart adjustment can transform a boxy, tent-like garment into a fitted, flattering piece. Darts require precise marking and pressing to set them properly — a pressed dart creates a clean, professional silhouette while an unpressed dart looks homemade.
Sleeve Length Adjustments
Shortening or lengthening sleeves changes the overall proportion of a garment and how it coordinates with other clothing. Sleeve length alterations are moderately difficult because they affect the balance point of the sleeve cap. A sleeve that is too long throws off the visual proportion of the entire outfit; a sleeve that is too short can look awkward and limit range of motion. For structured garments like blazers and dress shirts, sleeve length adjustment also affects the position of buttons and cuffs.
Side Seam Alterations
Tapering or expanding through the side seams changes silhouette without requiring full structural reconstruction. A garment can be taken in through the torso or limbs via the side seams to create a more fitted look, or let out to provide more ease. This alteration works well when the adjustment needed is moderate (under 2.5 cm per seam) and when the original seams are straight and uncomplicated. Side seam alterations on curved areas like hips require more skill to avoid creating a wavy, uneven seam line.
| Alteration Type | DIY Difficulty | Professional Cost Range | Equipment Needed |
|---|---|---|---|
| Hemming (straight) | Easy | $15–$30 | Needle/thread or sewing machine, measuring tape |
| Hemming (blind hem) | Moderate | $25–$45 | Blind hem foot attachment, patience |
| Waist intake (elastic) | Easy | N/A | Elastic band, scissors |
| Waist intake (sewn) | Moderate | $30–$60 | Sewing machine, seam ripper |
| Shoulder adjustment | Difficult | $40–$75 | Hand stitching, professional grade |
| Sleeve length | Moderate | $25–$50 | Sewing machine, pressing equipment |
| Darts | Difficult | $35–$65 | Hand stitching, pressing iron |
| Lining replacement | Expert | $75–$150+ | Specialized sewing, lining fabric |
| Reseating armholes | Expert | $100–$200+ | Industrial machine, pattern skills |
DIY Clothing Alterations: What You Can Do at Home
DIY alterations make sense when the adjustment is simple, the fabric is forgiving, and the stakes are low. Knowing which alterations are within your skill zone — and which ones will end up costing more to fix after a failed DIY attempt — is the foundation of successful home alteration.
When DIY Works
Simple hemming under 2.5 cm is the best entry point for DIY alterations. Adding elastic waists to pants or skirts that have outgrown their original fit is straightforward — the elastic handles the forgiveness in fit. Repairing loose buttons or snapping closure failures takes minutes and requires no special equipment beyond a needle, thread, and button. Minor dart adjustments with hand stitching can refine the fit of a garment, particularly in woven fabrics that don’t stretch. Small tears (under 2.5 cm) and runs in knit fabrics can be stabilized with hand stitching or a iron-on patch. Any alteration that affects a garment by 2.5 cm (1 inch) or less in any direction, on a stable woven fabric, is generally a viable DIY project.
When DIY Fails
Anything requiring precise seam matching belongs in professional hands. Structural modifications — dismantling and reconstructing an entire seam rather than stitching along an existing seam line — demand pattern knowledge and industrial equipment most home sewists don’t possess. Delicate fabrics present the highest DIY failure risk: silk, satin, velvet, and leather all require specialist needles, fine thread, and techniques that differ substantially from standard home sewing. Pattern or plaid matching across seams requires expertise to cut and rejoining accurately. Structured garments with linings, interfacing, boning (in corsets or structured bodices), or pad-stitched chest pieces must be altered by professionals who understand how these internal structures interact.
The most expensive mistakes in DIY alteration come from not recognizing these limits. A puckered seam on a pair of cheap trousers costs $15–$30 to fix professionally after the fact. But a puckered seam on a $400 silk dress can cost $75–$150 to undo and restore — sometimes more than the dress is worth.
Essential DIY Alteration Toolkit
A well-stocked alteration kit doesn’t require a large investment, but quality tools make a measurable difference in results. Here’s what you need and what to expect to pay:
- Matching thread in multiple colors — $2–5 per spool. Keep 3–4 core colors on hand (white, black, navy, gray). The match doesn’t need to be perfect for structural seams, but visible hems and repairs benefit from a close match.
- Sharp fabric scissors — investment $30–60. This is the one tool where quality matters most. Dull scissors crush fabric fibers rather than cutting them cleanly, resulting in fraying edges and inaccurate cuts. A good pair of shears will last a decade with proper care.
- Measuring tape — $2–5. A flexible measuring tape is essential for taking body measurements and marking fabric accurately.
- Hand sewing needles — $3–8 per pack. Different needles suit different fabrics: ballpoint needles for knits, sharp needles for wovens, crewel needles for general hand sewing.
- Pins with heads — $3–6 per pack. Glass or pearl-top pins are sharpest. Avoid plastic-headed pins for any precision work — they melt under iron heat and don’t grip fabric as firmly.
- Seam ripper — $3–8. This is your most-used tool for corrections. A sharp seam ripper with a pointed end lets you remove stitches cleanly without stabbing the fabric.
- Thimble — $2–5. Protects your finger during hand stitching and provides the surface against which you push the needle. Choose metal over plastic for durability.
- Basic sewing machine — $100–300 for entry-level. For alteration work, you need straight stitch capability, a blind hem foot, and adjustable stitch length. Skip the decorative stitches — they aren’t relevant for alterations.
How to Hem Pants: A Step-by-Step DIY Alteration
Hemming pants is the most common DIY alteration and the best project for building alteration confidence. Follow these steps for a clean, professional result every time.
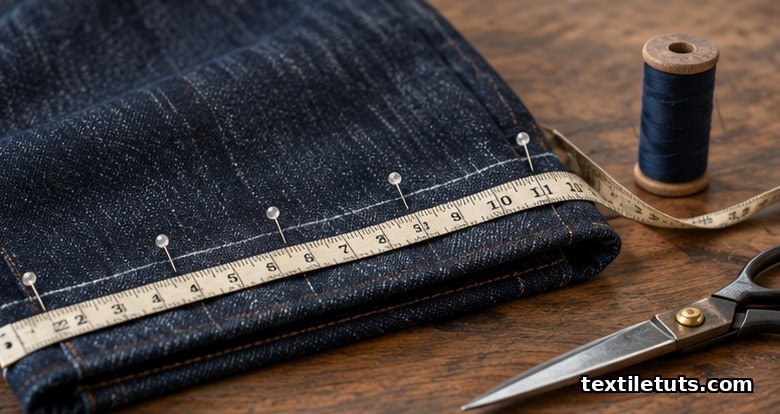
- Determine the correct length: Wear the pants with the shoes you plan to pair them with. Measure from your waist to the floor, then subtract the height of your shoe’s heel or sole. Mark the target length with pins around the leg, keeping the wearer standing straight during fitting.
- Mark the new hemline: Use chalk or a fabric marker to draw the cutting line. Account for hem allowance — typically 2.5 cm for standard hems. The finished hem will fold up to this line, so measure twice and mark once.
- Cut the excess fabric: Cut straight across below the new hemline using sharp fabric scissors. For denim or heavy fabrics, use shears rather than household scissors for a cleaner cut through multiple layers.
- Fold the hem up: Fold along the marked line to create a clean edge. Press with an iron set to the appropriate fabric temperature before pinning. Pressing sets the fold and makes subsequent stitching easier and more accurate.
- Pin the hem in place: Insert pins perpendicular to the hem edge for stability while sewing. For a visible hem, place pins horizontally across the fold. For an invisible hem, pin vertically to hold the fold flush against the garment.
- Sew the hem: For a visible hem, use matching thread and a straight stitch (2.5 mm stitch length) through all layers. For an invisible hem, use a blind hem stitch — either a machine blind hem or a hand slipstitch that catches only a few threads of the outer fabric. Hand slipstitching produces the most invisible result on fine fabrics.
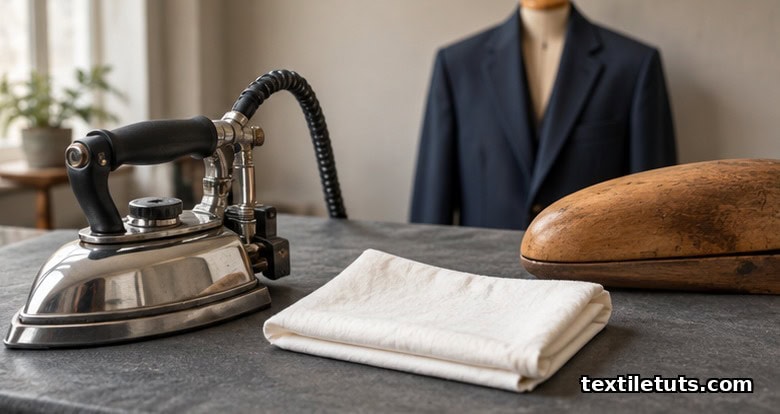
- Press the final hem: Press with an iron on the appropriate fabric setting to set the stitches and create a crisp, professional finish. For wool and heavy fabrics, use a damp press cloth and steam. For delicate fabrics, use a cool iron through a pressing cloth.
Professional Alterations: When and Why to Hire a Tailor
Professional tailors and alteration specialists bring industrial equipment, pattern knowledge, and years of hands-on experience that home sewists generally can’t match. Understanding when to invest in professional alteration — and what to expect from the process — is as important as knowing how to wield a needle and thread at home.
Signs You Need a Professional Tailor
The 2.5 cm rule is the primary threshold for professional intervention: any adjustment exceeding 2.5 cm in either direction alters garment proportions and usually requires pattern adjustment rather than simple seam repositioning. Beyond size, certain fabrics are inherently high-risk for home alteration and demand professional handling regardless of the adjustment’s complexity.
- The adjustment exceeds 2.5 cm in either direction (alters garment proportions)
- Fabric is silk, satin, velvet, leather, or specialty materials (slippery, damage-prone, or show every imperfection)
- The alteration requires dismantling and reconstructing the entire seam rather than stitching along an existing seam
- You need a perfect match on a patterned or plaid fabric (requires pattern-matching expertise and careful cutting)
- The garment has structured elements: linings, interfacing, boning in corsets, pad stitching in tailored chests
- Previous DIY attempts have created puckering, misalignment, or visible stitching that needs to be undone
What to Expect at a Professional Tailor
A professional alteration engagement typically begins with a consultation and fitting, which costs $10–20 and is usually credited toward the final alteration bill if you proceed. During this appointment, the tailor assesses the garment’s construction, measures the required adjustment, identifies any complications (uncooperative fabrics, insufficient seam allowance, lining constraints), and provides a quote based on labor time and fabric complexity.
Standard turnaround for most alterations is 1–2 weeks. Simple jobs like basic hemming may be completed same-day or within 24–48 hours at some tailors. Complex restructuring — particularly anything requiring multiple fittings, such as shoulder alterations or armhole reseating — requires multiple appointments spread over 3–4 weeks to allow for basting, fitting, adjustment, and final stitching. Rush service is available at most tailors for 1.5–2× the standard cost, delivering 24–48 hour turnaround on simple jobs.
Cost Comparison: DIY vs. Professional Alterations
The cost difference between DIY and professional alteration goes beyond the obvious materials vs. labor comparison. DIY saves money but demands your time, carries a risk of damaging the garment, and may produce a less polished result. Professional alteration costs more upfront but delivers predictable, high-quality outcomes with zero risk to the garment.
| Alteration | DIY Cost | DIY Time | Professional Cost | Professional Time |
|---|---|---|---|---|
| Basic hem (jeans/trousers) | $2–5 materials | 20–45 min | $15–30 | 30–60 min |
| Blind hem (dress pants) | $5–10 materials | 45–90 min | $25–45 | 45–60 min |
| Waist intake (2 seams) | $2–5 materials | 30–60 min | $30–60 | 45–90 min |
| Take in at shoulders | Not recommended | — | $40–75 | 1–2 hours |
| Sleeve shortening | $2–5 materials | 30–60 min | $25–50 | 45–60 min |
| Lining repair | $10–20 materials | 1–3 hours | $40–80 | 1–2 hours |
| Let out waist (trousers) | Not recommended | — | $40–70 | 1–2 hours |
| Restructure armhole | Not recommended | — | $75–150+ | 2–4 hours |
For garments priced below $75, the economics of professional alteration are often unfavorable — the cost of alteration approaches or exceeds the value of the garment itself. For garments priced between $75–$150, selective alterations (hemming, simple waist adjustments) are reasonable if the garment is high quality and the alteration is simple. For garments priced above $150, virtually any alteration becomes cost-effective given the value added by a proper fit.
Fabric-Specific Alteration Considerations
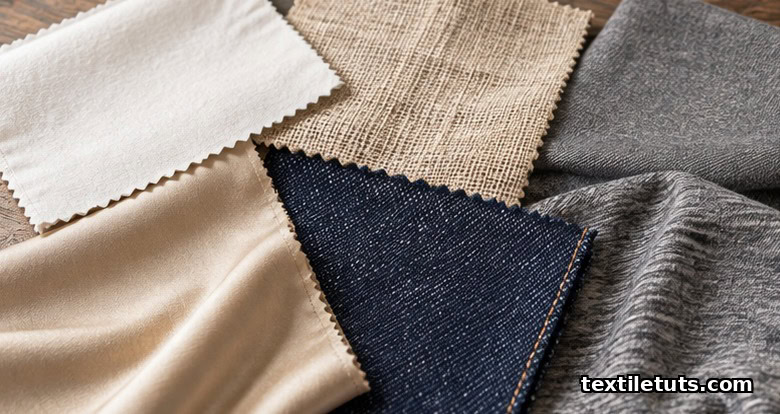
Fabric type is the single most important variable in determining whether an alteration succeeds or fails. Each fabric responds differently to cutting, stitching, and pressing, and understanding these properties prevents costly mistakes.
Cotton and Cotton Blends
Cotton and cotton blends are the most forgiving fabrics for DIY alterations. The fiber holds stitches securely (a seam stitch length of 2.0–2.5 mm is optimal for woven cotton), presses cleanly at medium-high heat (150–200°C), and tolerates measurement errors up to 1 cm without visible consequences. Cotton’s dimensional stability means that once a seam is pressed, it stays set. Machine washing before and after alteration is safe and can even improve the final result by pre-shrinking the altered area to match the rest of the garment.
Linen
Linen behaves similarly to cotton but frays more aggressively because the flax fiber has a rough, porous surface that doesn’t hold twisted yarn as tightly as cotton’s smoother fibers. Before altering linen, finish all cut edges with a zigzag stitch or serger overlock to prevent unraveling during handling and laundering. Press linen while slightly damp at high heat (200–220°C) — dry linen requires higher iron heat and produces more shine on the fabric surface.
Wool and Wool Blends
Wool and wool blends respond well to steam pressing and have natural elasticity that allows minor fit adjustments to settle naturally with wear. This elasticity means wool garments accommodate small body changes without requiring structural alteration — a well-chosen wool garment can serve through subtle weight fluctuations without adjustment. When machine stitching wool, hand basting seams before permanent stitching prevents puckering, as wool’s loft and compressibility can cause feed-dog pressure to create gathers in lightweight weaves. Steam pressing sets stitches and relaxes the fibers for a professional finish; avoid soaking wool or exposing it to direct water contact, which can cause shrinkage and felting.
Silk and Satin
Silk and satin are high-risk DIY fabrics. The smooth, tightly woven surface shows every pin mark, every uneven stitch, every pressing shine, and every fingerprint under direct light. These fabrics require specialist needles (size 60/8 or 65/9 sharps), fine thread (weight 100 or higher), and hand stitching rather than machine stitching for anything visible. The pressing challenge is acute: silk chars at temperatures above 150°C and develops water spots if a dry iron is used without a pressing cloth. Satin’s high sheen amplifies every imperfection. Professional handling is recommended for virtually all silk and satin alterations regardless of complexity.
Denim
Denim requires heavy-duty treatment at every stage of alteration. Use heavy-duty needles (size 100/16 or 110/18) designed specifically for denim and denim-lying fabrics, combined with upholstery-weight thread (tex 40 or heavier) for seams that need to bear stress. Standard presser foot pressure is often insufficient — denim’s multiple layers (especially at side seams) require firm pressure to feed evenly under the needle. Industrial machines produce noticeably cleaner results on denim hems; if you lack an industrial machine, consider a double-stitch line (two parallel rows of stitching 3 mm apart) for added durability on stressed seams like crotch and hem. Pre-wash denim before alteration to eliminate variables from future shrinkage.
Knits and Jersey
Knits and jersey present unique challenges due to their extreme stretch. A knit garment cut incorrectly cannot be “un-stretched” — the fibers don’t spring back to original dimensions once stretched out. Use ballpoint needles (size 70/10 or 80/12) to push between knit fibers rather than cutting through them, which creates runs and ladders. Stay tape (self-adhesive or sewn-in) stabilizes seam edges during alteration and prevents stretching out during wear. Never remove more than 1.5 cm from a knit garment — excess removal distorts the drape and can make the garment fit awkwardly tight or change its visual proportion entirely. A serger is strongly preferred over a standard sewing machine for knit alterations because it handles stretch fabric without creating popped stitches.
Finding a Good Tailor or Alteration Specialist
Not all tailors are equal. The difference between a competent tailor and an exceptional one lies in specialization, experience with specific fabric types, and communication clarity. Here’s how to find the right professional for your garment and alteration type.
- Word-of-mouth referrals are the gold standard — ask friends, dry cleaners, and bridal shops for recommendations. A dry cleaner who does in-house alterations typically has more generalized skills; a dedicated alteration tailor or dry cleaner who sub-contracts to a specialist often has better connections to highly skilled professionals.
- Look for specialists in your garment type when possible. Bridal tailors excel at formal wear and delicate fabrics. Menswear specialists (particularly those serving the suit industry) have deep experience with structured garments and pattern alterations. Denim specialists understand heavy fabrics and casual construction. A tailor who works primarily on bridal gowns may not be the best choice for adjusting a pair of heavy wool trousers.
- Ask about experience with your specific fabric before committing. A tailor who regularly works with silk is a completely different skill set from one who works exclusively with cotton and denim. Don’t assume general competence — ask specifically.
- Request a test seam on scrap fabric for expensive garments. Before committing a $500 silk dress to a tailor’s table, ask if they can demonstrate their stitching quality on a similar fabric. Most experienced tailors keep scrap fabric precisely for this purpose.
- Confirm total cost before work begins and get it in writing for complex jobs. A verbal quote for a multi-step alteration is not a guarantee — the final bill can surprise you if the tailor discovers additional complications mid-process. A written estimate protects both parties.
Frequently Asked Questions
Q: Is it worth getting clothes altered or should I just buy new?
A: It depends on the garment cost and the extent of alteration. Altering a $150+ garment to fit perfectly is cost-effective — tailoring extends the life of quality clothing and costs a fraction of replacement. Avoid altering cheap fast-fashion items where the fabric quality doesn’t justify the labor cost.
Q: How much does it cost to have pants hemmed professionally?
A: Professional pant hemming costs $15–30 for standard straight hems, $25–45 for blind hems on dress pants. Rush jobs add 50–100% premium. The cost varies by region and tailor experience — urban tailors in major cities charge 20–40% more than suburban or rural providers.
Q: Can a tailor make clothes bigger (let out)?
A: Yes, if there is sufficient seam allowance inside the garment. Most modern clothing has 1.5–2.5 cm of additional seam allowance at the side seams and waist. Checking this requires removing the current seam stitching and measuring the gap. Letting out more than 2.5 cm typically requires adding fabric matching the original — possible but expensive and visible.
Q: How long do professional alterations take?
A: Standard alterations take 1–2 weeks. Simple jobs (hemming, waist intake) may be done while you wait or within 24–48 hours for a rush fee. Complex restructuring (restitching armholes, restructuring shoulders) requires multiple fittings and can take 3–4 weeks.
References
- Clothing Engineers. (2024). CottonWorks — Fabric Alteration Guide. Cotton Incorporated.
- ASTM International. (2023). ASTM D3136 — Standard Specification for Care Labeling of Textile Floor Covering Products. ASTM International.
- International Wool Textile Organisation. (2024). IWTO Wool Mark — Fabric Care Guidelines. IWTO.
- American Association of Textile Chemists and Colorists. (2023). AATCC Test Method 124 — Appearance of Fabrics after Repeated Home Laundering. AATCC.
- Textile Exchange. (2024). Textile Exchange — Sustainable Fabric Resource Library. Textile Exchange.
- ScienceDirect. (2022). Garment Fit and Alteration — A Review of Fabric Behavior During Tailoring Processes. Materials Today: Proceedings.


