
Zipper Insertion: Standard vs Invisible

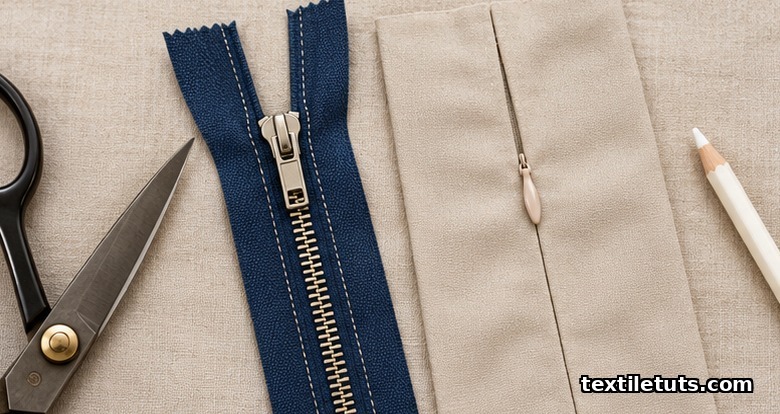
A standard zipper has exposed teeth sewn next to a seam with visible topstitching, while an invisible zipper has its coil tucked behind the seam so only the slider pull shows on the right side, and the two constructions differ in presser-foot choice, stitch placement, seam allowance, and the tensile-strength targets measured under ASTM D2061.
The functional difference is concealment: an invisible zipper disappears into a flat seam, whereas a standard zipper sits on the fabric as a visible trim that can also serve as a design element.
This guide walks through how each zipper is built, the foot and stitch settings each one needs, the seam allowances that make them sit flat, and the strength requirements that decide which one belongs in a finished garment.
How the Two Zipper Constructions Differ
A standard zipper, sometimes called a regular or exposed zipper, has its teeth or coil facing outward on the right side of the garment. The tape is sewn to the seam allowance with a regular zipper foot, and the seam line is then topstitched close to the teeth so the zipper reads as a visible row of teeth from the outside. Zipper size is denoted by a number such as #3, #5, or #8 that refers to the approximate chain width in millimeters when the zipper is closed, and the most common apparel size is #5 with a closed-chain width near 5 mm.
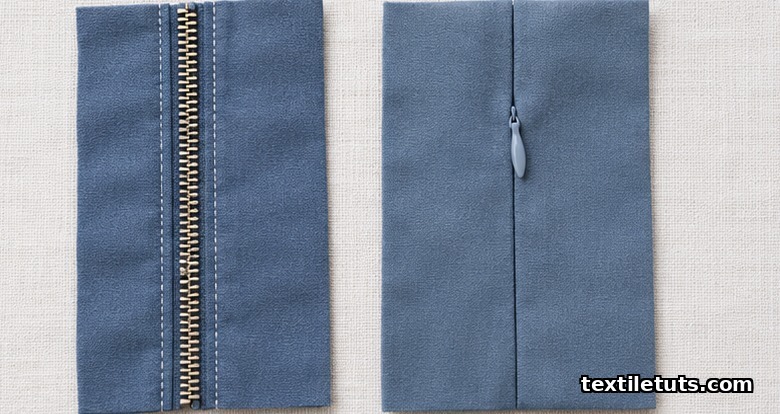
An invisible zipper uses a different construction. The coil is on the back of the tape rather than the front, so when the zipper is sewn into a seam the coil rolls toward the wrong side of the garment and only the slider pull is visible from the right side. The two halves of the zipper are sewn right sides together first, the seam is pressed open, and the resulting seam hides the coil entirely. For this to work the invisible zipper needs a special presser foot with two parallel grooves underneath the needle slot so the needle can stitch within 2 mm to 3 mm of the coil without striking it.
From a finishing standpoint the visual difference is what most readers see first. From a production standpoint the structural difference is what changes the construction sequence: a standard zipper is normally applied after the seam is sewn, while an invisible zipper is sewn into the seam itself before the seam is closed.
Presser Foot, Needle, and Stitch Settings
For a standard zipper the presser foot is a regular zipper foot with either one groove or two grooves on the underside. The groove lets the foot ride along the coil without crushing it, and the needle can be moved to one side of the foot so the stitch can run right next to the teeth. Stitch length on most apparel work sits between 2.0 mm and 2.5 mm, and the topstitch thread is usually a heavier weight such as Tex 30 or Tex 40 to keep the row of stitching flat and even.
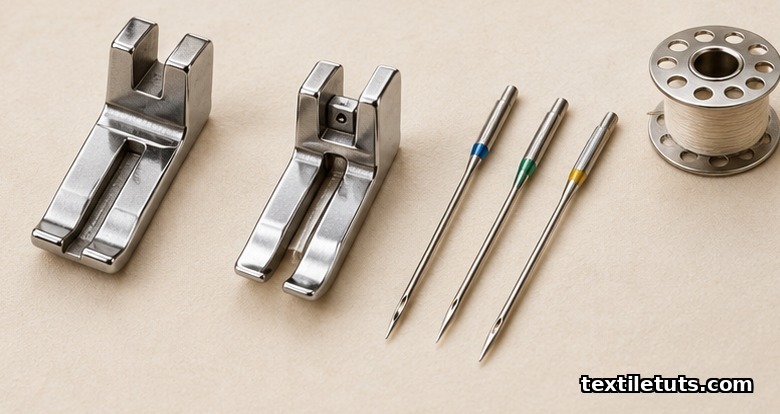
For an invisible zipper the foot has a different shape. Two grooves run under the foot, one for each side of the zipper, and the slot for the needle sits between them. The grooves hold the coil out of the way so the needle can stitch closer to the teeth than a standard zipper foot can usually manage. A size 12 or 14 universal needle is enough for most woven fabrics in the 100 g/m² to 250 g/m² range; heavier coatings call for a size 16 needle to prevent skipped stitches.
Thread tension is the other adjustment that often separates a flat invisible zipper from a puckered one. Most home sewing machines produce a clean result with the upper tension dial set 0.5 to 1.0 units looser than the default for the chosen thread, because the foot has to compress the tape lightly to keep the coil straight while the stitch forms.
Seam Allowance and Pattern Layout
Standard zippers are usually centered on a seam that is sewn first and then opened. A 1.5 cm (5/8 inch) seam allowance is the most common starting point, and the zipper is basted to the seam allowance with the coil on the seam line and the topstitch placed about 5 mm to 7 mm from the seam. This works for center-back and side-seam applications where the zipper sits flush with the seam.
Invisible zippers need a different layout. The two halves of the zipper are pinned face down on the right side of the fabric along the seam line, the seam is stitched with the invisible zipper foot, the seam allowance is trimmed to about 1 cm, and the seam is pressed open so the coil sits inside the seam rather than on top of the fabric. Most dress and skirt patterns call for a 1.5 cm seam allowance on either side of the zipper, which gives enough room to grade the seam and prevent the tape from showing through on sheer fabrics.
The grading step matters for both zipper types. Clipping the seam allowance at the top stop and trimming the bottom allowance to a wedge helps the zipper lie flat when the garment is worn; on curved applications such as a princess seam, clipping every 2 cm to 3 cm keeps the tape from pulling the fabric into a wave.
Strength and Durability Targets
Zippers used in apparel are tested for strength and durability under ASTM D2061, the Standard Test Methods for Strength Tests for Zippers. The two key metrics are crosswise strength, which measures the force required to pull the slider off the chain, and chain strength, which measures the force required to separate the two halves of the zipper perpendicular to the chain. For apparel-grade #5 nylon-coil zippers a typical minimum crosswise strength is 150 N and a typical minimum chain strength is around 90 N, though specifications vary by brand and application.
ASTM D3692, the Standard Practice for Selection of Zippers for Care-Labeled Apparel, complements D2061 by giving manufacturers a way to match zipper strength to the expected care cycle. The practice pairs zipper type and size with the expected number of care cycles and the type of garment, so a children’s jacket that will be washed weekly needs a higher slider pull-off strength than a decorative pillow closure that will rarely be opened.
For international buyers the relevant companion standards are ISO 13936 for seam slippage in sewn assemblies and ISO 13934 for tensile properties of fabrics, both of which are commonly referenced in zipper technical data sheets. ISO 105-B02, the color-fastness-to-light test, is also referenced for zipper tape and slider color match against the surrounding fabric. Oeko-Tex Standard 100 applies on top of these because zipper tapes and metal sliders can release nickel, lead, or azo-derived dyes; certified zippers are tested to the same limit values as the fabric they are sewn into.
Common Defects at Insertion
The most common defect on a standard zipper is a wavy topstitch, which usually points to one of three causes: the foot was not riding flat on the coil, the stitch length was too long for the fabric, or the tape was stretched during basting. A tell is that the topstitch is visually straight on the right side but the fabric ripples on the wrong side.
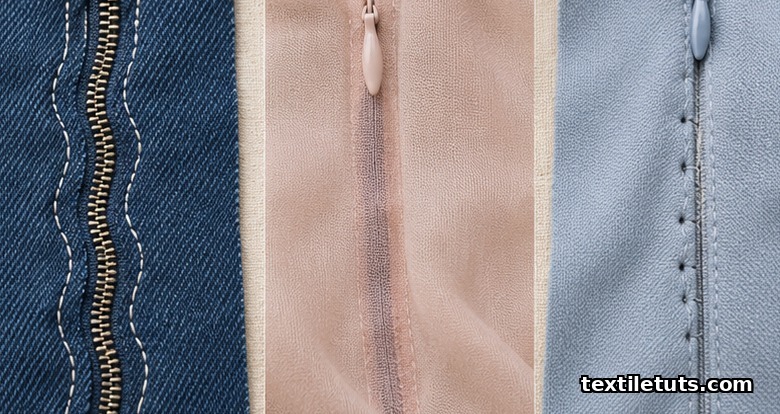
For an invisible zipper the most common defect is needle strike, where the needle hits the coil and either breaks or bends the needle or damages the coil. Needle strike is almost always a foot-positioning issue, not a needle-size issue. If the needle is not sitting in the groove closest to the coil, the needle will hit the teeth on every cycle. The other common defect is tape show-through, where the edge of the tape is visible on the right side of the garment because the seam allowance was too narrow to trim and grade properly.
Slider jams at the bottom stop are usually a chain-length problem rather than an insertion problem. If the bottom stop sits more than 2 mm below the seam line, the slider catches on it as the chain narrows. The fix is to position the bottom stop flush with the seam line before stitching the second side of the seam.
When to Pick Each Zipper
Standard zippers are the right pick when the zipper is meant to be a visible trim, when the fabric is too bulky for an invisible coil to hide cleanly, or when the application calls for a separating zipper such as a jacket front. They are also faster to install in production because the seam can be sewn and the zipper applied afterward, which makes rework easier if a stitch goes wrong.
Invisible zippers are the right pick for dresses, skirts, and pillow covers where a clean seam line matters more than speed. They are also a better match for sheer fabrics because the tape does not show through the seam. The trade-off is that invisible zippers require a special foot and a more careful seam allowance, and they are harder to shorten at the bottom because the lower stop is pre-set.
For a children’s wear or workwear application, strength and care cycle testing under ASTM D2061 and ASTM D3692 should drive the choice. A pair of coveralls that will be washed weekly needs a #5 or #8 chain with documented slider pull-off strength, regardless of whether the zipper is visible or hidden.
Frequently Asked Questions
Can I install an invisible zipper without a special foot?
It is technically possible to sew an invisible zipper with a standard zipper foot, but the result is rarely clean because the needle cannot get close enough to the coil without striking it. Most home sewing guides and machine manuals list an invisible zipper foot as a required accessory, and the cost is small relative to the improvement in finish quality.
What stitch length should I use for a standard zipper?
For most woven fabrics in the 100 g/m² to 250 g/m² range, a stitch length of 2.0 mm to 2.5 mm gives a flat, even topstitch without perforating the tape. For heavier coatings such as denim or canvas the stitch length can be increased to 3.0 mm to keep the seam from feeling stiff.
How do I shorten an invisible zipper?
The top of an invisible zipper can be shortened by sewing a new top stop across the coil with a tight zigzag at the desired length. The bottom of the zipper should not be cut because the pre-set bottom stop is what keeps the slider from running off the chain. If the zipper is too long, it is usually better to replace it than to alter the bottom stop.
What is the minimum slider pull-off strength for an apparel zipper?
ASTM D2061 lists crosswise strength as the force required to pull the slider off the chain in a direction perpendicular to the chain. For apparel-grade #5 nylon-coil zippers, a crosswise strength of at least 150 N is a common minimum, though specifications vary by brand and end use.
Why does my invisible zipper pucker on sheer fabrics?
Puckering on sheer fabrics usually means the seam allowance is too wide and the tape is being pulled into the seam, or the upper thread tension is too tight for the lightweight fabric. Loosening the upper tension by 0.5 to 1.0 units and trimming the seam allowance to 8 mm to 10 mm before pressing usually clears the issue.
References
- ASTM International. ASTM D2061-07(2019) Standard Test Methods for Strength Tests for Zippers. ASTM Compass. https://www.astm.org/d2061-07r19.html. Covers crosswise strength, chain strength, slider pull-off, and top stop holding strength for zippers.
- ASTM International. ASTM D3692-89(2016) Standard Practice for Selection of Zippers for Care-Labeled Apparel. ASTM Compass. https://www.astm.org/d3692-89r16.html. Matches zipper type and size to garment care cycle.
- International Organization for Standardization. ISO 13936-1:2004 Textiles, Determination of the slippage resistance of yarns at a seam in woven fabrics. ISO. https://www.iso.org/standard/35559.html. Referenced in zipper data sheets for sewn-assembly performance.
- International Organization for Standardization. ISO 105-B02:2014 Textiles, Tests for colour fastness, Part B02: Colour fastness to artificial light. ISO. https://www.iso.org/standard/65209.html. Referenced for zipper tape and slider color-fastness testing.
- International Organization for Standardization. ISO 13934-1:2013 Textiles, Tensile properties of fabrics, Part 1: Determination of maximum force and elongation at maximum force using the strip method. ISO. https://www.iso.org/standard/60676.html. Companion tensile-strength method for sewn assemblies that include zippers.
- OEKO-TEX Association. Standard 100 by OEKO-TEX, Limit Values and Individual Substances According to the Appendices. https://www.oeko-tex.com/en/our-standards/oeko-tex-standard-100. Relevant because zipper tapes and metal sliders can release nickel, lead, or azo-derived dyes.
- YKK Fastening Products Group. Zipper Technical Data and Care Guidelines. YKK Corporation. https://www.ykk.com/. Published crosswise and chain strength values for #3, #5, and #8 nylon-coil zippers commonly cited in apparel specifications.
This article is the working reference for zipper insertion in sewn garments. Editorial by Kazi Sifat Muntasir, TextileTuts. Sources: ASTM D2061, ASTM D3692, ISO 13936-1, ISO 105-B02, ISO 13934-1, OEKO-TEX Standard 100, YKK Fastening Products as cited.


