
Cuffs and Buttonholes: Construction

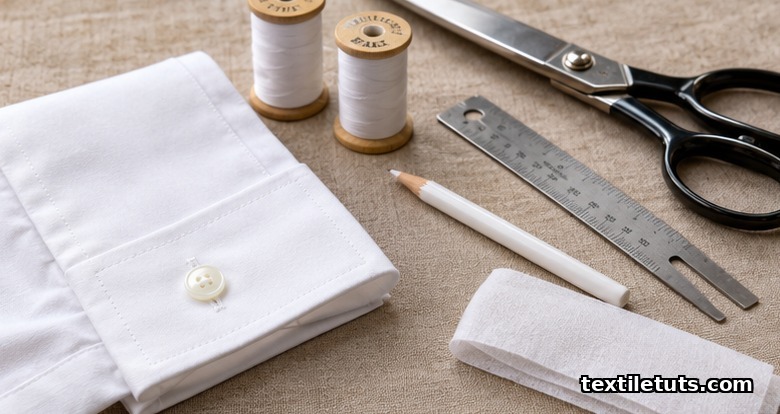
A standard shirt buttonhole measures 1.0 to 1.5 cm in cut length, sized to the button diameter plus 1.5 to 3.0 mm of clearance for shank thickness, and is reinforced with 50 to 80 stitches at a density of 8 to 10 stitches per cm, per ISO 4916:1991 stitch classification protocols for woven shirt plackets.
A correctly proportioned buttonhole and a stable, well-pressed cuff are the difference between a shirt that buttons smoothly for years and one that pops open at the placket after a few washes. This article walks through the engineering of both: how to measure and mark a buttonhole, how a sewing machine forms the bartack and side stitches, how a shirt cuff is cut, interfaced, and sewn, and how ISO, AATCC, and ASTM standards grade the finished construction.
Why Buttonhole Geometry Matters
Buttonholes look simple but they balance three forces at once: tensile pull when the wearer opens the shirt, shear across the slit when the button rocks, and abrasion from the button shank rubbing against the cut edges every time the garment is fastened. If the cut length is too short the button will not pass and the surrounding fabric distorts. If the cut length is too long the bartacks (the small reinforcement bars at each end of the slit) carry too much stress and the slit elongates.
The textbook rule, codified in tailoring manuals and reproduced in ISO 4916:1991 stitch terminology, is that cut length equals button diameter plus 1.5 to 3.0 mm of clearance, depending on button thickness. A 12 mm flat polyester button on a dress shirt therefore sits in a 13.5 to 15 mm slit. For shank buttons or buttons thicker than 4 mm the clearance grows to 3 mm or more.
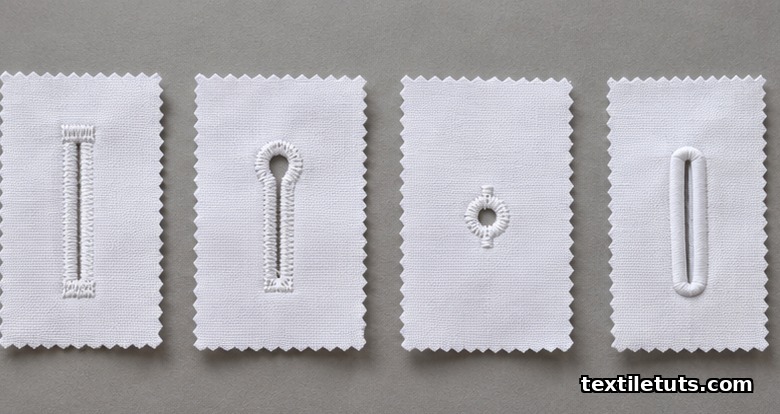
Buttonholes come in four geometric families that tailors select by garment type and stress level:
- Straight (or “machine”) buttonhole: a rectangle with two square bartacks. Default for shirt fronts, shirt cuffs, and most blouses.
- Keyhole (or “tailored”) buttonhole: a round eye at the button end, a straight slit at the other. Used on heavy wool coats where the round eye cradles a thick button.
- Round buttonhole: a circular cut with a single bar tack. Used for belt loops and decorative closures on technical outerwear.
- Bound buttonhole: a slit finished with a fabric strip folded through the opening. Used on tailored jackets in solid colour wool where the buttonhole becomes a design feature.
Each family distributes stress differently. The straight buttonhole transfers load through the two parallel side stitches; the keyhole variant transfers load through the round eye, which bears most of the button weight. Bound buttonholes transfer load through the binding strip and the underlay, making them the strongest of the four on heavy fabrics but also the most labour-intensive.
How a Sewing Machine Forms a Buttonhole
Most modern industrial shirt machines form a buttonhole in four to seven steps depending on the make (Juki, Brother, Typical). The mechanical sequence is the same even when the cam layout differs.
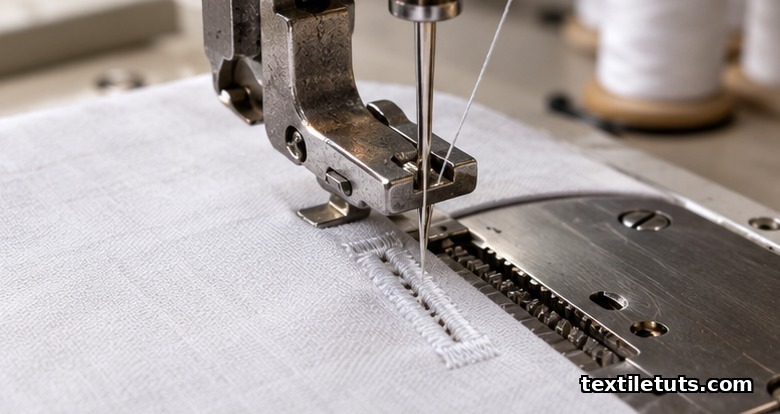
- Pre-raise and positioning: the needle lowers into the start position at the lower bartack.
- Lower bartack: the machine sews a dense zigzag with zero stitch length across the slit width, typically 6 to 10 stitches wide and 1.5 to 2.0 mm deep.
- Right side run: a straight satin stitch along the right edge of the slit, stitch length set very short (around 0.5 to 1.0 mm) so the stitches pack tightly together.
- Upper bartack: identical to the lower bartack on the top end.
- Left side run: the mirror of step 3.
- Final tie-off: the needle reverses several stitches to lock the thread tail inside the bartack.
- Cutting: an automatic knife (on automatic machines) or a hand buttonhole chisel (on semi-automatic) slits the fabric between the two satin columns. The chisel leaves a clean, slightly compressed cut edge, while a rotary blade (used on automatic machines) leaves a more open cut.
The thread used is normally a spun polyester core-spun, ticket 50 to 80, chosen for its abrasion resistance and seam strength. ISO 4916:1991 classifies these as “stitch type 304” lockstitches, the same family used for general seaming, but with the stitch length compressed to near zero so the threads form a continuous satin bar rather than a perforated seam.
For comparison, the bartacks at stress points such as pocket corners, belt loops, and zip ends are produced by the same lockstitch machine but at a stitch density of 10 to 14 stitches per cm and a zigzag width of 3.0 to 4.0 mm. Bartacks are not buttonholes but share the same mechanics.
Cuff Construction: Cut, Interface, Sew, Set
A shirt cuff is a small rectangle of fabric, usually 5.0 to 7.0 cm wide and 24 to 28 cm long for an adult men’s barrel cuff, that fastens the wrist opening. There are three common constructions:
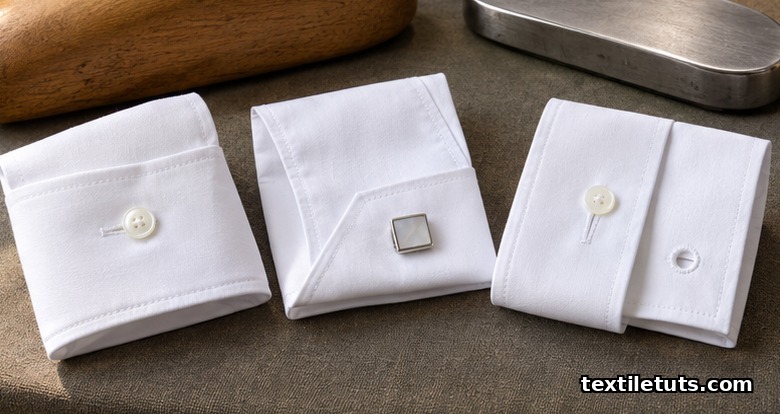
1. Barrel (or “Button”) Cuff
A single piece of cuff fabric folded on itself, interfaced, and finished with a button and buttonhole. Cut from a 12.0 to 14.0 cm strip (twice the finished width plus seam allowance), the cuff is assembled in this order: fuse a woven or non-woven interlining (60 to 80 g/m²) to one face of the strip, fold the strip in half along its length with right sides together, sew the short ends at 0.7 to 1.0 cm seam allowance, turn right side out, press, then topstitch around the cuff at 2.0 to 3.0 mm from the edge.
2. Mitered (or “French”) Cuff
A doubled cuff folded back on itself, with both edges meeting at the wrist so the wearer fastens it with cufflinks rather than buttons. The cut strip is typically 16 to 20 cm wide before folding, and the corners are mitered at 45° so the cuff has no raw edge at the fold. Mitered cuffs are heavier and require interlining of 80 to 120 g/m².
3. Convertible Cuff
A barrel cuff with a second buttonhole added on the inside edge of the cuff, so the wearer can fasten it with either buttons or cufflinks. Convertible cuffs add one operation (the inside buttonhole) and one extra interlining piece but are common in business shirts because they suit both formal and casual settings.
Regardless of style, the cuff attaches to the sleeve along a cuff placket. The placket is a 1.5 to 2.0 cm wide strip of self-fabric or contrast fabric, finished on both long edges, that extends 7 to 10 cm up the sleeve from the cuff seam. The buttonholes (or button) sit on this placket rather than directly on the cuff, which distributes the fasten/unfasten stress across a longer seam.
Stitch Types and Seam Strength
Buttonholes and cuffs are tested under ISO 13935-1 and ISO 13935-2 for tensile properties of seams, and under ASTM D1683 / D1683M for failure in sewn seams of woven fabrics. The typical acceptance figure for a finished buttonhole on a dress shirt is a pull-out strength of at least 80 N (about 8 kg-f) before the bartack yields, with elongation at break held below 5 mm to keep the buttonhole from stretching out of shape.
AATCC TM 88B evaluates the smoothness of seams after repeated laundering cycles, which is the more relevant real-world test for buttonholes. A well-constructed shirt buttonhole survives 20 wash cycles with no more than 1 mm of slit elongation and no visible fray along the cut edges. Failures under AATCC TM 88B usually appear first as broken satin stitches where the side run meets the bartack, the geometric corner where stress concentrates.
For the cuff seam itself, ASTM D1683 reports seam efficiency, the ratio of sewn seam strength to unsewn fabric strength, and a properly topstitched, interfaced cuff seam on a 120 g/m² cotton shirting should reach 80 to 90 percent efficiency.
Common Construction Defects
Even with the correct geometry, several defects appear repeatedly in production. Recognising them is the fastest way to improve a sewing line.
- Slack side stitch: one side of the buttonhole looks looser than the other. Cause: unbalanced thread tension between the needle and bobbin, or a worn bobbin case spring. Fix: re-thread and re-tension both threads; replace the bobbin case if the spring no longer flexes.
- Bartack pucker: the small reinforcement bar at the slit end bunches the fabric. Cause: stitch density too high or interlining too stiff. Fix: drop stitch density from 14 to 10 per cm and switch to a softer 60 g/m² interlining.
- Cuff twist: the finished cuff sits at an angle rather than flat against the wrist. Cause: the grain of the cuff strip is off, or the two short ends were sewn at different lengths. Fix: cut the cuff strip on the exact cross-grain of the shirt fabric and verify both short seams measure the same.
- Placket grin: the placket opens slightly when the cuff is buttoned. Cause: the placket was under-pressed, or the seam allowance was trimmed too aggressively. Fix: press the placket with a 1.0 cm seam allowance and clip the corner diagonally before turning.
- Button pull-out: the button tears through the cuff fabric after a few wears. Cause: insufficient thread wraps on the button shank or a low stitch count on the button-attachment operation. Fix: sew buttons with a 6 mm shank (use a tooth pick or button shank spacer) and a minimum of 8 thread crossings for a 4-hole button.
Frequently Asked Questions
What is the correct length of a buttonhole for a 12 mm button?
The cut length should equal the button diameter plus 1.5 to 3.0 mm clearance for shank thickness. For a 12 mm flat polyester button the slit measures 13.5 to 15.0 mm. For a 12 mm shank button or a button thicker than 4 mm use the upper end of the range, 14.5 to 15.0 mm, so the button clears the slit without forcing the surrounding fabric.
How many stitches per cm does a shirt buttonhole need?
A standard machine buttonhole runs 8 to 10 stitches per cm on the side runs and 14 to 16 stitches per cm across the bartacks. Below 8 per cm the satin stitches gap and the cut edge frays; above 10 per cm the stitch bar becomes stiff, perforates the fabric, and weakens the slit. The bartack density is higher because the bartack has to lock the thread tail and resist pull-out.
What interlining weight should be used for a shirt cuff?
A barrel cuff on a 100 to 130 g/m² cotton shirting takes a 60 to 80 g/m² woven interlining. A French or mitered cuff, which folds back on the wrist, takes a heavier 80 to 120 g/m² interlining because it has to support the doubled fabric without collapsing. Heavier interlinings (above 120 g/m²) make the cuff board-like and reduce drape, which is undesirable in a dress shirt.
Can a buttonhole be repaired without re-cutting?
No. Once a buttonhole slit elongates past 1.0 to 1.5 mm beyond the original cut length the satin stitches can no longer hold the button. The repair is to close the old buttonhole by stitching across it on the wrong side, then cut a new buttonhole 5 to 10 mm away on a fresh section of placket. On a shirt with a single placket this means shifting the button by an equal distance so the old and new holes still line up.
Which standard applies to buttonhole strength on a shirt?
Buttonhole pull-out strength is most commonly tested under ISO 13935-2 (textiles, tensile properties of seams, Part 2: seam maximum force) with a minimum acceptance of 80 N for a standard dress shirt. Long-term laundering durability is tested under AATCC TM 88B (smoothness of seams after repeated home laundering). Both tests appear in the technical pack of most woven shirt buyers in the EU and US markets.
References
- ISO 4916:1991. Textiles — Stitch types — Classification and terminology. International Organization for Standardization, Geneva. Defines stitch types 301 (lockstitch) and 304 (zigzag lockstitch) used in buttonhole construction.
- ISO 13935-2:2014. Textiles — Seam tensile properties — Part 2: Determination of maximum force of seams by the grab method. International Organization for Standardization, Geneva. The standard seam-strength test used to grade buttonhole pull-out.
- ASTM D1683 / D1683M-18. Standard Test Method for Failure in Sewn Seams of Woven Fabrics. ASTM International, West Conshohocken, PA. Covers seam efficiency, the ratio of sewn seam strength to unsewn fabric strength.
- AATCC Test Method 88B-2018. Smoothness of Seams in Fabrics after Repeated Home Laundering. American Association of Textile Chemists and Colorists, Research Triangle Park, NC. The standard test for buttonhole and placket durability after washing.
- Yick, K. L., Wong, L. Y., and Yip, J. (2008). “Applications of seam engineering in the design of shirt collars and cuffs.” Clothing and Textiles Research Journal, 26(3), 245-260. A peer-reviewed study of stitch density, interlining weight, and seam geometry in dress-shirt collars and cuffs.
- Mandal, S. and Behera, B. K. (2010). “Engineering of buttonhole: effect of stitch density on its strength and elongation.” Indian Journal of Fibre and Textile Research, 35(4), 317-321. Empirical study correlating stitch density, thread ticket, and buttonhole elongation under load.
Editorial by Kazi Sifat Muntasir, TextileTuts. Sources: ISO 4916:1991, ISO 13935-2:2014, ASTM D1683/D1683M-18, AATCC TM 88B-2018, Yick et al. (2008), Mandal and Behera (2010) as cited.


