
Tailoring Techniques

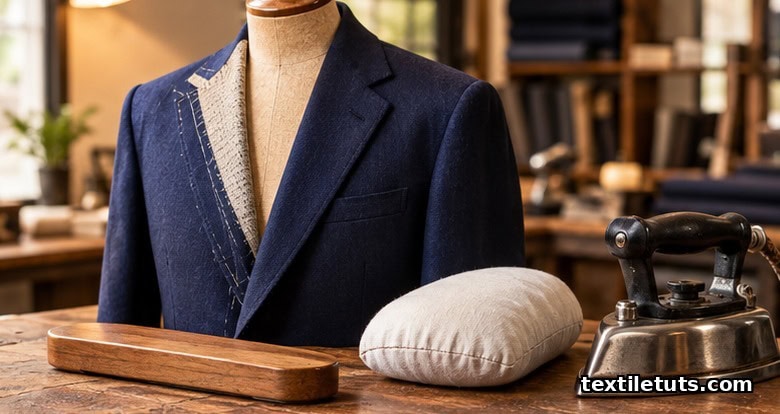
A tailored jacket uses between 2,500 and 3,000 hand stitches per panel, with side seam allowances of 1.0 to 1.5 cm and a center back seam allowance of 4 cm reserved so the back can be let out at the waist across two or three fittings.
Tailoring is the garment-construction discipline that turns a flat piece of woven cloth into a three-dimensional garment shaped to a specific body, and the result depends as much on stitch geometry, pressing, and seam allowance as on the paper pattern itself. This article walks through the seven core techniques every tailor uses on a wool suit or structured coat: pattern preparation, basting, hand stitching, seam construction, pressing, fitting alteration, and finishing.
Pattern Preparation and Marking
Before any cutting happens, the tailor transfers balance lines, notches, and match points from the paper pattern to the fabric. The most common transfer methods use tailor’s chalk, tracing paper with a tracing wheel, and machine stitching through tissue paper that is later torn away. Per ASTM D6193, every seam in a tailored garment should carry a visible match mark at the start and the end so the assembly order can be verified after pressing. A balanced garment has horizontal lines such as the bust line, waist line, and hip line running perpendicular to the center front and parallel to the floor when the garment is on the body.
Cutting direction matters. The warp (lengthwise grain) of the fabric runs parallel to the body on the center front, and the weft (crosswise grain) runs horizontally. Twill and worsted wool suitings show visible grain, so a tilted pattern piece shows up immediately at the fitting. Most tailored jacket patterns include a 2 cm grain line tolerance, but experienced tailors work to within 5 mm to avoid twist in the front panels.
Basting: The Tailor’s Temporary Stitching
Basting holds the garment together during fitting and before permanent stitching. The three basting stitches every tailor learns first are thread basting, pad stitching, and slip basting. Thread basting is a single thread drawn through both layers in 2.5 to 5 cm running stitches and removed before final construction. Pad stitching is a diagonal hand stitch worked through the lapel canvas and the chest piece, forming the roll line of the lapel. Slip basting is a stitch that holds two edges together without pins, ideal for matching stripes, plaids, and seam intersections where pin holes would be visible.
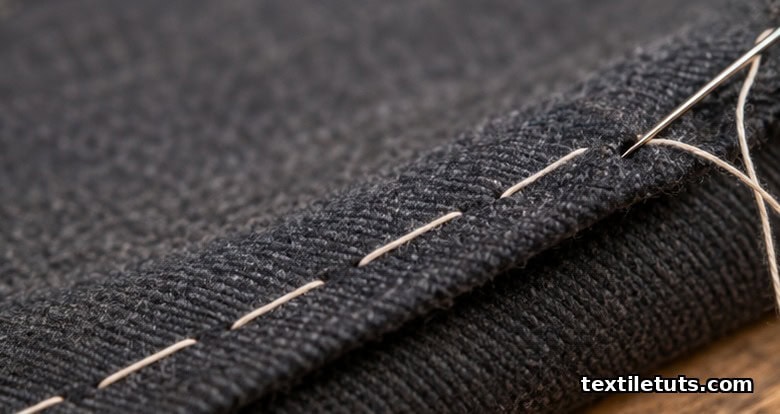
Hand basting is done with silk thread for wool and cotton thread for cotton and linen, in a contrast color so it is easy to see and remove. A full canvas chest piece in a tailored jacket takes around 1,200 to 1,800 pad stitches per side to build a stable chest and a clean lapel roll.
Hand Stitching Techniques
Hand stitching is what separates a tailored garment from a fused, mass-produced one. Five stitches form the foundation of custom tailoring:
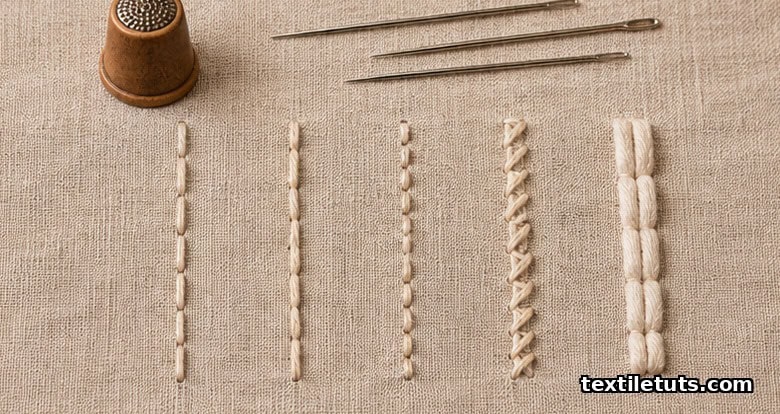
- Running stitch at 4 to 6 stitches per cm on the seam line, used for assembling the canvas to the outer fabric.
- Back stitch at 6 to 8 stitches per cm, used where strength matters, such as attaching buttons and bar tacks.
- Prick stitch, a back stitch worked from the outside of the garment and taking only one or two threads of the outer fabric so the stitch is invisible on the inside. Prick stitching secures the canvas to the lapel break line.
- Whip stitch, used to attach linings along the hem allowance.
- Pad stitch, a diagonal stitch that holds the hair canvas to the chest piece and shapes the lapel.
Per ISO 4915, stitches are classified into eight classes; classes 1 (chain stitch) and 2 (lock stitch) are both acceptable for seam assembly, with the choice driven by seam type and the stress the seam will carry. Tailored jackets almost always use lock stitch (class 2) for structural seams because chain stitch can unravel if a single thread breaks.
Seam Construction and Allowances
Seam allowance is the fabric between the stitch line and the raw edge, and tailoring uses a wider range of allowances than ready-to-wear. Standard allowances for a tailored jacket include:
- Side seams at 1.0 to 1.5 cm, finished with a small hand-rolled seam or bound with seam binding.
- Center back seam at 4 cm, left long so the back can be let out at the waist.
- Armhole seam at 1.5 cm, clipped at every 2 cm interval to release tension around the curve.
- Sleeve cap with 2.5 cm of easing allowance distributed evenly before setting the sleeve.
Seam finishes prevent the fabric from fraying and reduce bulk. The most common finishes in tailoring are pinked edges on loosely woven fabrics, bound seams using bias binding on jacket front edges and hems, and Hong Kong seams where a bias strip of lining fabric is wrapped around each seam allowance. The Hong Kong finish adds 15 to 20 g of fabric per meter of seam and is standard on fully canvas tailored jackets above a certain price point.
Pressing as a Construction Step
Pressing is not finishing, it is construction. Each seam is pressed open and then pressed to one side before the next layer is attached, and the difference between a flat, smooth seam and a rippled one is usually the press rather than the stitch. The four pressing tools every tailoring shop has are a heavy iron of 4 to 6 kg with steam, a pressing ham (a curved cushion that supports shaped areas like the bust and sleeve cap), a seam roll (a cylindrical cushion used to press seams open without creating a visible imprint on the right side of the fabric), and a clapper (a flat piece of wood placed on top of a just-pressed seam to lock in the crease).
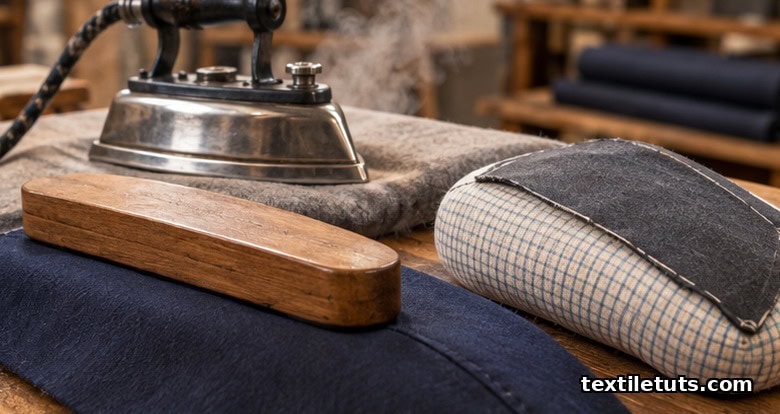
Steam dwell time matters. Wool requires 8 to 12 seconds of steam contact followed by a 2-second rest to set a crease. Cotton and linen need higher heat, around 200 °C for cotton and 230 °C for linen. Synthetic fibers such as polyester and triacetate press at 140 to 160 °C and will glaze, meaning turn shiny, above roughly 180 °C, which is why a press cloth is always used for these fibers.
Fitting and Alteration
A first fitting happens after the body of the jacket is assembled but before the lining is attached, so the tailor can access the seams. At this fitting the tailor checks the balance of the garment on the body (front-to-back and side-to-side), the position of the shoulder, the chest drape, and the back hang. Common alterations and the seam allowance they consume include taking in the side seam at the waist by 0.5 to 2 cm per side, letting out the center back seam by up to 2 cm while keeping 2 cm still in reserve, swinging the side seam forward to add chest width (which requires letting out the underarm seam by 0.5 cm), and shortening the sleeve by 1 to 3 cm taken from the cuff so the position of the buttons does not shift.
This is why the center back seam allowance is left at 4 cm rather than the more usual 1.5 cm. The reserve allowance lets the tailor respond to the second fitting and to weight changes the wearer may have between the second and third fittings.
Finishing and Closing
The last operations include attaching the lining, sewing the buttonholes by hand, setting the sleeves into the armholes, and pressing the finished garment under a finishing press for 30 to 45 minutes. Buttonholes on a tailored jacket are worked in buttonhole stitch at roughly 0.5 cm wide and 1.5 cm long for standard jacket buttons, with a bar tack at each end to prevent the buttonhole from stretching. The total number of hand operations on a fully canvas tailored jacket, including pad stitching, buttonholes, and hem, is typically between 35 and 45 hours of skilled labor.
Comparison of Tailoring Stitch Types
| Stitch | Stitches per cm | Typical use | Relative strength |
|---|---|---|---|
| Running stitch | 4 to 6 | Basting, canvas assembly | Low |
| Back stitch | 6 to 8 | Button attach, bar tacks | High |
| Prick stitch | 5 to 7 | Lapel roll line, topstitch | Medium to high |
| Pad stitch | 8 to 12 | Canvas to chest piece | Medium |
| Whip stitch | 3 to 5 | Lining hem, edge finish | Low to medium |
Frequently Asked Questions
What is the difference between tailoring and dressmaking?
Tailoring refers specifically to the construction of structured garments from woven fabrics, especially suit jackets, coats, and trousers, using hand-shaping techniques such as pad stitching and canvas interfacing. Dressmaking covers a broader category that includes soft, drapy, and knit garments where fit comes from pattern shaping rather than internal construction. The two disciplines share many hand stitches but differ in the use of interlinings and pressing methods.
How long does it take to tailor a suit jacket?
A fully hand-canvas tailored jacket takes between 35 and 45 hours of skilled work, distributed across cutting, basting, canvas construction, machine assembly, hand finishing, and pressing. A fused, or glued, jacket can be produced in 4 to 6 hours because the canvas is replaced by a fusible interlining that is heat-bonded to the outer fabric, although the fit and drape of a fused jacket is generally less refined than a hand-canvas one.
Why do tailored jackets have so many hand stitches?
Hand stitches distribute stress across the seam, allow the tailor to control tension stitch by stitch, and let the garment be shaped from the inside without visible stitch marks on the outside. Pad stitching in particular shapes the chest and lapel roll in a way that no machine operation can replicate, because each stitch is angled and tensioned individually to follow the contour of the body.
Can a tailored jacket be altered after it is finished?
Yes, but the reserve seam allowance limits how much. Side seams can be taken in by up to 2 cm per side and let out by up to 1 cm, the center back can be let out by up to 2 cm, and sleeves can be shortened by up to 3 cm from the cuff. Letting out a chest that is too tight is harder and usually requires opening the armhole seam and re-cutting the sleeve cap, which is why the first fitting is done before the lining goes in.
What is a Hong Kong seam and when is it used?
A Hong Kong seam is a finish where a bias strip of lightweight lining fabric is wrapped around each raw seam allowance and stitched in place, leaving no exposed raw edge inside the garment. It is the standard finish on tailored jacket side seams, back seams, and sleeve seams in higher-quality construction, and it adds a small amount of weight (around 15 to 20 g per meter of seam) that helps the jacket hang cleanly.
References
- ASTM International. ASTM D6193: Standard Practice for Stitches and Seams. https://www.astm.org — Defines stitch and seam classifications used in apparel construction.
- International Organization for Standardization. ISO 4915:1991 Textiles — Stitch Types — Classification and Terminology. https://www.iso.org — Classifies stitches into eight classes used in sewn products.
- International Organization for Standardization. ISO 4916:1991 Textiles — Seam Types — Classification and Terminology. https://www.iso.org — Classifies seam types by the number and position of fabric parts joined.
- AATCC. AATCC Technical Manual, Current Edition. https://www.aatcc.org — Provides test methods for seam slippage and seam strength referenced in apparel specifications.
- ScienceDirect. Apparel Manufacturing: Sewn Product Performance (peer-reviewed review article). https://www.sciencedirect.com — Reviews seam performance, stitch tension, and pressing in woven garment construction.
- ResearchGate. Hand Techniques in Traditional Wool Suit Tailoring (academic paper). https://www.researchgate.net — Covers pad stitch distribution and canvas tailoring technique.
Editorial by Kazi Sifat Muntasir, TextileTuts. Sources: ASTM D6193, ISO 4915, ISO 4916, AATCC Technical Manual, and the peer-reviewed garment-construction references above as cited.


