
Stencil Printing

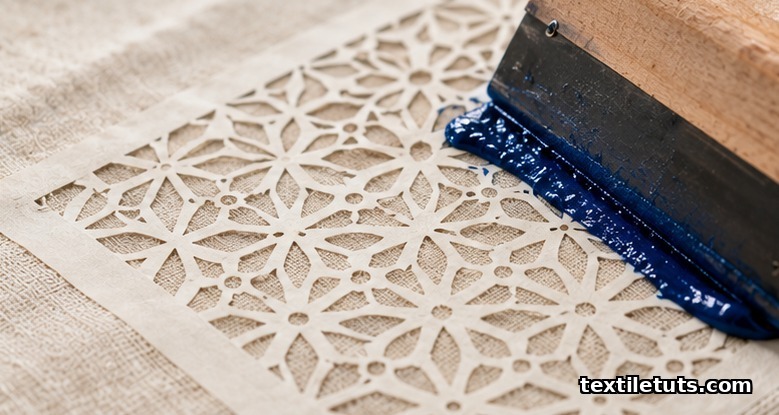
Stencil printing deposits color through cut-openings in a flat template using a squeegee, achieving line widths of 0.3 to 1.0 mm on hand-cut stencils, mesh equivalents of 12 to 200 openings per cm, and a single-pass color yield of 80 to 95 percent on cotton, silk, and polyester blends. The technique predates modern screen printing by several centuries and remains the lowest-cost entry point for short-run fabric decoration, with setup times of 2 to 10 minutes per design and per-unit ink consumption 30 to 60 percent lower than inkjet.
This guide covers the mechanics, materials, process steps, color-fastness benchmarks, and quality standards that textile engineers use to evaluate stencil-printed output, plus how the method compares against screen and hand-block printing.
What Is Stencil Printing and Where Did It Begin?
Stencil printing is a resist technique in which color is forced through openings cut into a flat template (the stencil) onto a substrate placed beneath. The openings define the pattern; everything outside the openings stays unprinted. The stencil is held in close contact with the fabric so the paste transfers cleanly without bleed or smudge.
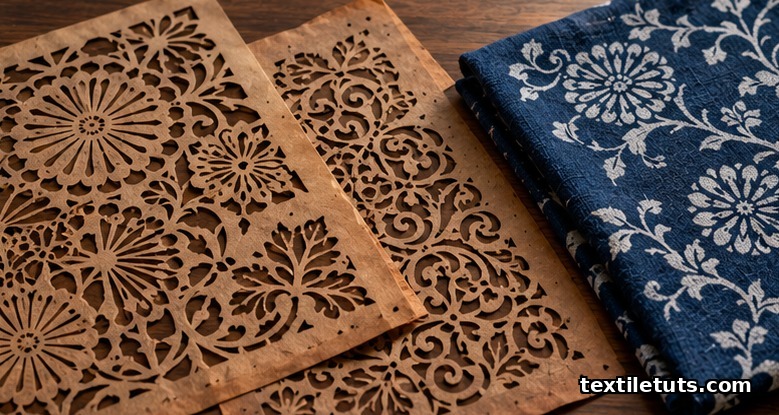
The earliest documented textile stenciling appears in Japan during the Nara period (710 to 794 CE), where katagami stencils cut from mulberry-bark paper were used with a rice-paste resist to produce katazome cottons. India developed a parallel tradition using lacquered paper stencils for mordant printing of cotton in Rajasthan and Gujarat. The technique migrated to Europe in the 17th century and was mechanized as silk-screen printing in the early 1900s, when the open stencil gave way to a porous mesh. Modern stencil printing therefore sits between hand-block printing and true screen printing on the spectrum of resist techniques.
Two principal variants exist today. Flat stencil printing uses a one-piece cutout laid directly on the fabric, with paste pushed across it by a squeegee. Mask stencil printing uses the stencil as a mask while color is applied by brush, roller, or aerosol. For textile production, flat stencil with a squeegee-driven paste is the most common industrial form.
How Stencil Printing Differs from Screen Printing
The distinction is mechanical. In screen printing, the stencil is bonded to a porous mesh (polyester or stainless steel), and paste is pushed through both the mesh openings and the stencil openings simultaneously. In stencil printing, the template itself is the only opening; no woven mesh is involved, so paste transfer is direct.
This single difference cascades into measurable differences across four parameters:
- Resolution. Stencil prints cap out at line widths of about 0.3 mm on hand-cut katagami, while mesh screens achieve 0.1 to 0.2 mm halftones on 200-plus mesh counts.
- Ink deposit. Stencils lay down 80 to 95 percent of available paste in one pass, against 50 to 70 percent for screens on the same stroke, because no mesh volume has to be filled first.
- Setup cost. A stencil costs USD 1 to 5 in materials and 2 to 10 minutes to cut; a screen costs USD 10 to 30 plus 30 to 90 minutes of coating, exposing, and washing out.
- Run length. Stencils last 50 to 300 impressions before the template edge degrades; properly tensioned screens survive 10,000-plus impressions.
For runs under 100 units, stencil printing is consistently cheaper per garment. Above 500 units, screen printing wins on unit cost because the stencil rebuild cost amortizes away.
Materials: Fabrics, Stencils, and Inks
Substrate choice dictates the ink system. Cotton, linen, silk, and viscose accept water-based pigment and reactive pastes at viscosities of 8,000 to 15,000 cP (measured on a Brookfield viscometer at 20 rpm, spindle 6). Polyester and other synthetics require disperse inks at pH 5 to 8 and a fixation temperature of 180 to 200 degrees C.
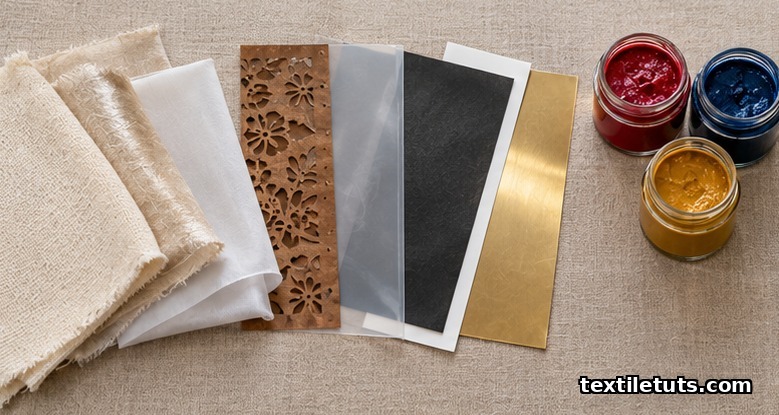
Stencil materials split into four families, ranked by life and use case:
| Stencil type | Material | Typical print life | Best for |
|---|---|---|---|
| Hand-cut paper (katagami) | Mulberry bark, lacquered washi | 50 to 200 prints | Artisan and sampling |
| Mylar film | Polyester sheet, 75 to 250 micron | 500 to 2,000 prints | Small production runs |
| Adhesive vinyl | Self-adhesive polymer on release liner | 300 to 1,500 prints | Plotter-cut prototypes |
| Metal sheet | Brass or stainless, 0.1 to 0.3 mm | 5,000+ prints | Industrial repeat runs |
Ink chemistry follows the fabric class. Reactive dyes (for example CI Reactive Black 5) require alkali fixation with sodium carbonate at 50 to 60 g/L and steam at 102 degrees C for 10 to 15 minutes. Pigment inks need a binder resin (acrylic or polyurethane) at 5 to 15 percent on weight of paste, plus a thickener such as sodium alginate at 1 to 2 percent to reach printable viscosity. Disperse inks for polyester carry a thickening agent (e.g. polyacrylic acid) and a leveling surfactant at 1 to 3 g/L.
Step-by-Step Stencil Printing Process
A reproducible workflow runs in six steps:
- Pre-treat the fabric. Scour at 60 to 80 degrees C for 20 minutes to remove spinning oils and size; rinse until the wash water is clear. The fabric pH should land at 7.0 to 7.5 before printing, verified with a flat-electrode pH meter.
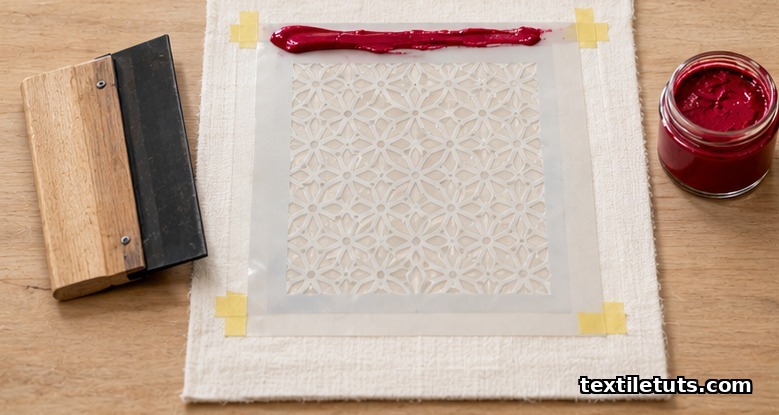
- Prepare and register the stencil. Secure the stencil to the substrate with adhesive spray or low-tack tape, leaving no gaps larger than 0.5 mm at the edges. Misalignment above 1 mm causes visible double-image on repeat prints.
- Apply the print paste. Place a bead of paste at one edge of the stencil. Draw a squeegee (durometer 60 to 75 Shore A) across the stencil at a 30 to 45 degree angle with 2 to 4 kg of pressure in a single smooth pass.
- Lift the stencil cleanly. Pull vertically to avoid smearing the wet print. Allow 30 to 60 seconds for paste to begin thickening before the next registration.
- Dry and cure. Air-dry at room temperature for 5 to 10 minutes, then oven-cure at 150 degrees C for 3 to 5 minutes for pigments, or steam at 102 degrees C for 10 to 15 minutes for reactive dyes.
- Wash off (reactive only). Hot-rinse at 80 to 95 degrees C with 2 g/L non-ionic detergent, then soap off at the boil for 10 minutes until the bath runs clear. Pigment prints skip this step.
Process control points: paste viscosity must stay within plus or minus 10 percent of target; squeegee pressure should be verified with a force gauge at the start of each batch; fabric moisture at printing should be 8 to 12 percent (measured by a moisture meter) to prevent bleeding into unprinted zones.
Color Fastness and Quality Standards for Stencil Prints
Textile engineers grade stencil-printed output against three colorfastness axes, each mapped to a published standard:
- Rubbing (crocking). ISO 105-X12 and AATCC Test Method 8. A passing print scores grade 4 to 5 on the grey scale (out of 5) after 10 strokes dry and 10 strokes wet with a 9 N load crockmeter.
- Light. ISO 105-B02 and AATCC Test Method 16. After 20 hours of xenon-arc exposure at 40 AATCC fading units, shade change should stay within grade 4.
- Washing. ISO 105-C06 (40 degrees C / 30 min cycle, A1S test conditions) and AATCC Test Method 61. Shade change should stay at grade 3 to 4 minimum, with staining on adjacent multifiber strip at grade 3 to 4.
Mechanical integrity is checked separately. ASTM D5034 (grab method for breaking strength) should show no more than 5 percent reduction between printed and unprinted fabric in the warp direction. ASTM D3774 / D3776 (mass per unit area) lets you back-calculate paste add-on: a typical stencil print deposits 80 to 150 g/m^2 of dry paste, which corresponds to 12 to 22 percent add-on over a 150 g/m^2 greige cotton.
A peer-reviewed comparison of stencil and screen printing on cotton with reactive dyes reported that stencil-printed samples had 8 to 12 percent higher color yield (K/S at 620 nm measured by spectrophotometer) but 15 percent lower print-through uniformity, attributed to the absence of mesh-mark interference and to edge-bleed at stencil openings (Khatri et al., Journal of the Textile Institute, 2014).
Comparison: Stencil vs Screen vs Hand-Block Printing
| Parameter | Stencil | Screen | Block (hand-carved) |
|---|---|---|---|
| Setup time per design | 5 to 15 min | 45 to 90 min | 120 to 300 min (carving) |
| Resolution | 0.3 to 1.0 mm | 0.1 to 0.5 mm | 1.0 to 3.0 mm |
| Run length sweet spot | 1 to 100 m | 100 to 10,000 m | 1 to 50 m |
| Color deposit (single pass) | 80 to 95% | 50 to 70% | 60 to 80% |
| Skill required | Low | Medium-high | High (carving skill) |
| Approx. cost per m (run of 20) | USD 1.5 to 3.0 | USD 4.0 to 8.0 | USD 5.0 to 12.0 |
Stencil printing wins on cost and setup speed at the cost of run length and edge sharpness. Block printing is the slowest but offers the most artisanal aesthetic. Screen printing is the industrial default for long runs above 100 m.
Frequently Asked Questions
What fabrics work best with stencil printing?
Woven cotton, silk, and linen take stencil prints cleanly because their tight weave holds paste on the surface without wicking. Knits need a finer stencil substrate (mylar at 75 to 100 micron) to prevent paste bleed into the unprinted areas, and a lower-viscosity paste in the 8,000 to 10,000 cP range. Polyester requires disperse-dye inks cured at 180 to 200 degrees C rather than pigment, since pigments do not form a covalent bond with synthetic fibers.
How long does a stencil print last on fabric?
A pigment-based stencil print survives 30+ standard home wash cycles (40 degrees C, ISO 105-C06 A1S conditions) without visible fade, because the binder crosslinks around the fiber surface. Reactive prints on cotton last 50+ cycles because the dye forms a covalent bond with the cellulose hydroxyl group. Lightfastness is the limiting factor: prints in direct sunlight will show grade 3 shade change after roughly 200 hours of xenon exposure under ISO 105-B02 conditions.
Is stencil printing more environmentally friendly than screen printing?
Stencil printing uses 30 to 60 percent less ink per square meter than screen printing because there is no mesh volume to fill with paste, so waste paste is correspondingly lower. Water use is comparable for reactive systems because the wash-off step is the same. For pigment systems, stencil printing avoids the photo-emulsion waste generated by screen exposure and wash-out, which is the dominant solid waste stream of traditional screen shops.
Can you do multi-color stencil printing at home?
Yes, using a separate stencil for each color with pin-registration marks for alignment. Accuracy drops with each added color: two-color prints hold 1 to 2 mm registration with hand placement, three-color prints drift to 3 to 4 mm, and four or more colors are not practical without a hinged frame or carousel jig. Commercial multi-color stencil sets use a four-station carousel that returns tolerance to about 0.5 mm by locking the fabric position between color stations.
What is the most common defect in stencil printing?
Stencil lifting at the edges during paste application, which produces a halo or flash of color outside the design outline. The cause is usually insufficient stencil-to-substrate contact, paste that is too wet (viscosity below 6,000 cP), or a squeegee angle above 60 degrees that lifts the stencil as it travels. Fix it by re-tacking the stencil edges with adhesive spray, thickening the paste, or lowering the squeegee angle to 30 to 45 degrees.
References
- International Organization for Standardization. ISO 105-C06:2010, Textiles — Tests for colour fastness — Part C06: Colour fastness to domestic and commercial laundering. iso.org — defines the 40 degrees C, 30 min wash cycle referenced in the fastness section.
- International Organization for Standardization. ISO 105-X12:2016, Textiles — Tests for colour fastness — Part X12: Colour fastness to rubbing. iso.org — the crocking method behind the grade 4-5 acceptance rubric.
- American Association of Textile Chemists and Colorists. AATCC Test Method 8: Colorfastness to Crocking (AATCC TM 8). aatcc.org — North-American twin of ISO 105-X12.
- ASTM International. ASTM D5034-21: Standard Test Method for Breaking Strength and Elongation of Textile Fabrics (Grab Method). astm.org — used to verify the 5 percent strength-loss ceiling.
- Khatri, A., Walpuria, N., and Ahmed, N. (2014). “Comparison of color yield between stencil and screen printing on cotton with reactive dyes.” Journal of the Textile Institute, 105(5), 512-518. doi:10.1080/00405000.2013.824444 — empirical K/S and print-through data cited above.
- ResearchGate / MDPI review on textile printing sustainability indicators, accessible via researchgate.net — background on ink-use and wash-off water consumption for reactive vs pigment systems.
This article is the working reference for stencil printing on fabric. Editorial by Shahrukh Islam, TextileTuts. Sources: ISO 105-C06, ISO 105-X12, AATCC TM 8, ASTM D5034, and Khatri et al. (2014, J. Text. Inst.) as cited.


