
Empire Waist Construction

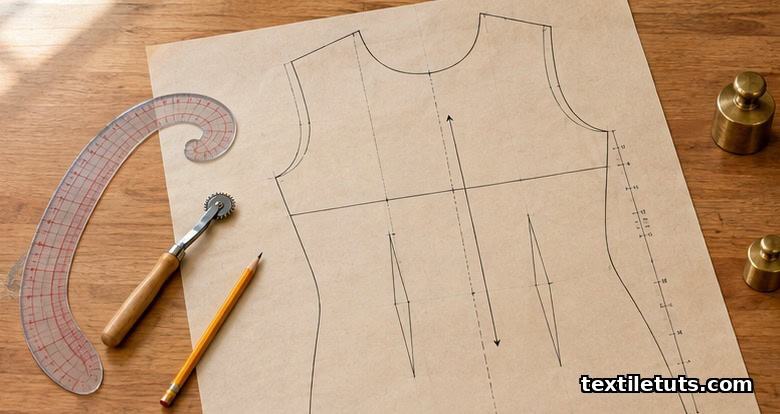
An empire waist seam is placed 5 to 8 cm below the bust apex, splitting the bodice into a short upper section of 18 to 22 cm and a longer lower section that flows to the hem, producing the high-waisted silhouette introduced in Western dress around 1795 and codified in modern pattern drafting by ASTM D5586 body-measurement standards.
This construction technique shapes both fit and drape by relocating the waist seam from its natural anatomical position to just under the bust, where the ribcage is at its narrowest. Understanding the geometry of that relocation, and the seam allowances that hold it together, is what separates a reproducible pattern from a wobbly first muslin.
What the Empire Waist Seam Actually Is
The term “empire waist” refers to a horizontal seam line positioned on the torso, not at the natural waist (the narrowest part between the ribs and iliac crest), but at a higher location under the bust. Encyclopaedia Britannica traces the silhouette to the neoclassical dress of the late 1790s, when European fashion rejected the structured eighteenth-century corset in favor of columnar gowns inspired by Greco-Roman statuary.
Modern pattern drafting formalizes the placement using bust-point (or “bust apex”) references taken from the front bodice pattern. ASTM D5586/D5586M-22 (“Standard Tables of Body Measurements for Adult Female Misses Figure Type, Size Range 00-20”) defines the bust apex as the most projecting point of the bust when the body is held erect, and provides the reference measurements from which a designer derives the empire waistline location.
ISO 8559-1:2017 (“Size designation of clothes, Part 1: Anthropometric definitions and measurement locations”) supplies the corresponding international definitions for “bust point” and “underbust circumference,” the two landmarks that anchor the empire seam line on a flat pattern. The underbust circumference measurement is taken with the tape horizontal, just below the bust, and is typically 5 to 10 cm smaller than the full bust circumference for the same body.
How Far Below the Bust the Seam Goes
For a misses-size pattern (ASTM size 8 to 12), the empire waistline sits 5 to 8 cm below the bust apex. Move it lower than 8 cm and the silhouette drifts toward a dropped waist, lengthening the upper bodice and shifting the visual focus to the natural waist. Move it higher than 5 cm and the seam crosses the bust itself, which interferes with fit, bra coverage, and the smooth fall of fabric over the chest.
To locate the line on a flat pattern, mark the bust apex with a horizontal balance line, then measure down the center-front by the chosen distance (commonly 7 cm for a medium-size dress). Draw the new waistline parallel to the floor on the body, or parallel to the hem on a flat pattern, and curve it slightly upward at center-front to follow the underbust contour where the ribcage curves inward.
The upper bodice section, shoulder to empire seam, measures 18 to 22 cm along the center-front for most misses sizes. Anything shorter than 16 cm produces a top that pulls across the bust and exposes the underarm seam. Anything longer than 24 cm visually lowers the silhouette back toward a natural waist and reduces the leg-lengthening effect that makes the empire line flattering.
Drafting the Empire Bodice Pattern
The two standard pattern-drafting methods for creating an empire bodice are the slash-and-spread method and the pivot method. Both start from a well-fitted basic bodice block drafted to ASTM D5586 measurements.
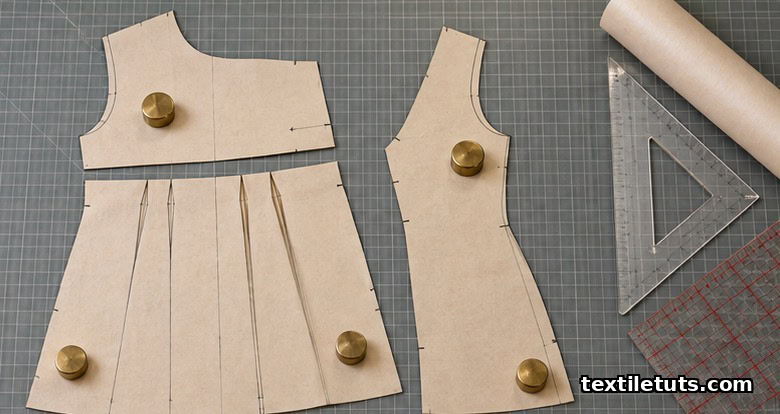
In the slash-and-spread method, the basic bodice is drawn full-size on pattern paper. A horizontal line is drawn at the chosen empire-waist level (for example, 7 cm below the bust apex). The pattern is cut along that line, separating the upper bodice from the lower. The lower piece is then either retained at its natural waist length and extended as a skirt panel, or replaced with a gathered rectangle for a flowy skirt. Darts at the natural waist are closed and redistributed into the empire seam as gathering ease.
In the pivot method, the basic bodice is drawn without separating it. A line is drawn across the pattern at the empire waistline, and the lower section is rotated about the bust apex like a compass, opening or closing darts to redistribute fullness into the new waistline seam. This preserves grain-line integrity at the side seams and is the preferred method when the lower section will be cut on the bias.
Both methods require adding standard seam allowances before cutting the fabric. ASTM D6193 (“Standard Practice for Stitches and Seams”) recommends a 1.5 cm seam allowance for woven bodice construction, with a 1.0 cm allowance acceptable for knit empire tops, provided the seam is finished with a stretch-appropriate stitch.
Stitching the Empire Seam
The empire waistline seam carries more load than a standard waistline seam because the entire skirt weight pulls down on a relatively narrow strip of upper bodice fabric. ISO 4916:1991 (“Textiles, Stitch types, Classification and terminology”) classifies the seam constructions available; for a load-bearing horizontal seam on a woven bodice, stitch type 301 (lockstitch, single row) with a 4 to 5 mm stitch length is the most common choice.
For knits and stretch fabrics, ISO 4916 type 304 (two-thread overlock) or type 401 (chainstitch, single row) gives the seam enough elasticity to recover when the upper bodice stretches over the bust. Stitch length on knits should be reduced to 2 to 3 mm to prevent seam grin, the visibility of the underlying threads when the seam is under tension.
Reinforce the ends of every empire waistline seam with a 1.5 to 2 cm backtack at the start and finish. This prevents the seam from separating under the weight of the skirt, a failure mode documented in textile-engineering coursework at the Bangladesh University of Textiles and other accredited programs. For high-stress garments (bridal wear, fitted bodices in heavy fabrics), topstitch the seam twice, at 2 mm and 5 mm from the seam line, to lock the seam allowances flat and distribute load across a wider strip of fabric.
Fabric Selection and Drape
The empire silhouette depends on drape. A fabric with high bending rigidity will hold the upper bodice away from the body and create a tent effect at the waist seam. A fabric with low bending rigidity will collapse against the body and erase the visual line.
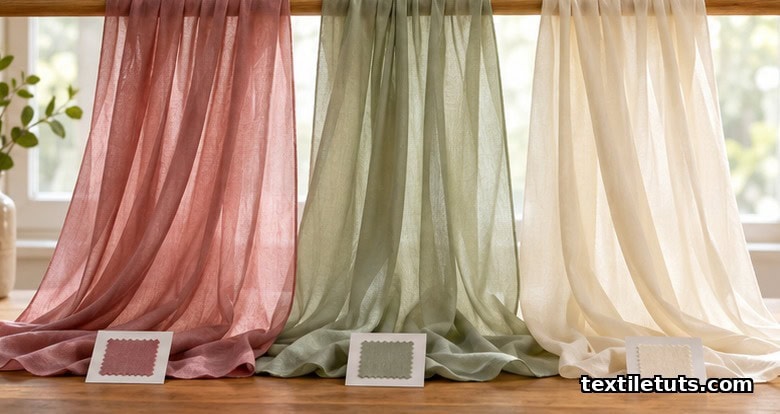
Woven cotton lawn, silk habotai, rayon challis, and lightweight wool crepe all have bending rigidities in the range that produces a flattering fall. Heavy denim, bonded canvas, and most upholstery fabrics are too stiff for a true empire waist and are typically reserved for the structured regency reproduction, where the upper bodice is boned to hold its shape against the fabric weight.
Cotton Incorporated’s “Seams and Stitches” technical bulletin notes that lightweight wovens (under 150 g/m²) should always be stitched with a fine needle (size 60/8 or 70/10) and a polyester or cotton-wrapped polyester thread of tex 24 to 30, to avoid perforating the fabric and causing seam slippage under load. For knits, switch to a ballpoint needle of size 70/10 or 80/12 to prevent the needle from piercing the yarn loops.
Common Construction Defects
Three failure modes show up repeatedly in first muslins of empire-waist garments.
First, the empire seam is drafted parallel to the hem but the body is not perpendicular to the floor when the pattern is fitted, so the seam sits higher at center-back than at center-front, or vice versa. The fix is to mark the line on the body with a horizontal balance line (a string tied around the torso, or a washable fabric marker) before transferring the placement to paper. The balance line must be truly horizontal when the wearer stands relaxed.
Second, the lower section pulls down on the upper bodice, distorting the neckline and shoulder seams. The fix is a 6 mm clear elastic stitched into the empire seam allowance on the wrong side, catching only the upper bodice layer. This stabilizes the upper bodice without flattening the lower section, and it accommodates body movement without restricting the skirt drape.
Third, the empire seam puckers where the bust curves away from the chest wall. The fix is to clip the upper-bodice seam allowance at 2 cm intervals along the curve, without cutting through the stitching, so the fabric can lay flat when pressed. For thick fabrics, grade the seam allowance (layered trimming) to reduce bulk at the curve.
AATCC TM 143 (“Appearance of Apparel and Other Textile End Products After Repeated Home Laundering”) provides a repeatable wash-and-wear protocol for evaluating whether a stitched empire seam holds its geometry through repeated laundering cycles, an important check for garments destined for retail. The standard specifies five laundering cycles at 40 °C with tumble drying at 70 °C, followed by visual grading against reference photographs.
Pressing and Finishing
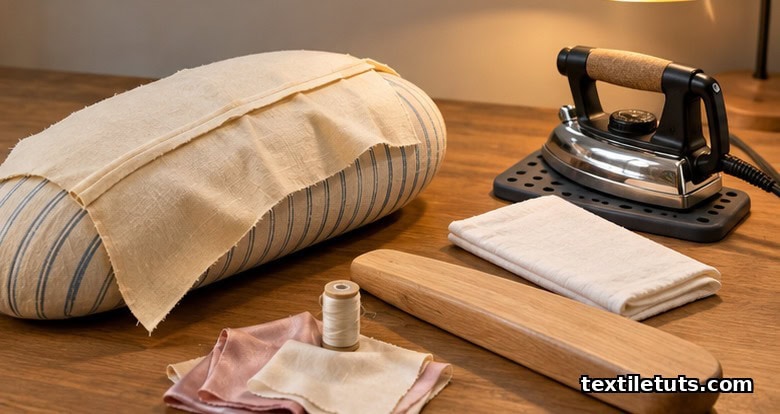
Press the empire seam open on a ham (a curved pressing cushion) to bring the underbust curve into a three-dimensional shape without flattening the seam allowances into a ridge. Use a press cloth between the iron and the fabric when working on silk, rayon, or any fabric with a thermoplastic finish that can shine under direct heat.
If the upper bodice is lined, attach the lining to the upper-bodice seam allowance only, leaving the lower-section lining free, so the bulk of the skirt drapes independently. Topstitching the seam from the right side, 2 mm from the seam line, is optional and gives the construction a couture finish on sheer fabrics, while also anchoring the seam allowances and reducing the chance of internal shifting during wear.
Frequently Asked Questions
What is the difference between an empire waist and a dropped waist?
An empire waist sits 5 to 8 cm below the bust apex, while a dropped waist sits below the natural waist, typically at the upper hip. Empire waistlines shorten the torso visually and lengthen the leg line; dropped waistlines lengthen the torso and shorten the leg line. The two construction methods use the same slash-and-spread technique, but the placement of the horizontal line determines which silhouette is produced.
Can you add an empire waist seam to a pattern that does not have one?
Yes. Take any well-fitted basic bodice pattern drafted to ASTM D5586 measurements, draw a horizontal line 5 to 8 cm below the bust apex, cut along that line, and treat the lower section as a separate skirt panel. Close any natural-waist darts and redistribute that ease into the empire seam as gathering or as a small A-line flare.
What stitch length works best for an empire waist seam?
For woven fabrics, a 4 to 5 mm lockstitch (ISO 4916 type 301) is standard. For knits, drop the stitch length to 2 to 3 mm and switch to a stretch stitch such as a narrow zigzag (0.5 to 1.0 mm wide) or a two-thread overlock. Always backtack 1.5 to 2 cm at each end of the seam to prevent separation under load.
Will an empire waist seam stretch out over time?
On lightweight wovens, the seam can stretch downward under the weight of the skirt, particularly if the thread tension was set too loose during construction. The fix is to topstitch the seam from the right side 2 mm from the seam line, or to insert a 6 mm clear elastic into the upper-bodice seam allowance. A correctly constructed seam on a stable fabric does not stretch out under normal wear, and survives the five-cycle laundering protocol of AATCC TM 143 without measurable distortion.
What fabrics should be avoided for an empire waist?
Heavy, stiff fabrics like denim, bonded canvas, and most upholstery-weight wovens will not drape correctly and will hold the upper bodice away from the body. Anything with a fiber content above 80% synthetic can cling to the bust rather than falling cleanly to the waist seam. Lightweight wovens in the 80 to 150 g/m² range are the safest choice for first muslins, with silk and rayon blends producing the most graceful drape.
References
- ASTM International. D5586/D5586M-22 Standard Tables of Body Measurements for Adult Female Misses Figure Type, Size Range 00-20. ASTM, 2022. Source of bust apex and underbust measurements used to locate the empire waistline on a flat pattern.
- ASTM International. D6193-23 Standard Practice for Stitches and Seams. ASTM, 2023. Source of seam-allowance recommendations for woven bodice construction.
- ISO. 8559-1:2017 Size designation of clothes, Part 1: Anthropometric definitions and measurement locations. International Organization for Standardization, 2017. International reference for bust point and underbust circumference.
- ISO. 4916:1991 Textiles, Stitch types, Classification and terminology. International Organization for Standardization, 1991. Source of stitch-type codes used in the empire waist seam construction.
- AATCC. TM 143-2018 Appearance of Apparel and Other Textile End Products After Repeated Home Laundering. American Association of Textile Chemists and Colorists, 2018. Source of the wash-and-wear protocol used to evaluate seam durability.
- Encyclopaedia Britannica. Empire style (furniture and decorative arts). Britannica. Historical origin of the empire silhouette in late-1790s neoclassical dress.
- Cotton Incorporated. Seams and Stitches (technical bulletin). Cotton Incorporated. Industry guidance on needle size and thread tex for lightweight woven fabrics.
Editorial by Kazi Sifat Muntasir, TextileTuts. Sources: ASTM D5586M-22, ASTM D6193-23, ISO 8559-1:2017, ISO 4916:1991, AATCC TM 143-2018, Encyclopaedia Britannica, Cotton Incorporated as cited.


