
Can You Dye Fabric With Sharpie

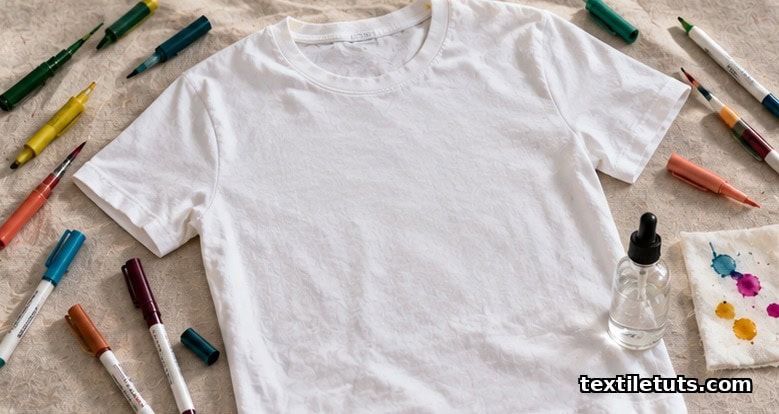
As creative individuals, we often look for unconventional tools to transform everyday items – such as utilizing a Sharpie marker for fabric dyeing. You might be wondering: Can you really dye fabric with a Sharpie?
Yes, you can dye fabric with a Sharpie marker. The ink from the Sharpie pen is permanent and hence works effectively for fabric dyeing. However, the key to a properly dyed fabric lies in setting the color to prevent it from fading or washing out.
Stay tuned as we unravel the process, tips, and cautions of this inspiring, colorful DIY project. So grab those Sharpies and let’s get started!
Unmasking the Magic of Sharpie Art
Sharpies, those ubiquitous markers that we’ve used for countless projects, carry an exciting secret. When used on fabric, they’re capable of creating vibrant, enduring designs. This peculiar blend of Sharpies and cloth opens up a new realm of potential, one worth exploring.
Understanding Sharpie’s Versatile Nature
Sharpie markers, recognized for their robust pigments and staple presence in nearly every tool kit, showcase an incredible adaptability in terms of the surfaces they can be applied to. Famed for their permanent nature, these markers are not just for paper. You can use a Sharpie on glass, plastic, metal, and even fabric. Their flexibility is largely due to the type of ink they possess – strong, permanent ink that clings to the surface it is applied on, enabling it to last for a fair amount of time.
This explorable feature of the Sharpie is mostly due to the chemicals it has. The most common Sharpie markers are alcohol-based, which makes them dry quickly and adhere to a vast selection of surfaces. Here’s a brief list of common Sharpie types and their unique characteristics:
- Sharpie Permanent Markers: Fast-drying, alcohol-based ink that can write on most surfaces including fabric.
- Sharpie Oil-Based Paint Markers: Marks opaque and glossy on light and dark surfaces, great for rubber, metal, glass and plastic.
- Sharpie Gel Highlighters: Works on a variety of paper types including glossy and thin papers, magazines and Bibles.
Sharpie and Fabric: An Unusual Love Story
Sharpies on clothing? Yes, it’s a little unconventional, but the results can be impressive. The relationship between Sharpie and fabric might seem strange, but they combine to make a compelling artistic medium. It’s an inexpensive way to personalize your items or even create elaborate, vibrant designs.
Sharpies can indeed dye fabric permanently. They are a popular tool for DIY fabric design projects, such as creating distinctive t-shirt designs. However, it’s worth noting that the fabric does influence how well the color holds and the richness of the design’s appearance once the marker dries. Cotton or other natural fabrics often work well with Sharpies.
Also, remember, heat setting (such as using a hot iron after the design is dry) can offer better colorfast results, ensuring a long-lasting design. Another potential discovery to note- there is a specialized process known as “Sharpie dyeing”, which involves using Sharpies and alcohol to create one-of-a-kind tie-dye effects on fabric.
Dyeing Fabric with Sharpies: Simple Steps
Dyeing fabric with Sharpies can be a fun and creative way to personalize your items. From T-shirts to tote bags, you can turn any plain piece into art with just a few simple steps. No fancy equipment needed; a work of art is at the tip of your markers. So let’s get started!
Choosing Your Canvas: Right Fabric for Sharpie Art
Not all fabrics react the same with Sharpie ink, so choosing the correct material is crucial. Natural fibers like cotton, silk, or linen work best. Synthetic fabrics such as nylon or polyester might not absorb the ink properly which leads to a blurred design. Opt for light-colored items for the best color payoff.
From Stationery to Fabric Paint: Gathering Your Materials
Before you start, ensure you have all your materials on hand. You’ll need Sharpies (assorted colors), the fabric item, and rubbing alcohol. Get a sturdy piece of cardboard that fits inside your fabric piece to prevent the ink from bleeding onto the back. You’ll also need a dropper or a spray bottle to drip the alcohol onto the fabric.
Step-by-Step Guide: Translating Your Creativity
Step 1: Sketching the Design
Begin by sketching your design with a pencil on your fabric. This gives room for mistakes and changing up the design before you put marker to fabric. Keep it simple to start and remember, the beauty of this craft is its imperfection!
Step 2: Filling the Colors
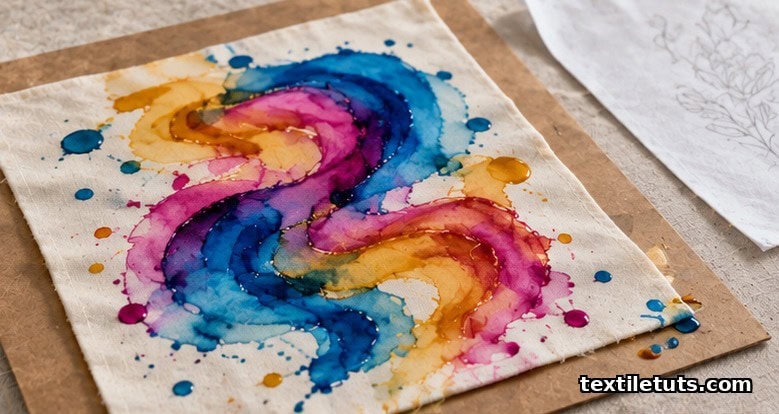
Once you’re happy with your design, grab your Sharpies and start coloring in. You can use different shades of the same color to give your design depth and dimension. Don’t worry about filling the designs completely as the alcohol will help spread the ink, creating a watercolor effect.
Step 3: Setting the Ink
The last step in the process is setting the ink with rubbing alcohol. Place your fabric on top of the cardboard, then use a dropper or spray bottle to apply the alcohol over your design. The alcohol will cause the ink to bleed and blend into each other, creating that beautiful, hazy effect. Allow your design to dry completely before removing the cardboard. For longer lasting results, consider ironing your fabric to set the design further.
Note: Always wash your Sharpie-dyed fabric separately for the first few washes to avoid any color bleed onto other clothes.
The Science Behind Permanent Markers
Sharpies are well known for their enduring ink, and as such, are often considered permanent markers. But why does Sharpie stick so well to fabric? What makes it capable of dyeing fabric effectively? Understanding the science behind these permanent markers can provide more insight.
Why Does Sharpie Stick to Fabric?
Firstly, you need to know that Sharpies are alcohol-based ink, meaning it’s quick-drying and can adhere to a wide variety of surfaces. When you use a Sharpie on fabric, the ink from the marker is absorbed into the fibers of the fabric.
Since the fibers absorb the ink. Unlike a liquid dye that can wash out if not set properly, the ink from a Sharpie is effectively held in place by the fiber of the fabric. This makes the color long-lasting and less likely to fade quickly after washing.
Let’s break it down a bit. The fibers in materials such as cotton, wool or polyester have tiny gaps in between them, known as interstices. When you apply Sharpie ink to textiles, the dye molecules, which are very small, penetrate into these interstices and stick to the fibers. They’re so small in fact, that around a million dye molecules can fit across the width of a human hair! This allows the Sharpies to deliver vibrant colors that adhere well to the fabric fibers.
To further illustrate, let’s look at this information in a table.
| Component | Description |
|---|---|
| Sharpie Ink | Alcohol-based, quick-drying, can adhere to a wide variety of surfaces. |
| Fabric Fibers | Have tiny gaps known as interstices which absorb the ink from a Sharpie. |
| Dye Molecules | Very small, can penetrate into the interstices and stick to the fibers. |
This process, along with the alcohol base used in Sharpie ink, allows for the ink to not only stick to the fabric but to last for extended periods, even after the fabric has been washed. Thus, Sharpies can effectively be used to dye fabric, albeit in a more concentrated and localized manner than traditional fabric dyes.
Handy Tips and Tricks for Sharpie Fabric Dyeing
Dyeing fabric with Sharpies is a fun and creative way to personalize your items. Here are a few handy tips and tricks to help you make the most out of your Sharpie fabric dyeing endeavors.
Making your Sharpie Art Last Longer
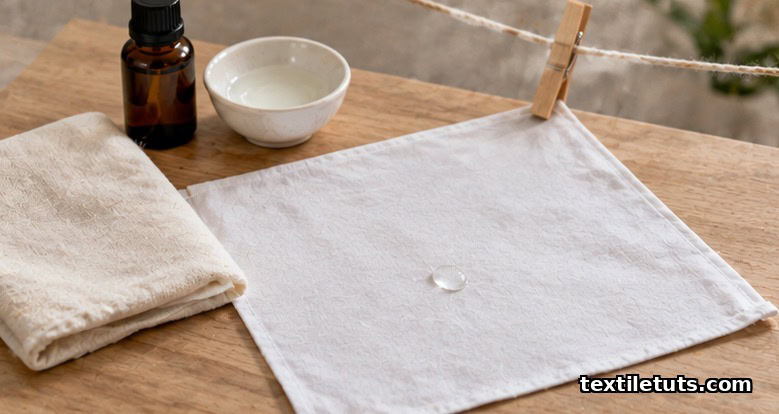
Creating beautiful designs is just the first step, making them last is another. When dyeing fabric with Sharpies, you want your art to last as long as possible. Here is how you can ensure longevity:
- Use High-Quality Fabric: Higher quality fabrics tend to hold Sharpie ink better than cheaper varieties.
- Iron Your Art: After your design has dried, use an iron to heat set the ink. This will make your design more resistant to washing.
- Wash Gently: When you need to wash your item, do so in cold water and hang to dry. Warm water and dryers can cause the Sharpie ink to fade.
- Use a Fabric Medium: Applying a fabric medium over your Sharpie design can make it permanent. Ensure to follow the product’s instructions.
Dealing With Accidental Stains and Smudges
Accidents happen! Don’t fret if your Sharpie slips or smudges. Here’s what you can do to salvage your project:
- Act Quickly: The faster you act on a stain, the easier it will be to remove. Don’t let it set.
- Use Alcohol: Rubbing alcohol can help lift Sharpie stains. Apply a small amount on the stain and blot with a clean cloth. Remember not to rub! Rubbing can smear the color.
- Work from the Outside In: When dealing with a Sharpie smudge, start cleaning from the edges towards the center. This will help avoid spreading the smudge.
- Incorporate the Stain: If all else fails, consider incorporating the smudge or stain into your design. Sometimes, what at first seems like a mistake can turn into a happy accident!
Dyeing fabric with Sharpies can be a great creative outlet, and with these tips and tricks, you can ensure your designs last. So grab your Sharpies and start creating!
Did you Know? Creative Projects with Sharpie and Fabric
Sharpies, more than being a mere writing tool, have emerged as a creative medium in various art and craft projects. They offer an easy and fun way for various DIY projects, including fabric dyeing. All you need is your creativity, a sharpie, and a piece of fabric to get started.
Celebrating Events: Make Personalized Gifts
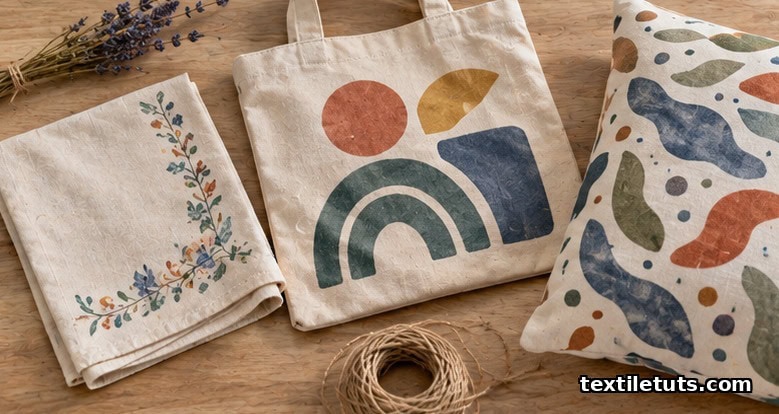
Gifts carry more meaning when they are personalized. And what can be more heart-warming than receiving gifts which were hand-dyed with love? Here, sharpies can come to your rescue. For instance, you can make personalized handkerchiefs, pillow cases, sachets, or table runners by simply using sharpies. While these are cost-effective, they convey a lot of sentiments as well.
Personalized sharpie-dye projects with fabric are a great way to commemorate special events, like birthdays, anniversaries, or mother’s day. You can draw or write messages directly onto the fabric. You can also use sharpie dyeing techniques like the alcohol-drip method or the tie-dye method to create unique designs.
Embrace your Fashionista: Revamp your Wardrobe
If you are tired of your old, plain clothing and want an affordable way to add color and design to your attire, then hold that sharpie and get ready to revamp your wardrobe. You can bring in a whole new life to your pair of sneakers, jeans, or white t-shirt by adding sharpie-dyed designs.
Over the years, fashionistas and designers have experimented and played with sharpies over fabric. The result? A fabulous sharpie-dyed fashion that is personal, unique, and trendy. It’s inexpensive and fun. Above all, it showcases your style.
You can try the sharpie tie-dye, where you make dots or circles with sharpie on the fabric and add rubbing alcohol to blend and smudge the colors, creating a unique design. Or you can try the regular sharpie dye where you make designs or write phrases directly. The choices are endless.
Pitfalls to Avoid While Using Sharpie on Fabric
When using a Sharpie to dye fabric, certain pitfalls must be avoided for a successful result. One of the common issues is the fading of the color applied to the fabric. That is why proper care and maintenance are vital after applying the color to maintain its intensity and durability.
Prevent Fading: Care and Maintenance
After using a Sharpie to dye your fabric, it’s essential to take steps to prevent the color from fading. Here are four essential care steps to take:
- Setting the Color: After applying the dye, leave the fabric to dry completely for a minimum of 24 hours. This waiting period allows the color to set in correctly.
- Ironing the Fabric: To further ensure the stability of the dye, gently iron the fabric on a low heat setting. Place a plain cloth between the iron and the fabric to avoid direct contact, which could lead to a mess.
- Washing the Fabric: Normally, you should wash the garment inside out using cold water. A mild, color-safe detergent can further help your dye stay put.
- Drying the Fabric: Air drying is the best option after washing. The heat from dryers can fade the colors faster, leading to your Sharpie design disappearing quickly.
Bear in mind that despite taking all these precautions, Sharpie dye on fabric is not permanent. It may last several washes, but you may notice a gradual fade in color over time. Regular use, exposure to sunlight and repeated washing can expedite this process.
In conclusion, using sharpies to dye fabric requires careful handling and extra treatment procedures. This helps ensure the designs are bright and vivid for as long as possible.


