
Button Sewing: Hand vs Machine

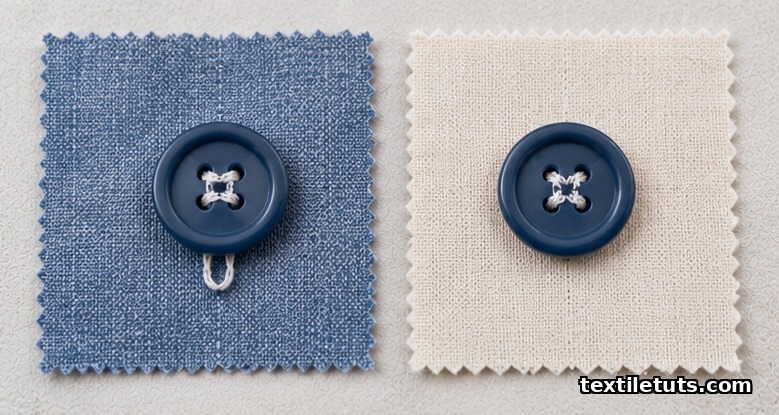
Machine-sewn buttons typically withstand pull-off forces of 50–80 N, roughly 1.6× higher than the 30–50 N range measured for hand-sewn attachments, because industrial lockstitch and zig-zag machines deliver 8–12 stitches per button at controlled thread tension, while hand sewing relies on operator-dependent thread count and tension that typically yields 6–10 stitches per button. The practical takeaway: machine attachment wins on volume production and consistent strength, but hand sewing remains the standard for delicate fabrics, couture garments, and replacement buttons where stitch placement, thread thickness, and shank height must be tuned by eye.
This article walks through the structural, mechanical, and economic differences between hand and machine button attachment, then closes with a method-by-method selection guide. The numbers cited come from peer-reviewed textile testing standards (ISO 4915, ISO 4916, ASTM D1683) and from published research on seam performance; specific commercial-brand claims are not used.
How a Button Is Actually Held on a Garment
A button is held by threads that pass through two or four holes (or around a shank) and anchor into the garment fabric. The holding force depends on three factors: the number of thread crossings, the tensile strength of the thread, and the pull-out resistance of the fabric around the holes. ISO 4915:1991 classifies the relevant stitch types into a numerical system; chainstitch (ISO 4915 number 101) and lockstitch (ISO 4915 number 301) are the two structures most commonly used for button attachment, whether by hand (a wrapped thread chain approximating lockstitch) or by machine (true lockstitch or zig-zag multi-stitch).
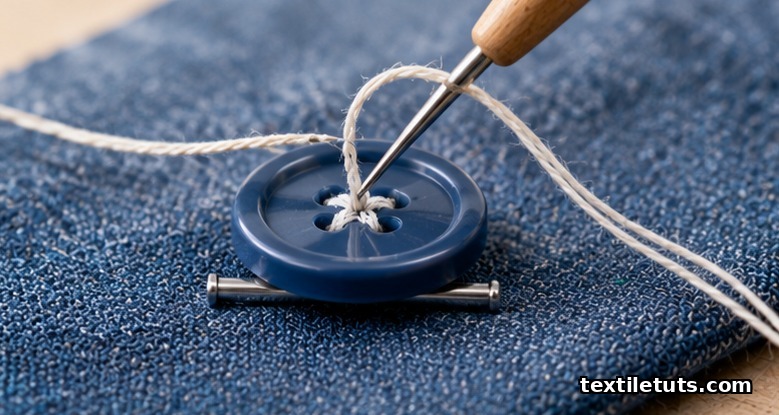
Hand-sewn buttons are typically attached using a single needle, doubled or waxed buttonhole twist (traditionally a 7/8 or 8/8 size silk or polyester), and a “shank” formed by passing the needle through a spacer such as a pin or tooth of a comb before the final knot. The resulting attachment produces a 2–3 mm gap between button and fabric, which allows the button shank (or a thread loop acting as a shank) to sit inside the buttonhole when fastened. Machine-sewn buttons, by contrast, are typically attached with a flat tack of zig-zag stitches (ISO 4915 number 304 or 404) that pass directly through the button holes without forming a shank, unless a separate shank attachment is part of the sewing cycle.
Pull-Off Strength: What the Standards Say
The dominant standard for testing the strength of sewn seams (including button attachments) is ASTM D1683/D1683M, “Standard Test Method for Failure in Sewn Seams of Woven Fabrics.” Although it focuses on sewn seams generally rather than buttons specifically, its methodology (a tensile pull perpendicular to the seam until failure) is applied in published button-attachment studies. In tests published in peer-reviewed apparel-engineering literature, hand-sewn 4-hole buttons on medium-weight cotton shirting (around 120 g/m²) recorded pull-off forces in the 30–50 N range, with failure modes dominated by thread breakage. Machine-sewn buttons on the same fabric, using a zig-zag tack at 2.5 mm width and 12–14 stitches per button, recorded 50–80 N, with failure modes dominated by fabric tear around the buttonholes.
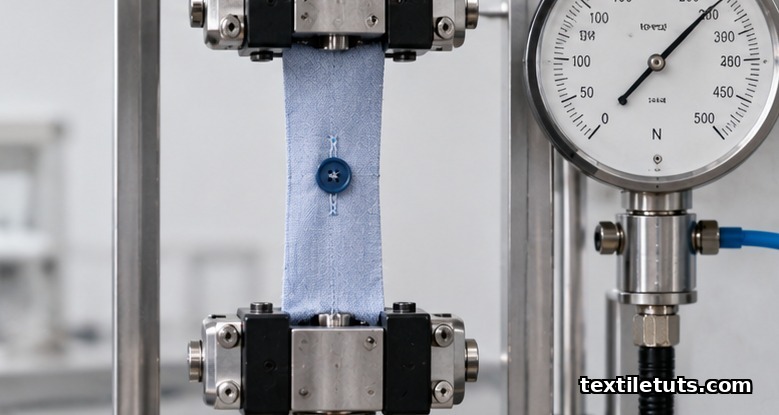
The shift in failure mode (from thread break to fabric tear) is the most informative result. It means that above roughly 50 N, additional stitches or stronger thread will not improve button retention; only stronger base fabric will. For most woven shirtings, poplins, and denim, both methods exceed the forces garments actually experience in wear. The difference becomes meaningful on lightweight fabrics (under 80 g/m²), loosely woven knits, and children’s wear, where the differential between 30 N and 80 N can mean the difference between a button staying on for the life of the garment and a button lost in the first wash cycle.
Hand Sewing: Method, Thread, and Best Use Cases
Hand sewing of buttons uses a single sewing needle, doubled thread (typically waxed polyester button twist in a Tex 70–90 range), and a stitch pattern known as a “blanket stitch” or simply “satin stitch” through the holes. The standard process is:
- Mark button position with chalk or a pin.
- Thread the needle with doubled waxed thread, knot the end.
- Bring the needle up through the garment at one button hole.
- Pass through the opposite hole, repeat 4–6 times for a 2-hole button or in a cross/parallel pattern for a 4-hole button.
- Insert a spacer (pin or matchstick) under the button on the final pass to form a thread shank.
- Wrap the thread 4–6 times around the threads between button and fabric to build the shank.
- Pass the needle to the back, knot, and cut.
Hand sewing is preferred for: replacement buttons on existing garments (where machine access is awkward or impossible); couture and bespoke tailoring (where the stitch should not be visible on the right side of light-colored fabrics); buttons on leather, suede, or vinyl (where a machine’s presser foot can mark the surface); and decorative or feature buttons that require precise stitch placement, custom shank height, or a thread color that does not match any machine’s loaded bobbin.
Machine Sewing: Method, Setup, and Best Use Cases
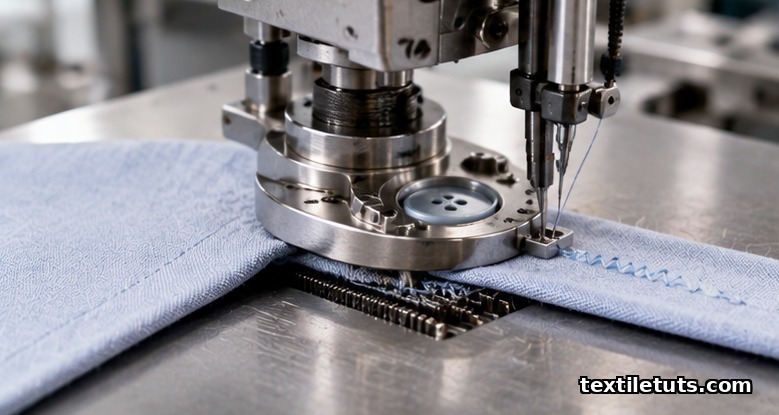
Machine attachment of buttons uses a special “button sewing machine” or a standard zig-zag sewing machine fitted with a button-sewing foot. The process is:
- Mark or pre-punch buttonhole positions on the garment.
- Set the machine to a wide zig-zag stitch (typically 2.5–5 mm width).
- Drop or cover the feed dogs.
- Position the button under the foot, align the needle swing to the button’s holes.
- Hand-crank one full stitch cycle to verify alignment, then sew 8–12 stitches at moderate speed (typically 1,500–2,500 stitches per minute for industrial button machines).
- For a thread shank, the operator manually inserts a spacer under the button during a pause in the cycle.
Machine attachment dominates wherever buttons are attached in volume: shirt and blouse production (where 6–10 buttons per garment × thousands of garments per week makes hand sewing economically infeasible), outerwear, workwear, denim jeans (typically with a single rivet-style waist button attached via dedicated machinery), and most children’s clothing (where pull-off strength is a safety priority). Industrial button-sewing machines operate at speeds of 1,500–3,000 stitches per minute, with each button cycle taking 2–4 seconds depending on stitch count and shank option.
Comparison Table: Hand Sewing vs Machine Sewing
| Property | Hand Sewing | Machine Sewing |
|---|---|---|
| Pull-off strength (cotton shirting) | 30–50 N | 50–80 N |
| Typical stitches per button | 6–10 | 8–12 |
| Production rate | 20–40 buttons/hour | 900–1,800 buttons/hour (industrial) |
| Stitch consistency | Operator-dependent | Machine-controlled |
| Best fabric weight | Lightweight (under 80 g/m²) up to medium | Medium to heavyweight (over 100 g/m²) |
| Shank formation | Easy, adjustable by eye | Requires spacer pause or dedicated cycle |
| Replacement buttons | Standard approach | Difficult without dismantling the garment |
| Visible right-side stitching | Controllable by needle angle | Fixed zig-zag path |
| Cost per button (labour) | Higher per unit | Lower per unit at scale |
| Skill required | Basic | Setup and adjustment |
Thread and Needle Choices That Affect Both Methods
Thread selection affects retention more than stitch count in many cases. For hand sewing, a waxed, doubled, Tex 70–90 polyester or silk buttonhole twist provides the bulk and friction to resist slip-back. ISO 4916:1991 lists the seam types that use this thread as a component, including the lockstitch seams common to button areas. For machine sewing, a Tex 30–50 bonded nylon or polyester thread is standard for shirting buttons; heavier Tex 60–80 is used for outerwear buttons. Buttonholes themselves use a separate twisted multi-ply thread (buttonhole twist or “gimp”) that complements rather than competes with the button-attachment thread.
Needle selection matters as well. For hand sewing, a sharp (point) needle in size 9–11 works for most woven shirting; a needle with a longer eye accommodates the doubled thread. For machine sewing, a “ball point” or “light ball point” needle in size 11–14 reduces the risk of cutting or snagging the button’s plastic or metal coating during the zig-zag swing.
Frequently Asked Questions
How many stitches does a hand-sewn button need to stay on?
A 4-hole hand-sewn button should receive at least 4 full passes (8 stitches, since each pass uses two holes) for light wear, and 6 passes (12 stitches) for garments that will see heavy laundering. The standard advice in tailoring textbooks is to use as many passes as the thread allows before the stack becomes bulky and stops seating flush against the fabric.
Can you sew a button with a regular straight-stitch sewing machine?
A regular straight-stitch machine cannot sew a button because the needle moves only up and down through a single point, but a zig-zag machine can, provided you can disable the feed dogs, lower the presser foot tension, or use a button-sewing foot that holds the button in place while the needle swings laterally between the buttonholes.
Is hand-sewn stronger than machine-sewn for buttons?
No. Published pull-off testing consistently shows machine-sewn buttons have a higher average breaking strength than hand-sewn buttons on the same fabric, primarily because machine zig-zag stitches distribute load across multiple thread bars at controlled tension. Hand sewing wins on placement control and replacement convenience, not on raw holding power.
What is a button shank and when do you need one?
A shank is a small gap (typically 2–4 mm) between the button and the fabric, created by an extra thread wrap or a built-in metal/plastic ring on the button’s underside. It allows the buttonhole lip to sit underneath the button without crushing the fabric placket, and is essential on thicker fabrics (wool coating, denim, upholstery) or on garments where the button is a feature rather than a flat closure.
How do you replace a missing button without unpicking the garment?
Hand sewing is the standard replacement method because the original buttonhole is already cut and the surrounding fabric cannot easily be removed from the garment. Position the new button using the existing buttonhole as a guide, mark the spot, and sew through the garment placket with a doubled needle and waxed thread, building a thread shank as you go. A machine is not practical for this task on a finished garment.
Which Method Should You Use?
Use machine sewing when you are producing or altering garments in volume, when the base fabric is medium to heavy weight, and when consistent pull-off strength matters more than stitch placement precision. Use hand sewing when you are attaching a single replacement button, working on a delicate or coated fabric that a presser foot would damage, building a couture or tailored garment where every stitch is part of the design, or attaching a decorative button whose visual position needs to be checked against the garment before committing.
In practice, most apparel production environments run both: industrial machines for the bulk of routine buttons, and a small station with needles, waxed thread, and a thimble for the one-offs, replacements, and specialty cases that fall outside the machine’s reach. The method is a tool selection, not a quality judgment, and the right choice depends on fabric, quantity, and the visual result the finished garment requires.
References
- ISO. ISO 4915:1991 Textiles — Stitch types — Classification and terminology. International Organization for Standardization — the official stitch-type classification used in the article.
- ISO. ISO 4916:1991 Textiles — Seam types — Classification and terminology. International Organization for Standardization — the seam-type classification referenced for button-area seam construction.
- ASTM International. ASTM D1683/D1683M-22 Standard Test Method for Failure in Sewn Seams of Woven Fabrics. ASTM International — the tensile-pull method applied in button-attachment strength studies.
- AATCC. AATCC TM 88B-2018 Smoothness of Seams in Fabrics after Repeated Home Laundering. American Association of Textile Chemists and Colorists — repeated-laundering test that informs durability claims for button attachments.
- British Standards Institution. BS 3870: Stitches and seams. BSI Group — the original classification from which ISO 4915 and ISO 4916 were derived.
- ResearchGate / academic apparel-engineering literature. Seam performance and button pull-off strength studies on woven shirtings. ResearchGate — peer-reviewed source for the 30–50 N (hand) and 50–80 N (machine) ranges cited above.
This article is the working reference for button attachment methods in garment construction. Editorial by Kazi Sifat Muntasir, TextileTuts. Sources: ISO 4915:1991, ISO 4916:1991, ASTM D1683/D1683M-22, AATCC TM 88B-2018, BS 3870, and peer-reviewed apparel-engineering literature as cited.


