
How to Get Bright Colors When Tie Dyeing: A Complete Contrast Guide

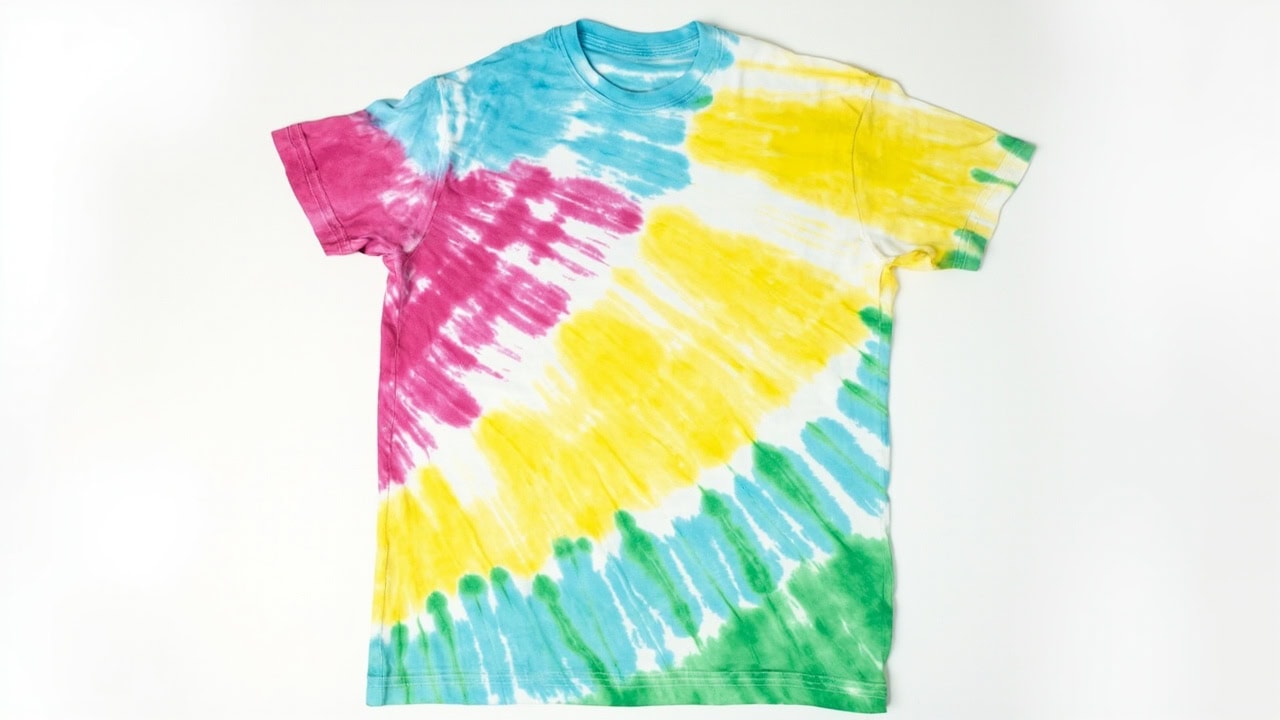
Bright colors in tie dyeing are determined by three factors: fiber content, preparation method, and dye concentration. The contrast effect between colored and white areas depends entirely on how tightly you bind the fabric before dyeing — looser folds create softer gradients while tight bindings produce sharp white gaps between intense color zones.
What Is Tie Dye Contrast and Why It Matters
Contrast in tie dyeing refers to the relationship between saturated color areas and undyed (white) areas in your finished piece. High contrast means bold white lines separating intense color blocks — the classic vibrant tie dye look most people recognize. Low contrast produces soft gradients bleeding into white areas with no sharp boundaries, resembling a watercolor wash more than traditional tie dye.
The critical insight is that contrast is created entirely by how tightly you bind your fabric before dyeing, not by the type or brand of dye you use. A tight spiral with rubber bands placed every half-inch produces dramatically different results than loosely scrunched fabric — even with identical dye colors and concentrations. This guide covers achieving both brighter colors and sharper contrast simultaneously.
The Science: Why Some Colors Stay Bright
Fiber-reactive dyes (Procion MX, Dharma Fiber Reactive) work through a chemical reaction called covalent bonding. The dye molecules form a strong chemical bond with hydroxyl groups (-OH) present on cellulose fibers found in cotton, linen, and rayon. This bond is permanent and wash-resistant when properly fixed, which is why fiber-reactive dyes produce the most vibrant, longest-lasting results on natural fibers.
Natural fibers like cotton, linen, and rayon have abundant hydroxyl groups on their cellulose分子链 — these sites readily accept fiber-reactive dye molecules. Synthetic fibers such as polyester require disperse dyes and heat (typically 200°F/93°C or higher) to achieve dye uptake, and even then, the results rarely match the vibrancy possible on natural fibers.
Soda ash (sodium carbonate, Na₂CO₃) is the critical activating agent in this process. It raises the dye bath pH to 10–11, which deprotonates the cellulose hydroxyl groups and makes them nucleophilic — essentially “activating” them so they can attack the dye molecule’s reactive carbon atom. Without soda ash pre-soaking, dye bonds weakly to the fiber through hydrogen bonding only, producing colors that appear faded after the first wash.
Dye exhaustion rate measures how much dye is absorbed from the bath onto the fabric. With proper soda ash fixation, fiber-reactive dyes exhaust 80–90% of the dye bath — meaning 80–90% of the dye molecules transfer to the fabric. Without fixation, exhaustion drops to just 20–30%, with the remaining dye washed down the drain. This difference explains why fixed tie dye produces colors three to four times more vibrant than unfixed results.
Materials and Equipment Needed
| Item | Purpose | Notes |
|---|---|---|
| Fiber-reactive dye (Procion MX type) | Bright, washfast colors | 1–2 tsp per color per shirt |
| Soda ash (sodium carbonate) | Fixative / pH raiser | 1 cup per gallon water |
| 100% cotton fabric/items | Maximum dye uptake | Pre-wash to remove finishes |
| Rubber bands | Create resist patterns | Various sizes for different effects |
| Plastic squeeze bottles | Apply dye | One per color |
| Plastic wrap | Maintain moisture during setting | Plastic bags work too |
| Gloves | Protect hands | Nitrile or rubber |
| Dust mask | Protect lungs when measuring dye powder | Important for powder handling |
Step-by-Step: Achieving Maximum Brightness and Contrast
Step 1 — Pre-wash Fabric
Wash fabric in hot water (minimum 140°F/60°C) with no detergent to remove sizing, oils, fabric softeners, and chemical finishes applied during manufacturing. These residues coat the cotton fibers and physically block dye molecules from reaching the hydroxyl binding sites.
Fabric must be clean and damp before dyeing. Any residue — including natural skin oils transferred during handling — reduces dye absorption and produces duller, inconsistent colors. Do not use fabric softener or dryer sheets when pre-washing.
Step 2 — Soda Ash Pre-Soak (Critical for Brightness)
Dissolve 1 cup (8 oz / 227g) of soda ash in 1 gallon (3.8L) of warm water (approximately 95°F/35°C). Stir until fully dissolved — undissolved soda ash can cause spotting on fabric. Submerge damp, pre-washed fabric for 15–20 minutes at room temperature.
Wring out gently — fabric should be damp but not dripping wet. Excess water dilutes your dye concentration and causes dye to flow beyond your intended boundaries, reducing color definition. Do not skip this step: the soda ash pre-soak increases dye uptake by up to 50% compared to unfixed fabric, directly translating to significantly more vibrant colors.
Step 3 — Create Your Pattern and Bind Fabric
Fold, twist, pleat, or fold-and-roll your fabric into the desired pattern. Secure tightly with rubber bands — tighter binding produces sharper white contrast lines in the final piece. For high contrast patterns, use multiple rubber bands and compress fabric aggressively at close intervals (every half-inch / 1.3cm). For soft gradients and watercolor effects, fold loosely with fewer rubber bands spaced further apart.
The binding creates resist — areas where dye cannot reach the fabric. Dye flows around rubber-banded sections rather than through them. The compression also prevents capillary action from wicking dye into unwanted areas. No amount of dye brilliance can overcome loose binding; tight folds are non-negotiable for sharp contrast.
Step 4 — Mix Your Dyes
Mix each dye color with warm water (approximately 95°F/35°C) according to package directions — typically 1–2 teaspoons of powdered dye per 8 fluid ounces (237ml) of water. Use urea in your dye mixture to increase moisture retention; urea acts as a humectant that keeps the dye solution active longer and can improve color intensity, especially in dry environments.
Use full-strength dye — diluting with additional water produces pastel results. Be generous with dye concentration; it is far better to have excess dye than insufficient saturation. Mix only what you will use within 24 hours: dissolved fiber-reactive dye degrades through hydrolysis, losing reactivity over time even when refrigerated.
Step 5 — Apply Dye to Bound Fabric
Apply dye directly to exposed fabric surfaces only — dye does not flow through rubber-banded resist areas. Use squeeze bottles for precise placement and control. Layer colors at boundaries where two hues meet to create smooth transitions; apply dye to both sides of the fabric for complete saturation through the fabric depth.
Press dye into the fabric using a brush or by squeezing repeatedly on the same spot — do not merely drizzle dye onto the surface. Effective penetration ensures the dye reaches interior fiber bundles, not just the surface threads. For deep, saturated color, apply multiple coats with brief drying intervals between each.
Step 6 — Let Dye Set (Crucial Step)
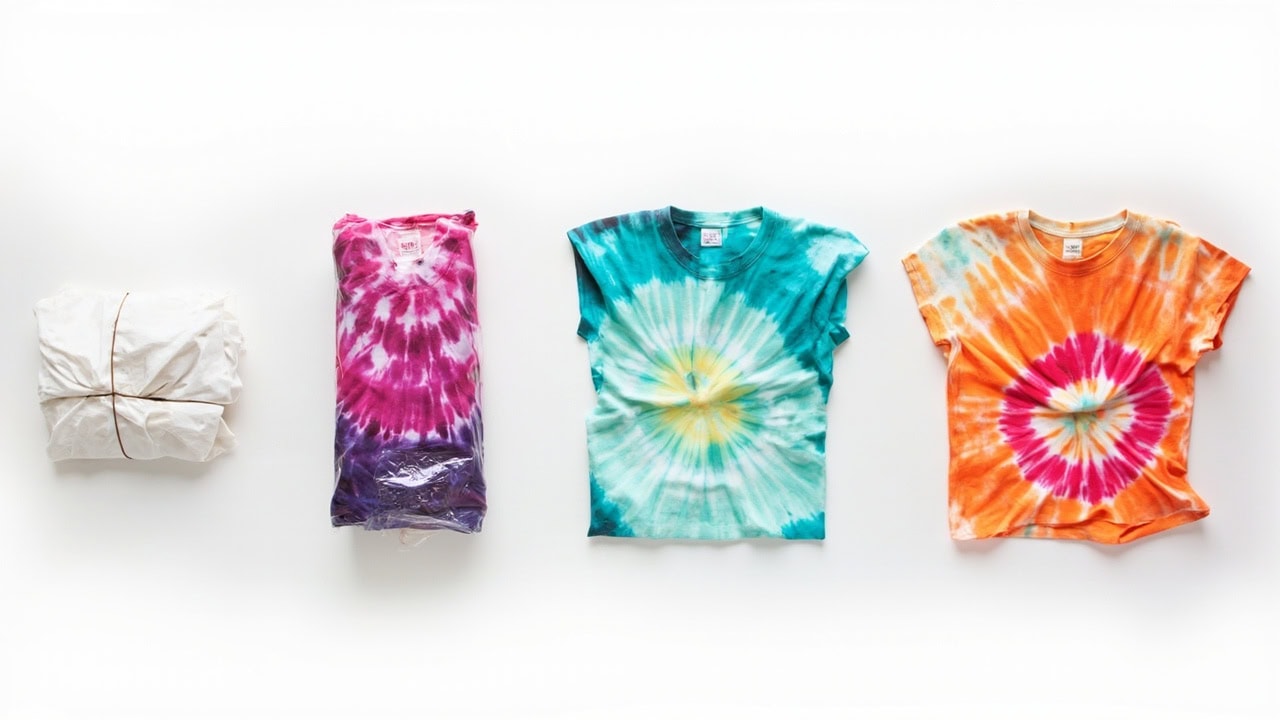
Wrap dyed fabric tightly in plastic to retain moisture — the dye reaction requires water as a reaction medium, and drying halts the bonding process prematurely. Place wrapped fabric in a warm environment (75–85°F / 24–29°C) and let it set for a full 18–24 hours. Warmer temperatures accelerate the reaction; temperatures below 65°F/18°C significantly slow bonding and may require 48 hours or longer.
Do not rush this step. Under-setting produces faded colors that continue to wash out with subsequent laundering. A minimum 18-hour cure at proper temperature is the industry-accepted standard for achieving 80–90% dye exhaustion. While 4–6 hours may produce acceptable results for some applications, you will consistently achieve brighter, more washfast colors with the full 24-hour window.
Step 7 — Rinse, Wash, and Dry
Remove rubber bands over a protected surface — dye will stain any work area it contacts. Rinse fabric in warm water (95–105°F / 35–40°C) until the water runs nearly clear, then switch to cold water. Initial warm rinsing dissolves excess dye that did not bond, preventing transference to other items during laundering.
Wash separately with cold water and mild detergent (pH-neutral is ideal) on a gentle cycle. Machine dry or line dry. The first three to five washes may release trace amounts of excess dye — this is normal behavior representing unfixed dye residue, not a quality defect. After this initial shedding period, colors become completely stable and washfast.
Fiber Compatibility for Maximum Brightness
| Fiber Type | Dye Type Needed | Brightness Result | Notes |
|---|---|---|---|
| 100% cotton | Fiber-reactive (Procion) | Maximum brightness | Best choice for tie dye |
| Cotton/polyester blend (65/35) | Fiber-reactive | Good (some dulling) | Polyester portion won’t absorb dye |
| Linen | Fiber-reactive | Maximum brightness | Similar to cotton |
| Rayon | Fiber-reactive | Very bright | Often brighter than cotton due to tighter weave |
| Hemp | Fiber-reactive | Bright | May need longer soak time for fiber opening |
| Polyester | Disperse + heat (200°F+) | Low brightness | Requires boiling or heat press setting |
| Wool/silk | Acid dye (not fiber-reactive) | Bright but different chemistry | Protein fibers require acid dyes |
Rayon often produces exceptionally bright tie dye results because its cellulose分子链 is more accessible than cotton’s tightly wound microfibers. The trade-off is durability — rayon wrinkles more easily and has lower abrasion resistance than cotton. For the best combination of color vibrancy and garment longevity, 100% cotton remains the gold standard for tie dyeing.
Common Mistakes That Cause Dull Colors
Mistake 1 — Skipping the Soda Ash Pre-Soak
Without soda ash, dye bonds weakly to cellulose fibers through physical adhesion rather than covalent chemical bonding. Colors appear noticeably faded after just one wash cycle. This single error accounts for the majority of disappointing tie dye results reported by beginners. The soda ash pre-soak is not optional — it is the chemical foundation of every vibrant tie dye project.
Mistake 2 — Using Old or Improperly Stored Dye
Liquid dye mixture degrades within weeks of mixing due to hydrolysis of the reactive groups. Powder dye remains viable for years when stored in a cool, dry, dark environment in an airtight container. Heat, light, and humidity all accelerate degradation. Before using old dye on a final project, test it on a scrap of cotton fabric — faded, uneven, or mottled results indicate degraded dye.
Mistake 3 — Applying Dye to Excessively Wet Fabric
Dripping wet fabric dilutes your dye concentration and creates uncontrolled dye flow beyond your intended boundaries. The fabric should be damp — wrung out after the soda ash soak so no water drips when held. This moisture level is sufficient for dye dissolution and fiber swelling while maintaining the dye placement precision your design requires.
Mistake 4 — Using Insufficient Dye
Too little dye produces weak color saturation that cannot be corrected after the fact. Apply full-strength dye generously — the fabric can only absorb so much, and excess dye simply rinses away during the wash cycle without harming the final result. Err on the side of excess; under-saturation produces permanently dull results with no remedy.
Mistake 5 — Rushing the Setting Time
Dye needs a full 18–24 hours at room temperature (75–85°F / 24–29°C) for the covalent bonding reaction to reach 80–90% completion. Shorter cure times leave significant dye unfixed, resulting in colors that fade rapidly through subsequent washes. Cold environments below 65°F/18°C can require 48–72 hours for equivalent fixation. Patience during this step is the single most cost-effective improvement you can make to your results.
Contrast Techniques Compared
| Technique | How to Achieve | Contrast Level | Best For |
|---|---|---|---|
| Tight spiral with many rubber bands | Roll fabric tightly, apply bands every ½ inch | Very high | Bullseye patterns, sharp concentric rings |
| Accordion pleats | Fold fabric back and forth, bind at intervals | High | Stripes, linear patterns |
| Bullseye (shirt flat, twist from center) | Pinch center, twist spiral, rubber band at intervals | Medium-high | Classic spiral pattern |
| Scrunch (random gather) | Crumple fabric randomly, bind loosely | Low-medium | Watercolor effect, soft gradients |
| Single fold (half twist) | Fold shirt in half, twist lengthwise, bind | Medium | Half-and-half two-color patterns |
The tight spiral technique produces the highest contrast because compressing fabric into a tight coil with closely spaced rubber bands creates maximum physical resist — dye simply cannot penetrate the compressed zones. Each rubber band creates a complete barrier line, and closer spacing means more numerous, tighter barriers. For sharp white lines between color zones, this technique is unmatched.
Frequently Asked Questions
Q: Can you use regular fabric dye for tie dyeing?
A: RegularRIT dye is not ideal for tie dye because it lacks the bonding agents needed for bright, washfast results on natural fibers. Use fiber-reactive dyes (Procion MX or Dharma) which form covalent bonds with cellulose — these produce colors 3–4 times brighter and last through 50+ washes without fading.
Q: Why did my bright tie dye colors turn out faded?
A: Faded tie dye results from one of three causes: skipping the soda ash pre-soak (dye cannot bond properly), using insufficient dye concentration (apply full-strength, not diluted), or not allowing enough setting time (minimum 18–24 hours at room temperature). Check all three before re-dyeing.
Q: How do you get white areas in tie dye instead of light pastel?
A: White areas require complete resist — dye must not reach those sections. Bind fabric extremely tight with multiple rubber bands in areas you want to stay white. The tighter the binding, the more complete the resist. Loose folds result in dye bleeding under the rubber bands, creating light pastel areas instead of white.
Q: Does cotton tie dye need to be heat set?
A: Fiber-reactive dyes (Procion MX type) do not require heat — they bond chemically at room temperature over 18–24 hours. Heat setting is only needed for disperse dyes on polyester. Room temperature setting produces excellent washfastness on cotton, linen, and rayon.
Related Guides:
- → Complete Fabric Dyeing Guide — Hub for fiber-reactive dye chemistry and advanced techniques
- → How to Pre-Soak Fabric for Dyeing — Same pillar, preparation steps
- → Procion MX Dye vs. Dharma Dye Comparison — Same pillar, dye selection
- → How to Wash Cotton Clothes — Care after dyeing (Cross-cluster link)
- → Textile Glossary — fiber-reactive dye, soda ash, dye exhaustion, covalent bond, cellulose fiber, resist technique
References
- Cotton Incorporated. (n.d.). Guide for Producing Outstanding Cotton Products — Soda Ash. CottonWorks™.
- Dharma Trading Co. (n.d.). Fiber Reactive Dye Chemistry and Dye Bath Management. Dharma Trading Co.
- PBurch.net. (n.d.). Dyeing Cotton with Fiber Reactive Dyes. Paula Burch’s Dyeing Articles.
- Wikipedia. (2025). Soda Ash. Wikipedia.
- Jacquard Products. (n.d.). Fiber Reactive Dyeing Basics. Jacquard Products.


