
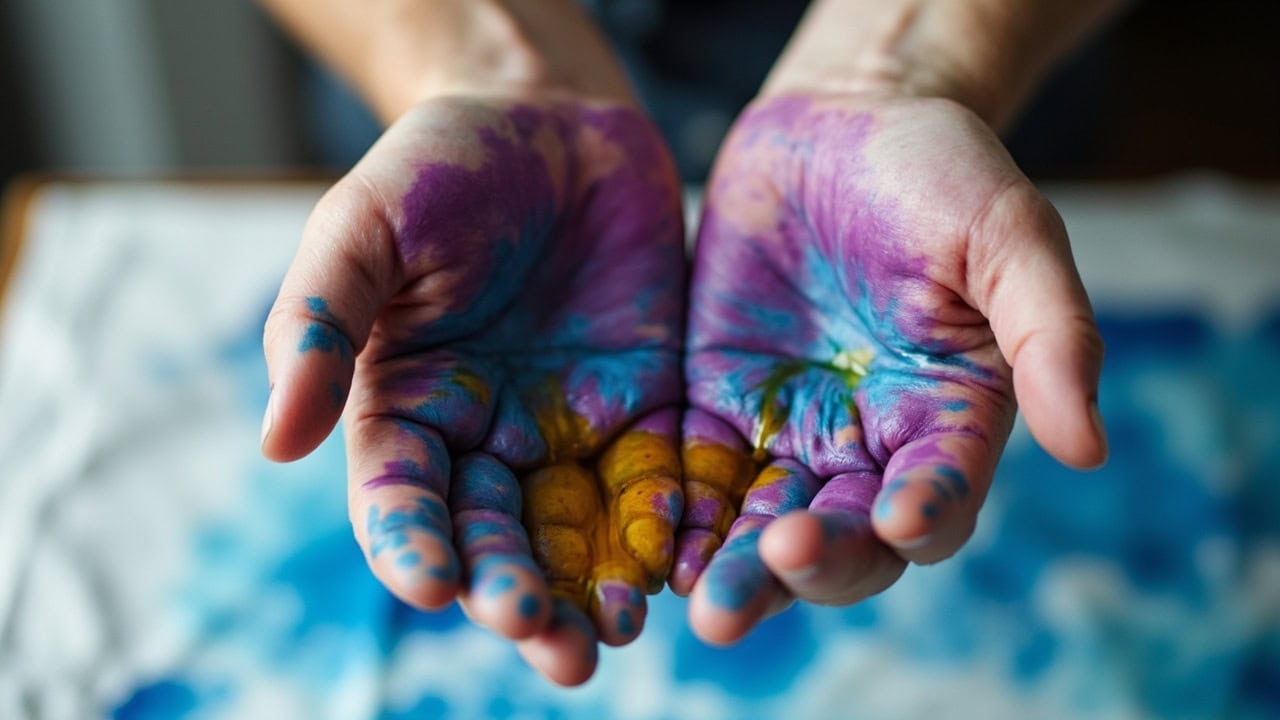
How to Remove Fabric Dye from Skin, Hands, and Surfaces

How to Remove Fabric Dye from Skin, Hands, and Surfaces
Fabric dye transfers to skin through direct contact during dyeing projects, and it bonds to the keratin protein in skin through the same chemical affinity that makes it bond to fabric fibers. Fresh dye on skin removes easily with cooking oil or petroleum jelly within 5 minutes; set-in dye requires rubbing alcohol or a baking soda paste with 10–15 minutes of contact time to break down the pigment molecules.
Why Fabric Dye Sticks to Skin
Skin contains keratin protein — the same protein found in wool that dye sites bond to chemically. Keratin is a fibrous structural protein featuring an α-helical domain where four helical segments are separated by three short linker segments in beta-turn conformation. The coiled-coil structure is maintained through hydrophobic interactions between apolar residues, and large amounts of cysteine (a sulfur-containing amino acid) create extensive disulfide bridges that make keratin extremely insoluble in water and organic solvents.
Dye molecules are designed to penetrate fiber structures, and skin protein offers similar binding sites. Human hair and skin contain approximately 14% cysteine by weight, providing numerous reactive sites where dye molecules can form temporary bonds. Direct contact during dye preparation, application, or rinsing transfers pigment to hands and cuticles. Dye bonds faster on damp skin because sweat and natural skin oils accelerate pigment absorption by softening the stratum corneum and opening micro-pores in the skin’s surface.
The skin’s epidermis continuously produces new cells, replacing approximately 40,000 old skin cells every day. A complete skin renewal cycle takes roughly 30 days, which means minor dye stains will naturally fade over 2–3 weeks through this exfoliation process. However, visible dye on hands during an active project requires active removal because each water exposure rehydrates the stain and can cause further bonding with keratin proteins.
Method 1: Oil-Based Removal (Best for Fresh Dye — Within 1 Hour)
Apply cooking oil, olive oil, or coconut oil directly to dyed skin area. The oil works through a dual mechanism: it acts as a solvent to dissolve oil-soluble dye pigments, and it simultaneously swells skin pores through occlusion, lifting the pigment away from the keratin surface. Rub vigorously for 1–2 minutes — the mechanical action combined with the solvent action breaks the dye bond.
Wipe away with a paper towel and rinse with warm soapy water. The warm water helps emulsify the oil-dye mixture, allowing it to wash away cleanly. Most fresh dye transfers off with this method alone, requiring no scrubbing or harsh chemicals. The cooking oil method is the gentlest approach and works because fabric dyes are fundamentally oil-soluble — they were originally dissolved in liquid medium during manufacturing and maintain that solubility property.
For best results, use approximately 1–2 tablespoons of oil per hand. Extra virgin olive oil contains oleic acid (a monounsaturated fatty acid that enhances solvent action), while coconut oil contains lauric acid with additional degreasing properties. Either option works effectively for fresh dye that has been on skin less than one hour.
Method 2: Rubbing Alcohol / Isopropyl Alcohol (Best for Set-In Dye)
Dampen a cotton ball with 70% isopropyl alcohol — the 70% concentration is optimal because it contains enough water (30%) to swell keratin fibers without evaporating too quickly. Press firmly on the dye stain and rub in circular motions for 5–10 minutes. The alcohol penetrates the skin’s outer layer and swells the keratin fibers, breaking the hydrogen bonds that hold dye molecules to the protein’s cysteine residues.
After treatment, rinse skin thoroughly with warm water and apply hand lotion immediately. Isopropyl alcohol acts as a degreasing agent and will strip natural skin oils, potentially causing dryness, irritation, or cracking with repeated use. Individuals with sensitive skin, eczema, or dermatitis should dilute the alcohol to 50% strength or avoid this method entirely. Always test on a small, inconspicuous area (such as the inner wrist) before applying to larger stained regions.
Acetone-based nail polish remover works similarly to isopropyl alcohol because acetone is a more potent solvent that breaks down dye pigment molecules faster. However, acetone is harsher than alcohol and may cause significant skin dryness, peeling, or chemical burns with repeated use. Reserve acetone-based removers for hard surfaces rather than skin application.
Method 3: Baking Soda Paste (Natural Abrasive for Stubborn Dye)
Mix 3 tablespoons of baking soda (sodium bicarbonate) with 1 tablespoon of water to form a thick paste. The alkaline nature of baking soda (pH approximately 8.3 in solution) helps break down some dye molecular bonds through saponification — the same process that makes baking soda effective for cleaning and deodorizing. Apply the paste to the dye stain and let it sit for 10–15 minutes without scrubbing initially, allowing the alkaline solution time to penetrate and soften the pigment.
After the dwell time, gently scrub with an old toothbrush or soft cloth using small circular motions. The baking soda crystals provide mild abrasive action to lift pigment from the skin’s surface without causing micro-abrasions when used gently. Avoid aggressive scrubbing, which can cause skin irritation. Rinse thoroughly with warm water and apply hand lotion afterward to restore the skin’s natural moisture barrier.
Baking soda is safe for most skin types when used occasionally. However, frequent use (more than 2–3 times per week) may disrupt the skin’s acid mantle — the protective film with a pH of approximately 4.5–5.5 that prevents bacterial and fungal colonization. People with sensitive skin should limit baking soda treatments to once weekly maximum.
Method 4: Petroleum Jelly (Preventive and Mild Removal)
Apply a thick layer of petroleum jelly (also called petrolatum or mineral jelly) to dye-stained skin. Let it sit for 5–10 minutes — during this time, the petroleum jelly acts as an occlusive barrier that traps moisture and allows the dye to transfer from the skin into the jelly itself through osmosis. Wipe away with a paper towel; the dye will have transferred into the jelly layer.
This method is effective for light dye transfer and very mild staining, but will not remove heavy or saturated dye stains. Its primary value lies in prevention: applying petroleum jelly as a barrier cream to hands and forearms before dyeing projects creates a protective layer that prevents dye from bonding to skin in the first place. The dye wipes off the petroleum jelly layer without staining the skin underneath.
Petroleum jelly is one of the most inert substances used in cosmetics — the Wikipedia article notes it is “highly resistant to digestive acids if ingested” and is certified as safe by FDA and EWG for topical use. It does not penetrate skin or cause systemic absorption, making it ideal for use as a barrier cream during messy craft projects.
Removing Dye from Hands vs. Fingers vs. Under Nails
Different areas of the hand require different approaches due to skin thickness and the presence of nail structures.
Hands (palm): The oil method works best for the palm because the skin is relatively thick (the stratum corneum on palms is approximately 0.4–0.6 mm compared to 0.07–0.12 mm on eyelids), and the large surface area allows for easy application and rubbing. The thicker skin on palms and fingers provides more keratin matrix for the oil to penetrate and dissolve dye effectively.
Fingers (tips and cuticles): These areas have thinner skin with more crevices where dye accumulates. Use isopropyl alcohol on a cotton swab rather than a cotton ball — the smaller surface area allows precise application to fingertip creases and cuticle lines. Pay extra attention to the area around fingernails where dye pools during dripping or immersion in dye baths.
Under nails: Nails are composed of keratin plates (similar to hair and skin) and trap dye pigment in the subungual space — the area beneath the nail plate. To remove dye from under nails, fill a small bowl with warm cooking oil and dip affected fingers into it for 5 minutes. The oil wicks beneath the nails and dissolves the trapped pigment. After soaking, scrub with an old toothbrush directed beneath the nail edges. Repeat as necessary until no more pigment releases.
Remove all jewelry — rings, bracelets, and watches — before dyeing projects. The space between jewelry and skin creates a capillary channel where dye pools and concentrates, creating a persistent ring stain that is difficult to remove. These “dye rings” occur because the confined space prevents cleaning solution from reaching the bonded dye.
Removing Dye from Different Body Areas
Different body areas have varying skin thickness, sensitivity, and exposure risk during fabric dyeing projects.
Forearms
Forearms are exposed during dye preparation and are often the first area to contact dye when reaching into containers or leaning over a dye bath. If dye contacts forearms during washing or rinsing, immediately rinse with cold water — cold water causes skin pores to contract, reducing dye penetration. Follow with the oil method if any stain remains visible after a cold water rinse.
Neck and Ears
Dye drips from the neck and ears occur when working with loose dye powders, during rinsing, or when leaning over open containers. For neck and ear dye exposure, start with gentle soap and warm water — the skin on the neck and around ears is thinner and more sensitive than hands. If the stain persists after soap and water, apply isopropyl alcohol sparingly on a cotton swab. Avoid aggressive rubbing on these sensitive areas.
Face
Face exposure requires the most careful approach. Never use isopropyl alcohol or acetone on facial skin — these solvents are too harsh for facial skin and can cause significant irritation, chemical burns, or damage to the delicate skin around the eyes. Use only the oil-based method (cooking oil, olive oil, or coconut oil) for dye on face. Test on a small area first to ensure no allergic reaction occurs.
If dye gets near eyes, flush immediately with clean water for at least 15 minutes and seek medical attention if any burning or redness persists. The conjunctival membrane that lines the eyelids and covers the eyeball is highly sensitive and can be damaged by dye pigments.
Removing Dye from Hard Surfaces
Dye inevitably spills on work surfaces during projects. The appropriate cleaning method depends on the surface material.
| Surface Type | Best Removal Method | Precautions |
|---|---|---|
| Sealed countertops (laminate, solid surface) | 70% isopropyl alcohol on paper towel; wipe clean with damp cloth | Avoid excessive liquid sitting on seams; dry thoroughly |
| Unsealed wood | Baking soda paste (test in hidden area first) | Mild abrasive may affect finish; test before full application |
| Plastic containers and tools | Acetone nail polish remover (without added oils) | Test on hidden area; acetone may melt some plastics |
| Glass and metal | Alcohol or acetone; rinse with water afterward | Both solvents are safe for glass; wipe metal to prevent corrosion |
For sealed countertops, the alcohol evaporates quickly and leaves no residue. For unsealed wood, the baking soda paste works through mild alkalinity rather than harsh abrasion, but should still be tested on an inconspicuous area because some wood finishes may react to the alkaline paste. Plastic containers benefit from acetone because most fabric dyes are soluble in acetone, but certain plastics (notably polystyrene and acrylic) will be damaged by acetone and require isopropyl alcohol instead.
Dye Removal Safety Precautions
Prevention is always easier than removal. Follow these safety guidelines to minimize skin contact during fabric dyeing projects.
- Wear nitrile gloves — Latex gloves tear easily when wet and when exposed to dye chemicals; nitrile provides superior chemical resistance and tear strength. Change gloves if they develop holes, tears, or become heavily contaminated on the outside.
- Work in well-ventilated areas — Some dye pigments, particularly disperse dyes and vat dyes, release fumes when dissolved or heated. The AATCC (American Association of Textile Chemists and Colorists) recommends working in spaces with at least 10 air exchanges per hour when handling powder dyes to prevent inhalation exposure.
- Avoid contact with eyes and mouth — Use splash goggles if handling liquid dye near face; never eat or drink while working with dyes. If dye contacts eyes, flush with water for 15 minutes minimum.
- Test all methods on small skin areas first — Apply any removal solution to the inner wrist and wait 5 minutes to check for irritation, redness, or allergic reaction before using on larger stained areas.
- Apply barrier cream before projects — Petroleum jelly or specialized barrier creams applied to hands and forearms before dyeing create a protective layer that prevents dye from bonding to skin.
Frequently Asked Questions
Q: Does fabric dye come off skin naturally?
A: Yes — skin naturally exfoliates over 2–3 days, so minor dye stains fade on their own. The skin renews itself completely in approximately 30 days, shedding 40,000 old skin cells every day. However, visible dye on hands and fingers during an active project requires active removal because the dye continues to bond with each water exposure.
Q: Can you use nail polish remover to remove fabric dye from skin?
A: Acetone-based nail polish remover works like rubbing alcohol on dye — it breaks down pigment molecules through solvent action. However, acetone is harsher than alcohol and may cause skin dryness, irritation, or chemical burns with repeated use. Reserve acetone-based removers for hard surfaces rather than skin application.
Q: How do you remove fabric dye from children’s skin?
A: For children, use the oil method only — cooking oil, coconut oil, or petroleum jelly. Avoid alcohol and acetone on children’s skin because children’s skin is thinner and more permeable than adult skin, increasing absorption and irritation risk. Apply oil, let sit 5 minutes, wipe away with warm soapy water. Repeat if necessary.
Q: How do you prevent fabric dye from staining skin during projects?
A: Apply a barrier cream or petroleum jelly to hands and forearms before dyeing. Wear nitrile gloves (latex can tear). Remove rings and bracelets to prevent under-jewelry dye pooling. Have a cold water rinse station ready for immediate washing if spills occur. Work quickly when rinsing excess dye — the first 30 seconds after a spill are critical for preventing bond formation.
Related Articles
For more information on fabric dyeing techniques and safety, read our complete fabric dyeing guide which covers safety and preparation in detail. If you’re working with a washing machine for larger projects, see our guide on how to dye fabric in the washing machine. For troubleshooting common issues, our article on how to fix uneven dye absorption on fabric provides solutions for patchy results. If you’ve gotten dye on your clothes, learn how to remove dye from white clothes to treat fabric stains. Understand key terminology in our textile glossary covering reactive dye, acid dye, colorfastness, mordant, and fiber reactive terms.
References
- Cleveland Clinic. (2024). Skin: Layers, Structure, and Function. Cleveland Clinic Health Library.
- Wikipedia. (2024). Keratin. Wikipedia Encyclopedia.
- Wikipedia. (2024). Dye. Wikipedia Encyclopedia.
- Environmental Working Group. (2024). EWG Skin Deep® Cosmetic Database. EWG.


