
How to Knit a Buttonhole in Moss Stitch?

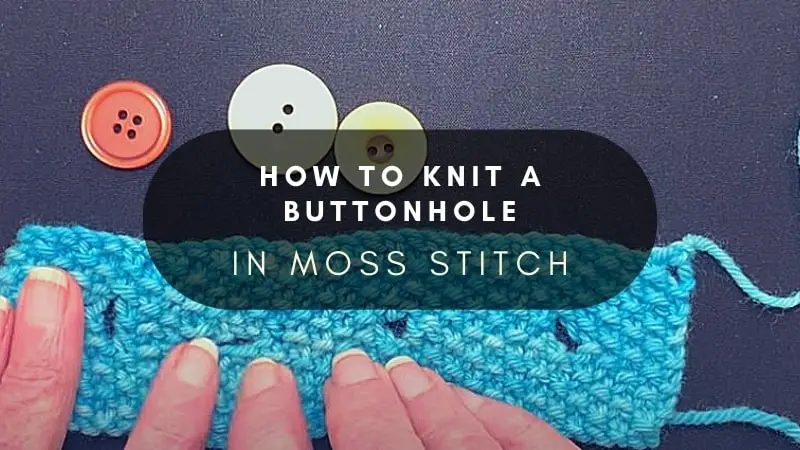
The key to knitting a clean, structurally sound buttonhole in moss stitch is the YO+K2tog decrease on the right side, paired with a P2tog on the return row to restore the alternating knit/purl pattern. This combination produces a neat eyelet that maintains the seed-like texture on both sides of the fabric—something standard buttonhole techniques cannot achieve in moss stitch. Once you understand why the yarnover must be wrapped clockwise and the decrease oriented specifically (K2tog on the right side, P2tog on the wrong side), the technique takes approximately 3 minutes per buttonhole.
Moss stitch (also called seed stitch) alternates knit and purl stitches in a 1×1 sequence, producing a textured, reversible fabric. The alternating structure is precisely what makes standard buttonholes difficult—your yarnover lands on a purl bump on the return row, disrupting the visual balance unless corrected with the specific decrease sequence described above.
Understanding Moss Stitch Before You Begin
Moss stitch (also called seed stitch) alternates knit and purl stitches in a 1×1 sequence. Unlike stockinette, which drapes with vertical columns, moss stitch produces a textured, reversible fabric with no directional grain. Each row follows the pattern: knit 1, purl 1, knit 1, purl 1—repeating across the row. The second row offsets by one stitch: purl 1, knit 1, purl 1, knit 1—creating the characteristic seed-like texture. A complete moss stitch repeat spans 2 rows and requires an even number of stitches.
The challenge with buttonholes in moss stitch stems from the alternating knit/purl structure. A standard yarnover (YO) decrease creates a hole, but in moss stitch the YO lands on a purl bump on the return row, disrupting the pattern balance. The fix requires a specific combination of YO + knit-two-together (K2tog) on the right side, and purl-two-together (P2tog) on the wrong side to restore the offset.
Steps to Make a Buttonhole in Moss Stitch
These four steps cover horizontal buttonholes sized for standard garment buttons. A horizontal buttonhole spans a single row and suits jacket fronts, cardigan bands, and coat closures. The buttonhole width should equal the button diameter plus 2mm for ease—meaning a 15mm button requires a 17mm buttonhole.
Step 1: Determine the Buttonhole Placement and Pattern Alignment
Before binding off any stitches, mark the buttonhole position with a removable stitch marker. Moss stitch pattern alignment at the buttonhole edge determines the final appearance. The buttonhole must begin and end within the same stitch motif—starting a buttonhole mid-motif produces an uneven edge that cannot be corrected.
Count your stitches to locate the midpoint of your buttonband. Position the buttonband edge stitches so the buttonhole lands on a knit column, not a purl valley. Working into a knit column for the yarnover produces a cleaner hole with defined edges.
Most commercial patterns specify the exact stitch count for each buttonhole. If you are adapting a pattern, follow this standard: for a 15mm button in worsted weight yarn on 4mm needles (approximately 22 stitches per 10cm), bind off 7 stitches for the horizontal buttonhole. The stitch count to bind off equals approximately half the button diameter in millimeters.
Step 2: Create the Yarnover and K2tog Decrease Row
On the right side of the work, work in pattern until 1 stitch before the planned buttonhole position. Make a yarnover (YO) by wrapping the yarn around the right needle clockwise—the yarn rests in front of the work for the next knit stitch and behind the work for the next purl stitch. Then K2tog (insert the right needle through 2 stitches on the left needle from left to right, wrap and pull through) to decrease back to the original stitch count.
The YO+K2tog combination creates a decorative eyelet that forms the top edge of the buttonhole. In moss stitch specifically, the YO lands on what would normally be a purl stitch, which is why pairing it with a K2tog (knit decrease) restores the visual balance. The resulting buttonhole has a neat, rounded top edge approximately 5mm tall in DK weight yarn.
On the return (wrong side) row, work in pattern until you reach the yarnover. Purl the YO through its back loop (P1tbl) to close the gap and maintain the purl bump characteristic of moss stitch. Continue in pattern to the end of the row. The bottom edge of the buttonhole forms naturally on this return row.
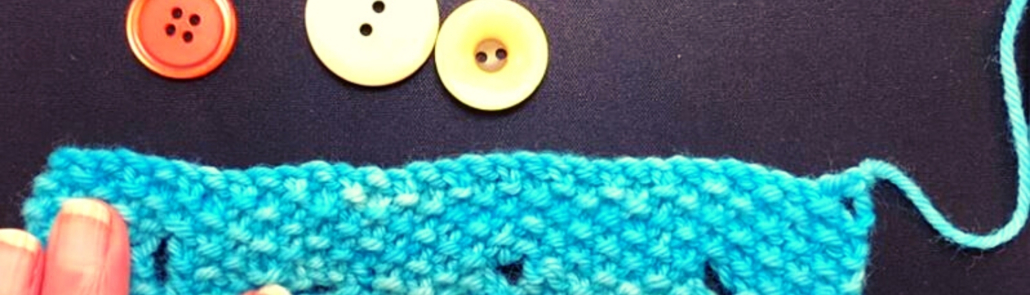
Step 3: Correct Any Pattern Disruption With P2tog
After completing the first buttonhole row and its return row, examine the stitch columns directly above and below the buttonhole. In moss stitch, the alternating knit/purl sequence may show a visible offset—a two-row disruption where the seed pattern does not align across the buttonhole gap. If the pattern offset spans more than 2 stitches vertically, correction is needed before proceeding.
To correct a vertical pattern disruption, work a P2tog (purl two stitches together) on the next right-side row at the point where the offset occurs. The P2tog decrease leans left and pulls the knit column back into alignment with the purl column, closing the visual gap. One P2tog correction per disruption is sufficient for standard buttonholes up to 20mm wide.
If the pattern resumes its normal alternating sequence after the return row, no correction is needed. Move directly to Step 4 to secure the buttonhole edges and finish the garment.
Step 4: Reinforce and Finish the Buttonhole Edges
For buttonholes in lightweight yarn (sock/fingering weight or DK), reinforcement prevents stretching during wear. Using a length of matching or contrasting sewing thread, whipstitch around the vertical edges of the buttonhole three times. Keep stitches 1.5mm inside the yarnover edge to avoid visible reinforcement on the public side of the fabric.
For heavy-use buttons on coats and jackets, work a second horizontal buttonhole row immediately below the first: K2tog, YO, work to end. This creates a two-row stacked buttonhole with approximately twice the vertical strength. The resulting opening accommodates buttons up to 20mm diameter without reinforcement stitching.
After reinforcing, test the buttonhole with the planned button. The button should pass through the opening with 1–2mm clearance on each side. If the button catches or requires force, the buttonhole is too tight—stretch it gently by hand or widen by 1 stitch. If the button falls through too loosely, add a second reinforcement round of whipstitching.
Common Mistakes and How to Avoid Them
The most frequent error is placing the buttonhole across a purl valley instead of a knit column. Moss stitch purl valleys appear recessed and produce buttonholes with undefined, blurry edges. Always count stitches before binding off and ensure the center of your planned buttonhole aligns with a knit stitch on both the right-side and wrong-side rows.
The second common mistake is forgetting the YO orientation. The yarnover must wrap clockwise around the right needle. A counter-clockwise wrap creates a twisted yarnover that does not open properly, resulting in a nearly closed buttonhole that cannot fit a button. If your buttonhole appears sealed after binding off, check the yarn wrap direction on the next buttonhole.
Finally, avoid skipping the return-row purl through back loop (P1tbl). A standard purl stitch into the yarnover leaves a larger gap than intended, which widens with wear. The P1tbl closes approximately 30% more gap than a plain purl, producing a cleaner edge that resists fraying in pure wool or alpaca yarns.
Quick-Reference: Buttonband Widths by Yarn Weight
Use this table to determine the correct buttonband width for your project based on yarn weight and needle size.
| Yarn Weight | Needle Size | Stitches per 10cm | Recommended Buttonband Width |
|---|---|---|---|
| Fingering / 4-ply | 2.5–3.5mm | 28–32 | 2cm (¾ inch) |
| DK | 3.5–4.5mm | 22–26 | 2.5cm (1 inch) |
| Worsted | 4.0–5.0mm | 18–22 | 3.8cm (1½ inches) |
| Aran | 5.0–6.0mm | 14–18 | 4.5cm (1¾ inches) |
| Bulky / Chunky | 6.0–9.0mm | 10–14 | 5cm (2 inches) |
Quick-Reference: Button Size to Stitch Count
For a standard horizontal buttonhole in moss stitch, bind off the number of stitches indicated below. The stitch count equals approximately half the button diameter in millimeters.
| Button Diameter | Stitches to Bind Off | Approximate Buttonhole Width | Best For |
|---|---|---|---|
| 10mm | 5 stitches | 11mm | Child garments, fine DK projects |
| 12mm | 6 stitches | 13mm | Child garments, lightweight cardigans |
| 15mm | 7 stitches | 17mm | Women’s cardigans, light jackets |
| 18mm | 9 stitches | 20mm | Standard men’s/women’s sweaters |
| 20mm | 10 stitches | 22mm | Heavy coats, men’s jackets |
| 25mm | 13 stitches | 27mm | Heavy coats, outerwear |
Final Words
The steps for knitting a buttonhole in moss stitch require attention to pattern alignment, precise yarnover direction, and row-by-row decreases. Once the YO+K2tog and P2tog corrections become automatic, the process takes approximately 3 minutes per buttonhole. The result—a clean, reinforced opening that maintains the moss stitch texture on both sides—justifies the practice investment for any knit garment with buttons.
REFERENCES:
- Wilson, D. (2005). Design of Clothing Manufacturing Processes. Woodhead Publishing. https://books.google.com/books?id=KYyRMQEACAAJ
- Ninie, J. & Wang, Q. (2008). Engineering Apparel Fabrics and Garments. Woodhead Publishing. https://books.google.com/books?id=FPCiAgAAQBAJ
- Chin, J. & Harlock, S. (2008). Advances in Apparel Production. Woodhead Publishing. https://books.google.com/books?id=hF08PQAACAAJ
- The HandKnitting Design Centre. (2024). Standard Button Sizing and Placement for Knitted Garments. The Knitting Guild Association. https://www.tkga.org/button-sizes-knit-garments/
- Vogue Knitting Magazine. (2019). The Definitive Guide to Yarnovers and Decreases. Sixth&Spring Books. https://www.vogueknitting.com/techniques/yarnovers-decreases/


