9 Easy Tie Dye Ideas for Beginners at Home
This guide covers 9 easy tie dye ideas for beginners: spiral, heart, shibori, spider, stripes, folding, ombre, crumple, and ice dye. Each technique produces a distinct pattern style using fiber-reactive dyes on natural fabrics, and all can be completed at home with basic supplies. The basic steps—wash, bind, mix dye, apply, and let fix—apply to every pattern.
Tie-dyeing produces hundreds of distinct spiral, mandala, and geometric patterns through a dyeing method in which fabric is folded, twisted, pleated, or crumpled and bound with rubber bands before dye is applied. The technique works most effectively on natural cellulosic fabrics including cotton, hemp, rayon, and silk. A 90/10 cotton-polyester blend yields acceptable results, but blends approaching 50/50 produce noticeably faded color according to SDC’s Basic Principles of Textile Coloriation.
Quick Reference: 9 Tie Dye Techniques at a Glance
| Technique | Pattern Style | Difficulty | Best For |
|---|---|---|---|
| Spiral | Radial segments | Easy | Classic look, t-shirts |
| Heart | Heart shape | Easy | Gifts, Valentine’s projects |
| Shibori | Wrapping resist | Easy | Japanese-inspired patterns |
| Spider | Radiating legs | Easy | Bold center designs |
| Stripes | Horizontal/vertical bands | Easy | Modern, minimalist styles |
| Folding | Geometric blocks | Easy | Symmetrical patterns |
| Ombre | Gradient fade | Easy | Modern, subtle color transitions |
| Crumple | Random creases | Easy | Organic, abstract results |
| Ice Dye | Melting watercolor | Easy | Soft, unpredictable patterns |
Basic Steps of Tie Dyeing
Step 1: Washing

Wash fabric or garments before dyeing to remove sizing agents, factory finishes, and detergents. Pre-washing ensures the fabric absorbs dye evenly without patches or inconsistent color uptake.
Step 2: Binding
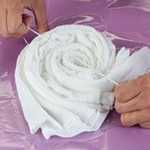
Twist, fold, and bind the fabric using rubber bands based on the specific tie-dye technique you intend to produce. The binding pattern determines the final design, so follow each technique’s instructions carefully.
Step 3: Dye Mixing
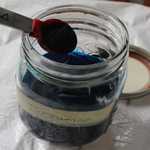
Pre-mixed dye bottles containing soda ash (sodium carbonate) are available commercially and eliminate the need for separate preparation. For DIY mixing, add 1 cup of soda ash per gallon (approximately 250ml per liter) of warm water at 100°F to 120°F (38°C to 49°C) to create an alkaline solution that activates fiber-reactive dyes. Shake the sealed bottle vigorously until the dye dissolves completely.
Step 4: Dyeing

Apply dye to each section of the fabric according to your chosen pattern. Rotate and flip the fabric as needed to ensure dye reaches all bound sections. For multi-color designs, apply each color to a separate wedge or section before moving to the next.
Step 5: Runtime
Seal the dyed fabric in a plastic bag or wrap to maintain moisture during dye fixation. Fiber-reactive dyes require 6-8 hours at room temperature (65°F to 75°F / 18°C to 24°C) for proper bond formation between dye molecules and cotton fibers. For darker, more vibrant results, extend fixation time to 24 hours.
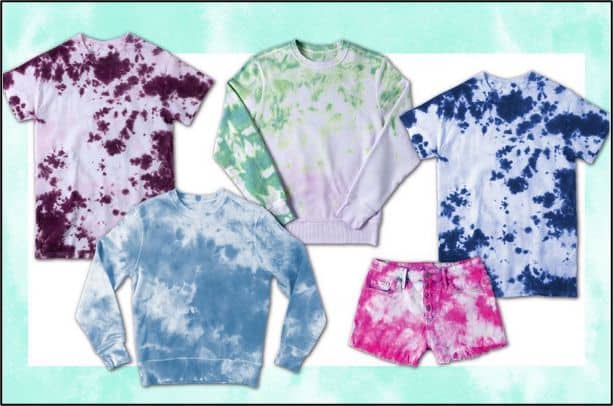
9 Easy Tie Dye Ideas for Beginners at Home
This guide covers the 9 most popular and accessible tie-dye techniques. Each method produces a distinct pattern style, from classic spirals to modern ombre gradients.
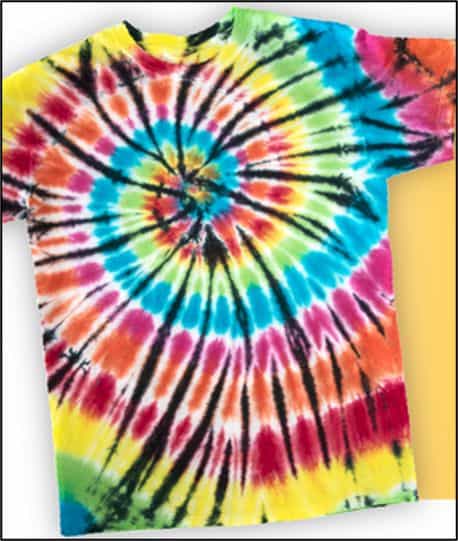
1. Spiral Tie Dye Technique
1. Pre-soaking with soda ash is unnecessary when using commercial dye bottles that contain pre-mixed soda ash. Lay the washed, damp fabric flat on your work surface.
2. Pinch the fabric at the exact center point where the spiral pattern will originate.
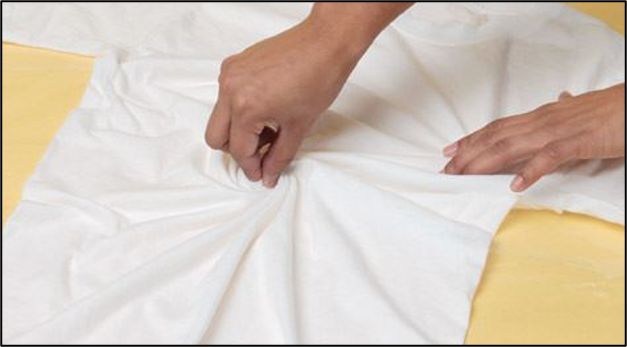
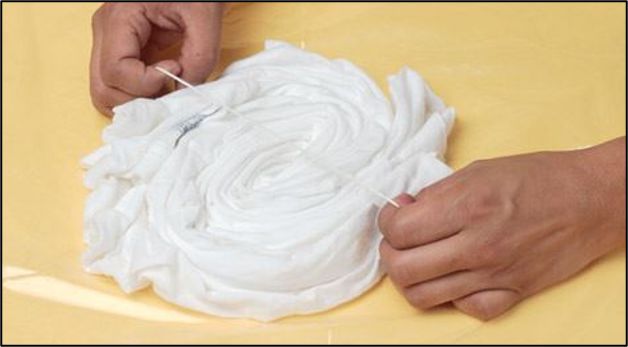
3. Twist the fabric continuously until the entire piece forms a spiral shape. Secure the spiral with 3-4 rubber bands wrapped around the center point. Position bands in a crisscross pattern to create 6-8 evenly spaced wedge sections.
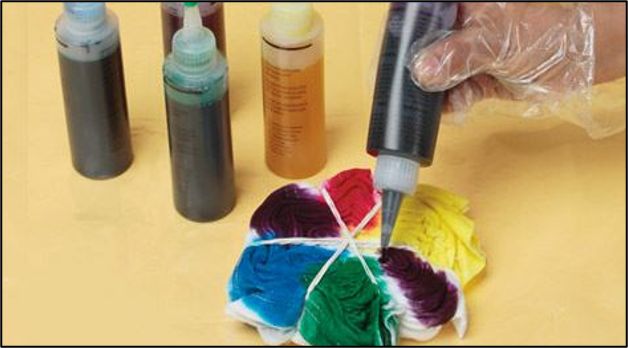
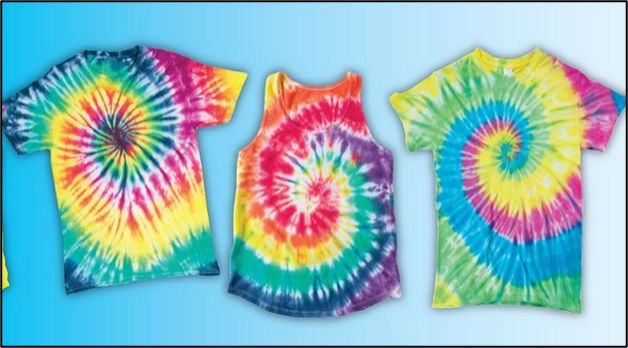
4. Mix one dye color per wedge section in the bottles. There is no incorrect approach to color selection—experimentation produces unique results. Apply dye to the front face of the fabric, then flip and apply to the back. Follow the standard runtime step (Step 5) for 6-8 hours of fixation.
The final design appears below:
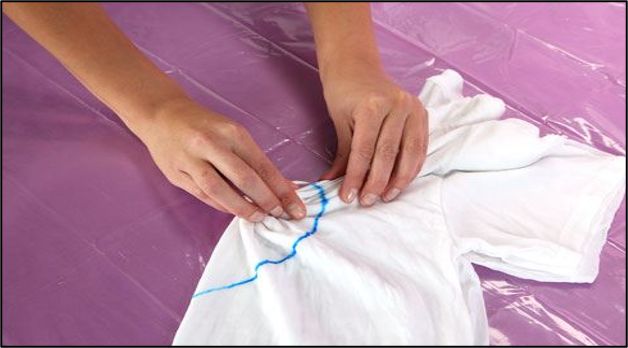
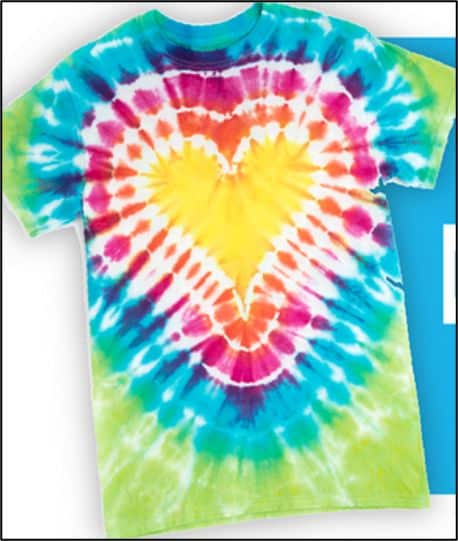
2. Heart Tie Dye Technique
- Fold the washed, damp shirt in half. Outline a heart shape using a washable fabric marker.

2. Pleat the fabric tightly along the marked heart outline to create a sharp edge.
3. Bind the pleated fabric tightly along the marked heart line with additional rubber bands positioned perpendicular to the fold.
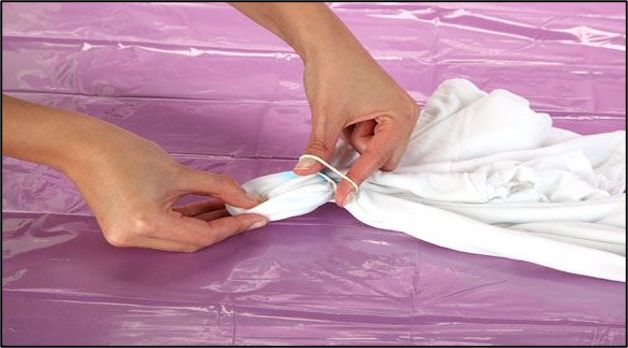
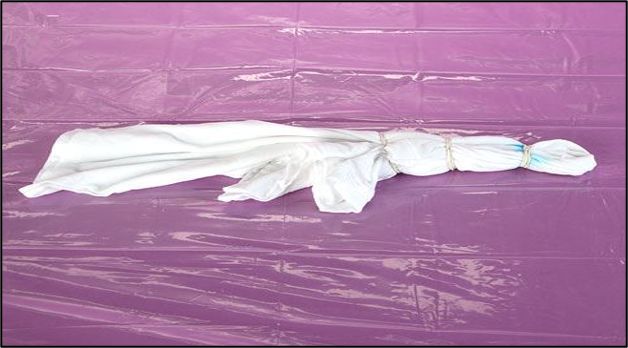
4. Position additional rubber bands across the bound heart section to create separate dye zones.
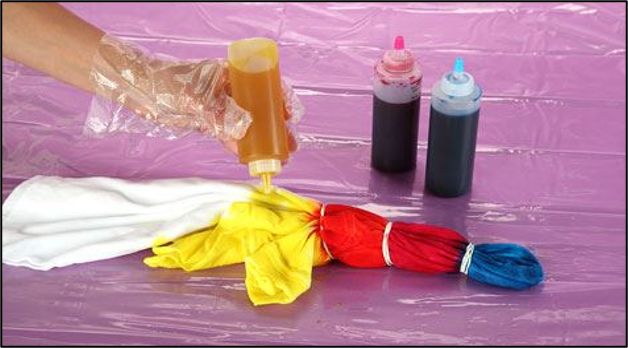
5. Apply different dye colors between the rubber bands on both sides of the fabric. Follow the standard runtime step (Step 5) for 6-8 hours of fixation.
The final design appears below:
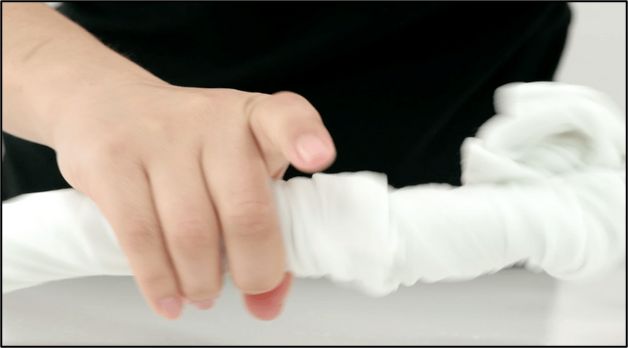
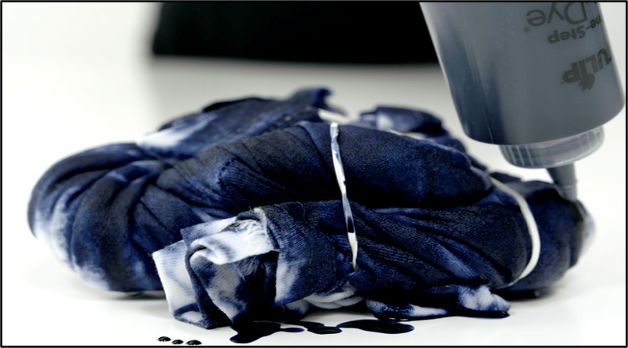
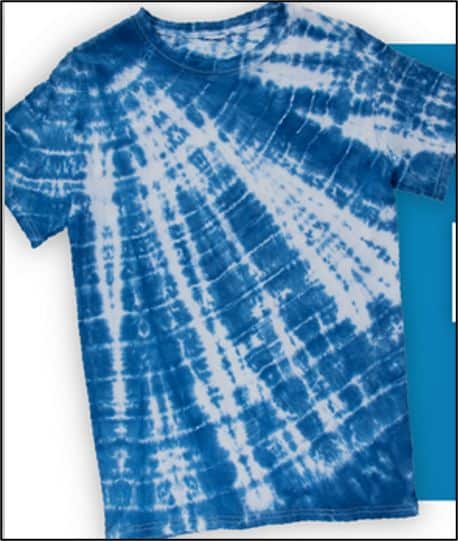
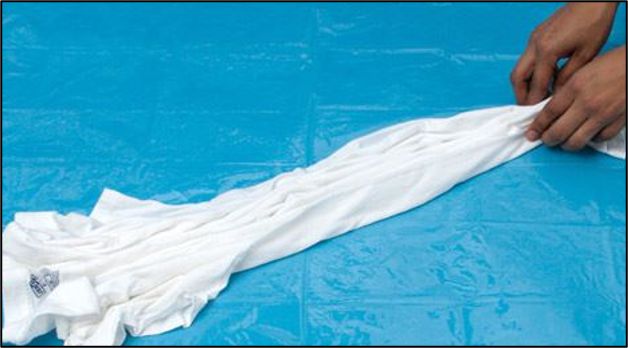
3. Shibori Tie Dye Technique
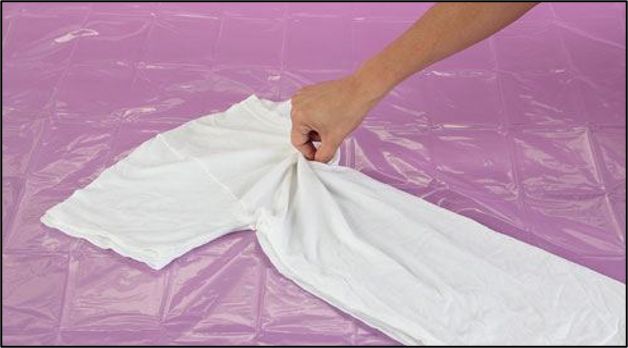
1. Twist the garment tightly along its length, working from one end to the other, similar to wringing out a towel.
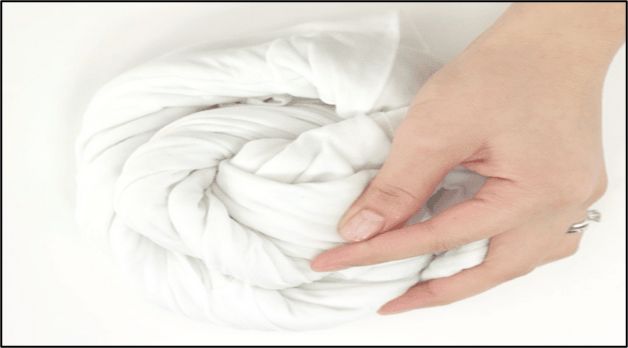
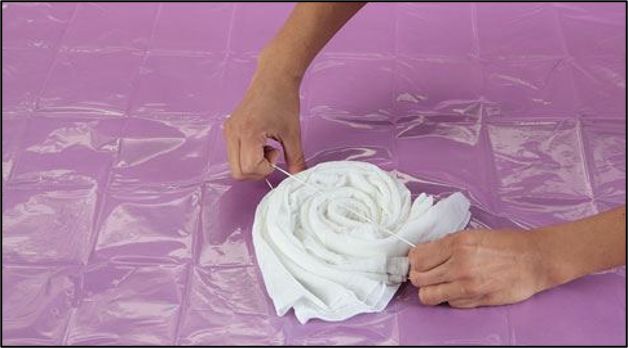
2. Coil the twisted garment into a flat spiral on your work surface and press down firmly to flatten.
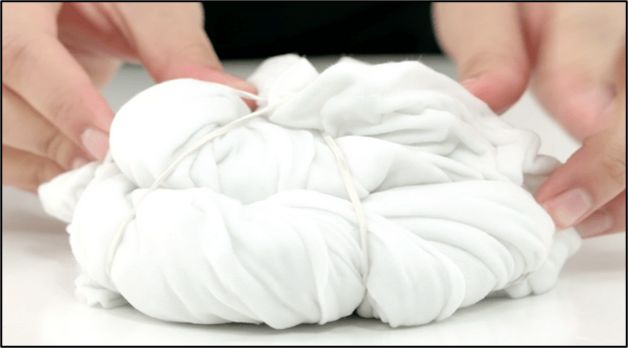
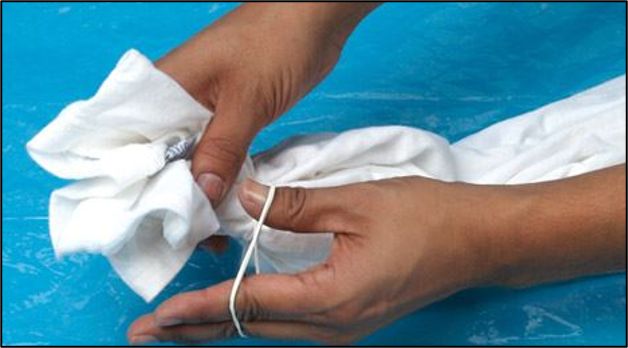
3. Secure the coiled spiral at multiple points using rubber bands spaced 2-3 inches apart along the coiled structure.
4. Apply dye to one side of the flattened coil, then flip the entire piece and apply dye to the reverse side. Follow the standard runtime step (Step 5) for 6-8 hours of fixation.
The final design appears below:
4. Spider Tie Dye Technique
1. Fold the washed, damp garment in half lengthwise to establish symmetry.
2. Pinch the fabric at the center point where the spider legs will radiate outward. Twist continuously until the entire garment forms a spiraled shape with legs extending outward.
3. Wrap 3 rubber bands around the center point in an intersecting pattern to create 6 evenly spaced wedge sections for dye application.
4. Apply dyes to each wedge section, working from the center outward. Follow the standard runtime step (Step 5) for 6-8 hours of fixation.
The final design appears below:
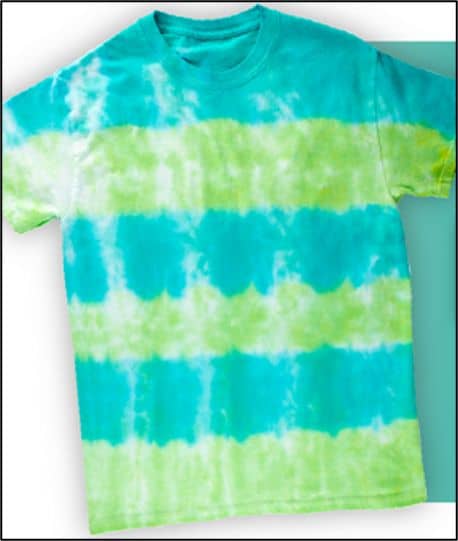
5. Stripes Tie Dye Technique
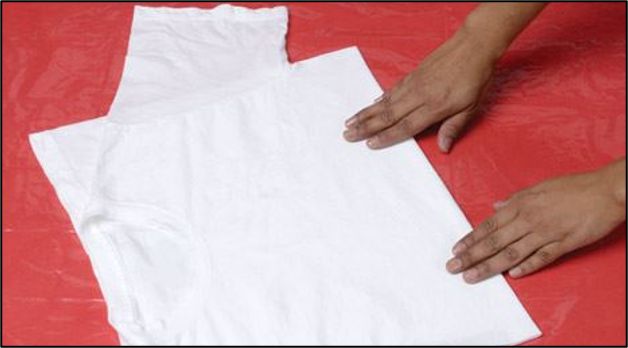
1. Lay the washed, damp garment flat on your work surface. Create horizontal or vertical pleats by accordion-folding the fabric in even increments, as shown in the image below.
2. Secure the pleated garment with rubber bands placed at equal intervals along the fold. Stripe width is determined by the spacing between bands—closer spacing produces narrower stripes of 1-2 inches, while wider spacing creates bold stripes of 3-4 inches or more.
3. Apply dye colors to alternating sections between the rubber bands. Follow the standard runtime step (Step 5) for 6-8 hours of fixation.
The final design appears below:
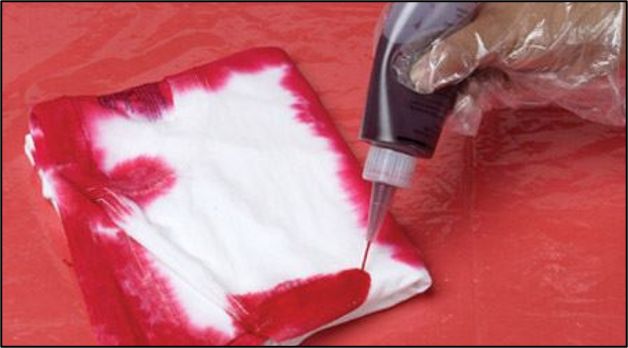
6. Folding Tie Dye Technique
1. Fold your fabric in half lengthwise to create a long rectangle.
2. Fold in half again widthwise, then fold once more to produce 8 layered panels stacked together.
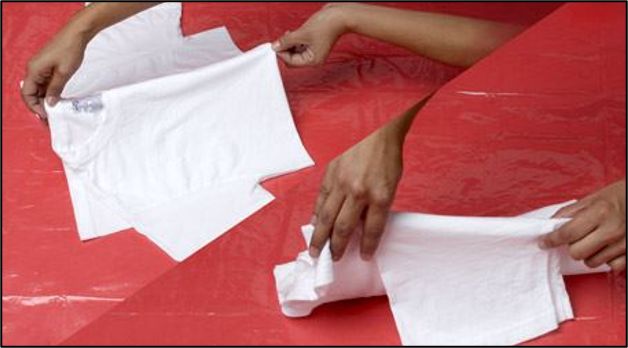
3. Apply dye to the folded edges of the stack on both sides using pre-mixed dye bottles. The dye travels inward from the cut edges, creating matching patterns on each layer. Follow the standard runtime step (Step 5) for 6-8 hours of fixation.
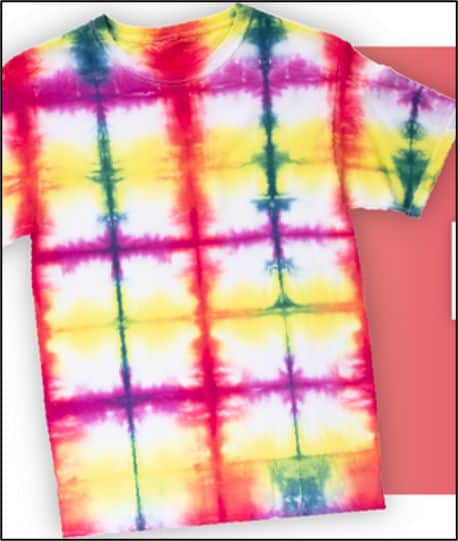
The final design appears below:
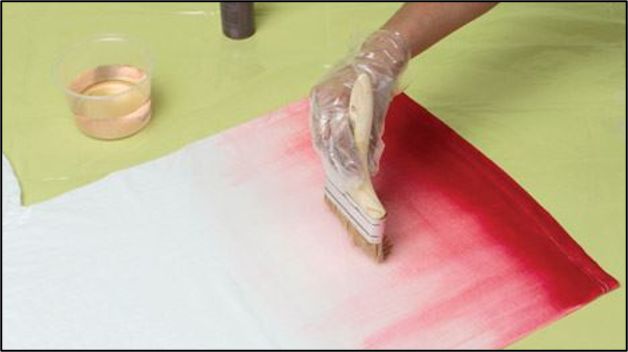
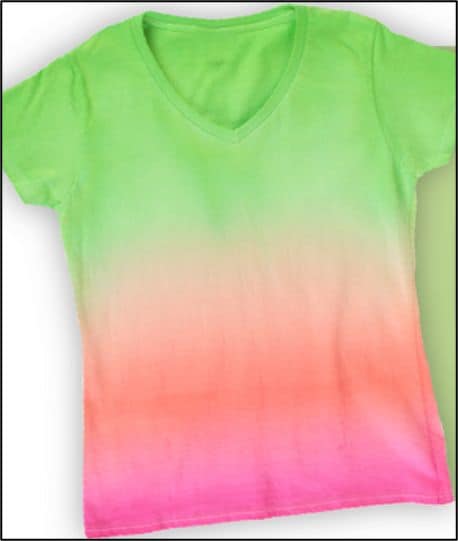
7. Ombre Tie Dye Technique
1. Apply dye colors in a straight line along one edge of the fabric, positioning them adjacent to each other without overlap.
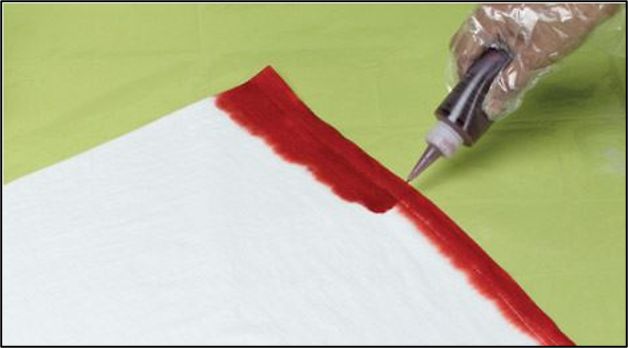
2. Use a paintbrush to pull and blend each dye color upward along the fabric body, creating a gradual transition between adjacent colors.
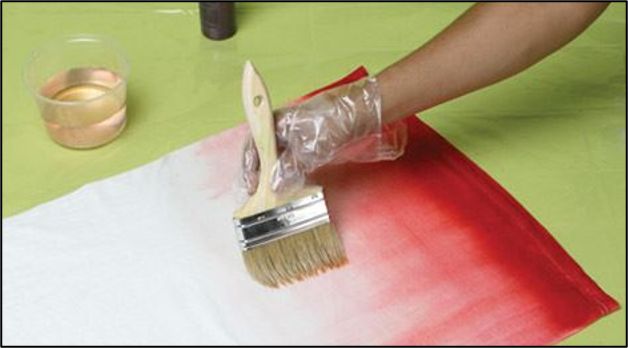
3. Lightly mist the paintbrush with water to dilute the dye at the transition zones and create a smoother gradient effect. Follow the standard runtime step (Step 5) for 6-8 hours of fixation.
The final design appears below:
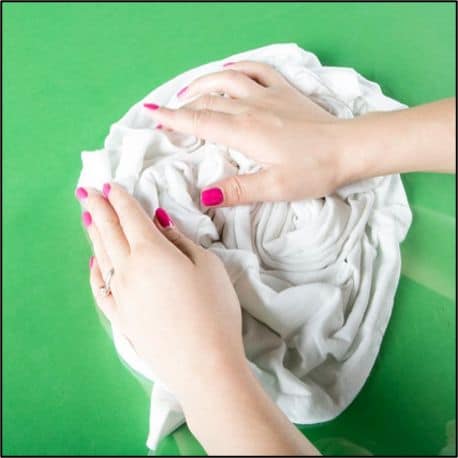
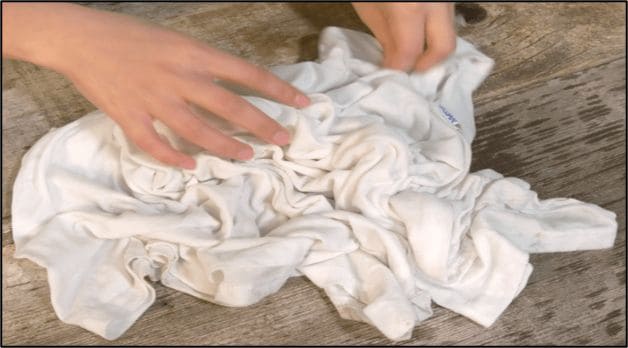
8. Crumple Tie Dye Technique
1. Lay the washed, damp fabric flat on your work surface. Scrunch the fabric into a tight, irregular mound by gathering and crumpling from all sides. For highly defined small patterns, crumple tightly; for softer, larger color areas, keep the mound looser.
2. For sharply defined crumple patterns, secure the mound with rubber bands wrapped around the entire bundle in 2-3 locations. Skipping this step produces softer, more diffuse color areas.
3. Apply dye to the visible surface areas of the crumpled mound, working around all sides. Follow the standard runtime step (Step 5) for 6-8 hours of fixation.
The final design appears below:
9. Ice Tie Dye Technique
1. Lay the washed, damp fabric flat and scrunch into a loose, irregular mound by gathering and crumpling from the edges toward the center.
2. For well-defined crumple patterns, wrap 2-3 rubber bands around the mound to hold its shape. Skipping rubber bands produces softer, more organic patterns.
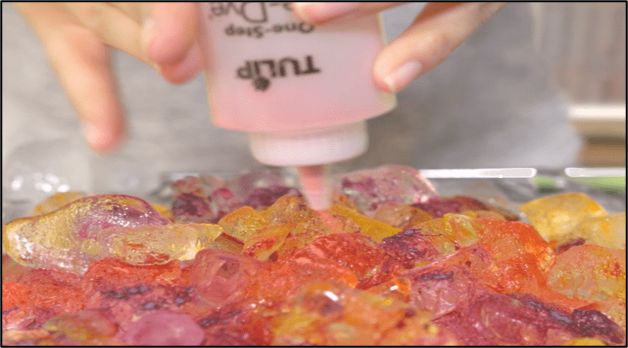
3. Place a baking rack over a tub or tray. Set the fabric mound on the rack and cover the entire surface with ice cubes arranged in a single layer. As the ice melts, dye powder dissolves in the runoff water and penetrates the fabric below through gravity-fed distribution.

4. The ice tie-dye technique requires dry dye powder rather than liquid dye. Sprinkle dye powder generously over the ice cubes in a random or planned color distribution. The powder dissolves as the ice melts and the dye-laden water drips onto the fabric.
5. Ice dissolution time varies from 4-6 hours in warm, humid conditions to 12-24 hours in cool, dry environments. Follow the standard runtime step (Step 5) for 6-8 hours of additional fixation after the ice has fully melted.
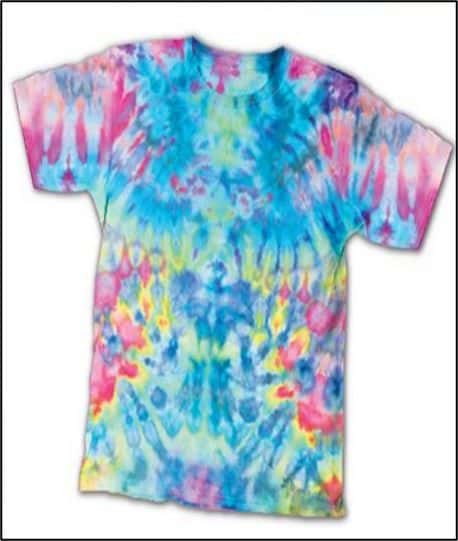
The final design appears below:
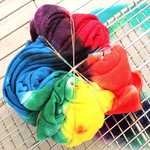
How to Tie Dye Mandalas
For crafters without access to commercial pre-mixed dye bottles, the mandala technique demonstrates how to achieve intricate radial patterns using standard fiber-reactive dye powders and soda ash pre-treatment.
- Prepare a soda ash solution using 250ml of soda ash (sodium carbonate) per gallon (3.8 liters) of warm water at 100°F to 120°F (38°C to 49°C). Submerge the fabric in this solution for 20-30 minutes, then remove and line-dry the fabric before folding and binding. This pre-treatment activates the fiber-reactive dye molecules for strong covalent bonding with cellulose fibers.
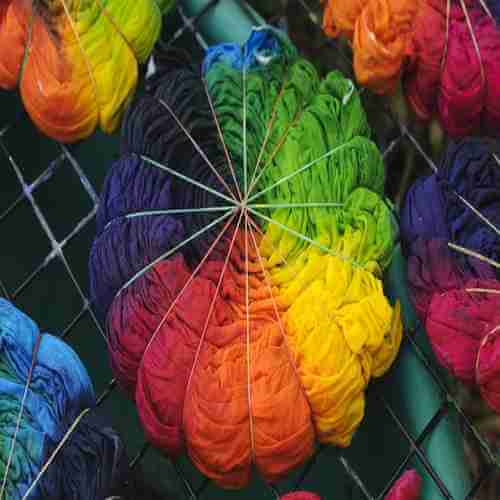
- The mandala folding technique uses a pleating method that radiates outward from a central point, creating multiple concentric rings of color. Fold the fabric in a radial pattern, working outward from the center in even increments as demonstrated in the image below.
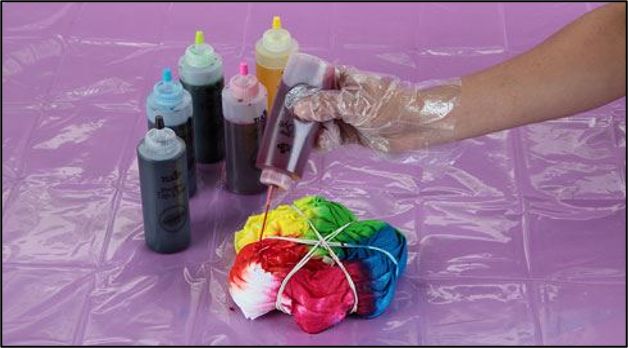
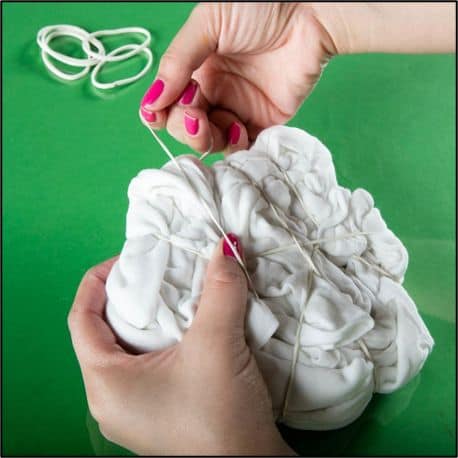
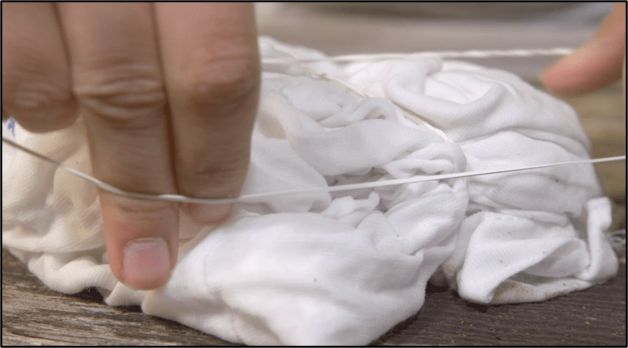
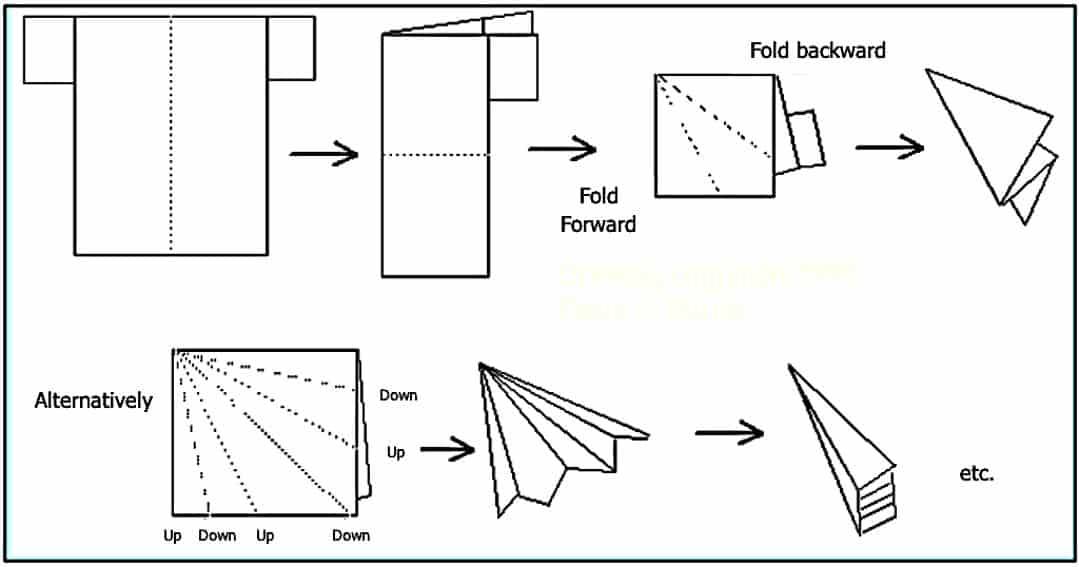 Mandala Tie Dye Folding Techniques with Pictures
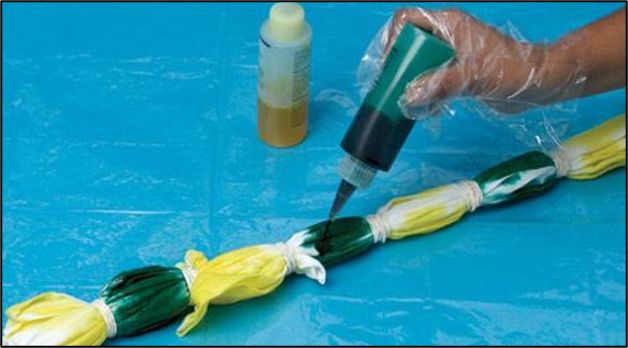
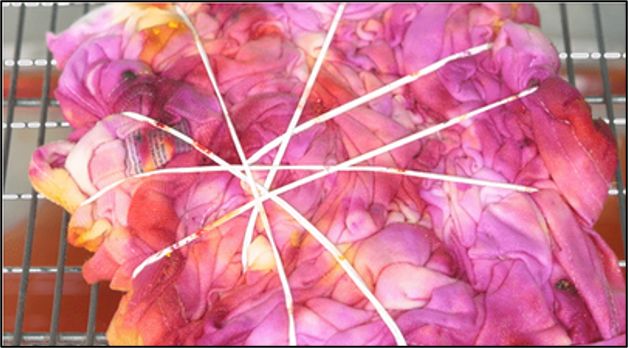
 - Secure the radial pleats at multiple points using rubber bands, twine, or synthetic sinew. The number and placement of ties determines the number of color segments in the final mandala pattern.
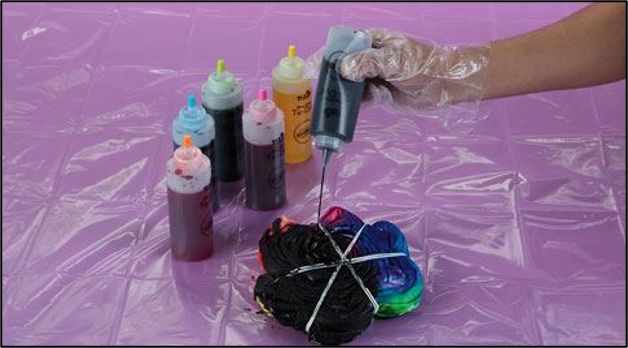
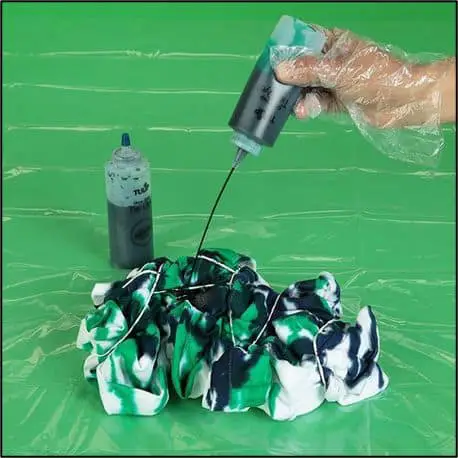
- Inject dye slowly into the bound fabric cones using a syringe or squeeze bottle for precise color placement and even saturation. Work from the outer edges inward to prevent dye from wicking to unintended areas.
- Seal the fabric in plastic wrap and allow to fix for 6-8 hours at room temperature (65°F to 75°F / 18°C to 24°C).
- Rinse the fabric first with cold water to remove unbound dye, then wash with hot water (140°F / 60°C) and detergent to eliminate all traces of hydrolyzed dye from the fabric surface.
The mandala technique is designed for natural cellulosic fabrics including cotton, viscose (rayon), and hemp. Synthetic fabrics such as polyester and nylon require acid dyes rather than fiber-reactive dyes, and the pre-treatment process differs significantly. Understanding the distinction between tie-dye techniques and fabric dyeing more broadly helps select the correct method for your fabric type.
This guide provides the visual instructions needed to achieve professional-quality tie dye results at home. With practice, each technique produces increasingly consistent and vibrant results.
If a pattern does not meet expectations, a fabric dye remover can correct the result for a second attempt. Note that dye removers reduce color vibrancy by 20-40% compared to the original dyebath results, and complete color removal may require multiple treatments.
References
- Chakraborty, J. N. (2013). Fundamentals and Practices in Colouration of Textiles. Springer.
- Wikipedia. (2025). Tie-dye. Wikimedia Foundation.


