
How to Sew a Tote Bag: Simple First Project

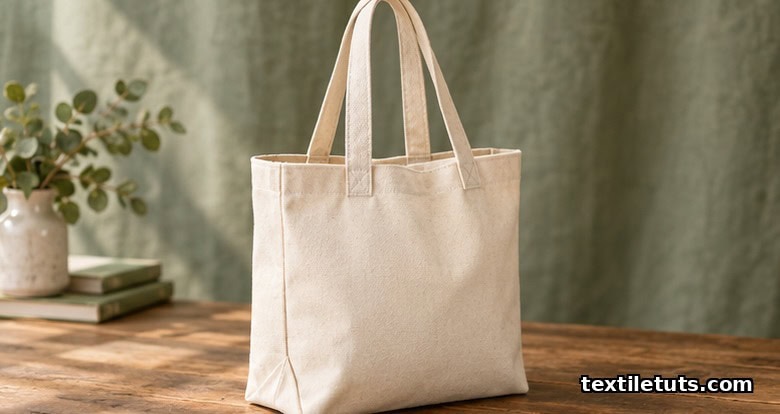
A tote bag is the ideal first sewing project because it requires only straight stitches, basic hemming, and two rectangular fabric pieces — no zippers, darts, or complex fitting involved. The entire project can be completed in under an hour with fabric that costs $5–15, making it the lowest-barrier entry point into garment and home décor sewing.
The Tote Bag Builds Foundational Sewing Skills in Under 60 Minutes
A tote bag strips sewing down to its most essential elements without sacrificing a useful, tangible result. Unlike a practice square that gets discarded, a tote bag becomes a daily companion, which makes every stitch matter and every lesson stick.
A tote bag requires no commercial pattern. Two rectangles of fabric — cut to size with household scissors or a rotary cutter — are the entire foundation. Every seam is a straight line, every edge is either hemmed or seamed, and there are no notches to match, no curves to navigate, and no closures to install. A standard sewing machine set to straight stitch handles 100% of the construction.
Sewing a tote bag teaches transferrable skills applicable to virtually every other sewing category. Measuring accurately becomes second nature — a seam allowance of ⅝ inch is the US industry standard used in garment and bag construction. Cutting with confidence prevents the most common beginner mistake of cutting twice and having nothing left. Pressing seams open with an iron separates amateur results from professional ones. Executing backstitching to lock seams makes the difference between seams that hold and seams that unravel under load.
A tote bag sewn at home costs $5–15 in materials. A comparable store-bought canvas tote bag retails for $20–40 — meaning your first project effectively pays for itself. The minimal tool investment (fabric, thread, scissors, pins, and a sewing machine) is also the complete tool kit for hundreds of future projects.
Essential Tools and Materials for Tote Bag Construction
Gathering everything on this list before starting prevents mid-project interruptions and maintains the momentum that makes a 45–60 minute session feel short rather than long.
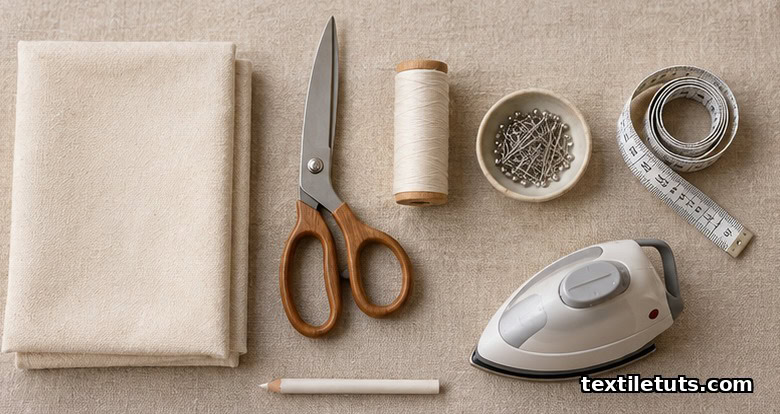
| Item | Purpose | Notes |
|---|---|---|
| ¾ yard of cotton canvas or linen | Main bag body | Use 45-inch wide fabric at 10–12 oz weight — the standard for durable tote bags |
| ¼ yard of contrasting fabric | Interior pocket (optional) | Cut 8×10 inches |
| All-purpose thread or heavy-duty thread | Construction | Size 40 wt thread is standard; match or contrast to fabric |
| Fabric scissors | Cutting fabric | Keep sharp; dedicate scissors to fabric only — paper dulls blades |
| Pins or quilting clips | Holding layers together | Quilting clips work especially well for canvas’s thicker layers |
| Measuring tape | Measuring and marking | Use a flexible fabric measuring tape, not a metal tape measure |
| Iron and ironing board | Pressing seams open | Essential for professional results — do not skip pressing |
| Sewing machine | Construction | Straight stitch only needed; no zigzag or decorative stitches required |
| Rotary cutter + self-healing mat | Straight cutting | Optional but highly recommended for clean, accurate fabric edges |
A universal needle in size 14/90 or 16/100 handles 10–12 oz cotton canvas. A size 14/90 works effectively for lighter canvas weights, while 16/100 provides the extra penetrating power needed for the heaviest canvas at 12 oz or more. Set stitch length to 2.5–3.0 mm for straight stitching — long enough to move fabric smoothly without puckering, short enough to produce strong, secure seams. Use a standard presser foot; a walking foot is helpful but not required for this project.
Step-by-Step: Sewing Your Tote Bag
Follow each step in sequence. Each stage builds on the previous one, and skipping steps or changing their order is the most common source of errors in tote bag construction. Read through all seven steps once before beginning so you understand how the finished bag comes together.
Step 1: Cut the Fabric Rectangles
Cutting fabric to 15×17 inches for the body and 3×22 inches for straps establishes the geometric foundation of a 15×17×4-inch finished bag. Using a rotary cutter on a self-healing mat produces the cleanest, most accurate edges and is especially worthwhile for canvas, which is thick enough to strain fabric scissors if you cut all layers at once.
Cut two pieces of canvas to 15 inches wide × 17 inches tall — these form the front and back of the bag body. Cut four strips of canvas at 3 inches wide × 22 inches long — these become the straps. Each strap requires two strips, so you will end up with two completed straps. Mark the top center of each body piece with a small snip or chalk notch. This notch is your alignment guide when attaching straps in Step 4.
- Cut 2 bag body pieces: 15″ wide × 17″ tall
- Cut 4 strap pieces: 3″ wide × 22″ long
- Mark top center notch on each body piece
Step 2: Prepare the Straps
The French hem method creates 1-inch wide straps with fully enclosed edges using three folds and two topstitching lines. This technique (folding fabric edges inward in three layers to enclose raw edges without exposed threads) is used in professional bag and luggage manufacturing because it produces clean, durable edges with no exposed fabric threads.
Take each 3×22-inch strap piece and fold it in half lengthwise, wrong sides together. Press firmly with an iron to create a crisp center crease. Open the fold. Then fold each raw edge toward the center crease — you are creating two inward folds that meet at the center crease without overlapping. Fold a second time along the original center crease, enclosing the raw edges inside the fold. You now have a 1-inch wide strap with clean enclosed edges.
Topstitch along both open edges, ⅛ inch from the outermost edge, closing the fold permanently and giving the strap its finished look. Repeat this process for all four strap pieces. Pair two completed straps together — one pair for each side of the bag.
- Fold strap in half lengthwise, wrong sides together; press
- Open fold; fold each raw edge toward center crease
- Fold again along original crease to enclose edges
- Topstitch ⅛ inch from outer edge on both sides
- Pair four completed pieces into two straps
Step 3: Hem the Top Edge of the Bag Body
A ½-inch double fold hem encloses all raw threads while adding durability to the bag opening that receives daily handling. The ½-inch double fold is the standard hem depth used in bag construction because it is narrow enough to be invisible from the outside while deep enough to securely enclose all raw threads.
Fold the top edge of each bag body piece under ½ inch and press. Fold under another ½ inch — creating a double fold that encloses the raw edge — and press again. Pin the hem in place every 3–4 inches. Sew close to the folded edge all the way across, using a stitch length of 2.5 mm. This seam is visible on the inside of the bag, so accuracy matters more than speed. The hemmed edge becomes the top — or opening — of your bag. Repeat for the second body piece.
- Fold top edge under ½ inch; press
- Fold again under ½ inch; press
- Pin every 3–4 inches
- Sew close to the folded edge; repeat for second body piece
Step 4: Attach the Straps
Straps centered 3 inches from each side edge and extending 9 inches above and below the hem create handles that hang at hip level when the bag is set down. Strap placement is the most technically critical step in tote bag construction — improper placement causes handles to twist, hang unevenly, or detach under load.
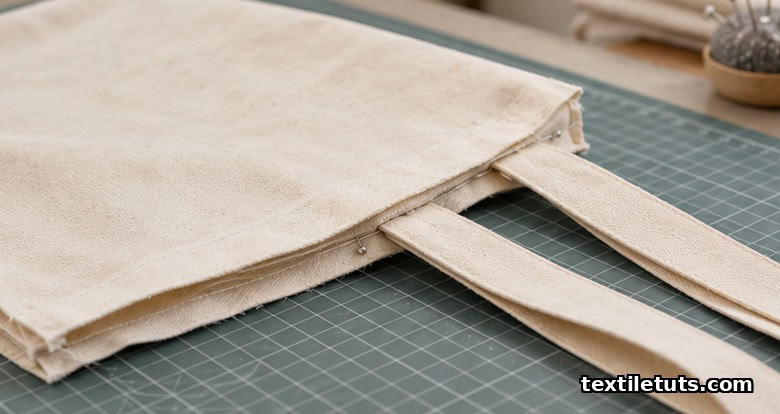
Mark the center point of the bag top width on each body piece (7½ inches from each side). Then measure and mark 3 inches in from each side edge. The straps attach between these two marks, centered at the 3-inch mark from each edge. Pin each strap 3 inches from the side edge, with the right side of the strap facing the right side of the bag body. The strap should extend 9 inches above the hem line and 9 inches below it — creating balanced handles. Baste (temporary stitch) at ¼ inch seam allowance to hold everything in place before sewing permanently.
Change to a ⅜ inch seam allowance for the final seam. Backstitch at both the start and end of each strap seam — three to four stitches in reverse at each end locks the seam so it cannot unravel under the repeated stress of picking up and setting down a loaded bag. Strap attachment seams are the highest-stress points on any tote bag, and backstitching makes the difference between a bag that lasts years and one that fails within months.
- Mark center point (7½ inches from each side) and 3-inch inset marks on each body piece
- Pin strap 3 inches from side edge, right side to right side
- Verify strap extends 9 inches above and 9 inches below hem line
- Baste at ¼ inch seam allowance
- Sew with ⅜ inch seam allowance, backstitching 3–4 stitches at each end
- Repeat on the second body piece
Step 5: Sew the Bag Body Together
Sewing with ⅝-inch seam allowance and backstitching creates seams that hold 15-20 pounds of load without failure. The ⅝ inch seam allowance is the US standard for garment and bag construction, providing enough fabric strength for the seam to hold under stress while keeping the stitching away from the fabric edge where it could weaken or fray.
Place the two body pieces right sides together, aligning the side seams, bottom seam, and the strap positions you marked in the previous step. The straps will be sandwiched between the two fabric layers at the sides — this is by design and correct. Pin the side seams and bottom seam at regular intervals to prevent the layers from shifting as you sew. Set your machine to a straight stitch at 2.5–3.0 mm length. Backstitch at the beginning and end of every seam. Tote bags carry weight — every seam must be locked at both ends.
- Place two body pieces right sides together
- Align side seams, bottom seam, and strap positions
- Pin side seams and bottom seam at regular intervals
- Sew with ⅝ inch seam allowance; backstitch at all start and end points
Step 6: Box the Corners for Depth
Boxing corners with 1-inch seam allowance creates a flat 4-inch deep bottom that lets the bag stand upright on its own. Boxing transforms a flat fabric tube into a bag with a flat bottom and defined depth — without it, the bottom seam creates a point at each corner that reduces usable space and creates an awkward, unfinished look.
At each bottom corner, pull the side seam and bottom seam apart so they form a 90-degree angle — you will see a small triangle of fabric pointing downward. Lay the bag flat and measure 1 inch up from the corner point along both the side seam and the bottom seam. Mark both points. Draw a straight line connecting the two marks — this line, when sewn, becomes the new bottom corner seam. Sew along this line. Then trim the excess corner fabric ⅜ inch from the new seam. This trimming reduces bulk so the corner lies flat and clean.
- Pull side seam and bottom seam apart at each corner to form a 90-degree angle
- Measure and mark 1 inch up from the corner point on both seams
- Draw a line connecting the two marks
- Sew along the line
- Trim excess fabric ⅜ inch from the seam
Step 7: Finish the Interior (Optional Pocket)
An 8×10-inch pocket centered on one body panel adds daily utility with less than 10 minutes of additional sewing. The pocket is constructed from the 8×10-inch contrasting fabric piece. Fold it in half to 5×8 inches, wrong sides together, and press the fold. Topstitch around three sides — left, right, and bottom — leaving the top edge (the fold) open.
Position the pocket on the inside of one bag body piece, centered horizontally. The open top of the pocket should face upward toward the bag’s opening so items placed inside stay in the pocket rather than sliding out. Pin the pocket in place, then baste the sides of the pocket to the bag body along the seam lines. The basting is removed after final construction if you used temporary stitches, or remains as a permanent interior finish if you used a long stitch length.
- Fold pocket piece in half to 5×8 inches, wrong sides together; press
- Topstitch around three sides (left, right, bottom), leaving top open
- Position on bag interior, centered horizontally
- Pin; baste pocket sides to bag body
Five Common Tote Bag Construction Mistakes and Their Fixes
Even careful beginners encounter these issues. Recognizing them early prevents wasted fabric and hours of unpicking.
| Mistake | Cause | Fix |
|---|---|---|
| Crooked straps | Straps not marked and pinned evenly before sewing | Re-measure from a fixed reference point (the side edge, not the center); always baste straps in place before final sewing |
| Wavy top hem | Iron not hot enough; pressing too large a section at once; fabric shifting | Re-press with steam; fold and press one 3–4 inch section at a time before pinning the next section |
| Uneven corners | Side seam and bottom seam not aligned when boxing; inconsistent seam allowance | Trim and resew; always match the ⅝ inch seam allowance precisely at corners before boxing |
| Straps coming loose | Insufficient seam allowance or no backstitch at strap attachment points | Resew with ⅜ inch seam allowance; backstitch 3–4 times at each end of every strap seam |
| Fabric shifting during cutting | Using dull scissors; no pattern weights; cutting on an uneven surface | Sharpen or replace scissors; use pattern weights or a rotary cutter with a self-healing mat |
When to Choose a Tote Bag Project Over Other Beginner Projects
A tote bag is the right project when the goal is building confidence with straight stitching, simple cutting, and basic construction before moving to more complex builds. The tote bag teaches measuring, cutting, pinning, topstitching, and seam finishing in a single session.
A pillowcase project suits those wanting to practice sewing continuous strips and enclosed seams without any cutting variance — pillowcases require only straight cuts on fabric yardage and no grain considerations. A zippered pouch suits those ready to add zipper installation, which requires a separate set of techniques not covered in this guide.
The tote bag serves as the stepping stone for intermediate bag projects. After completing this build, advancing by adding a zipper pocket to the interior, constructing a fully lined version using a lining fabric and slip stitch, or installing an adjustable strap using a tri-glide buckle and strapping fabric builds directly on the straight-stitch and seam-finishing skills developed here.
Six Customization Options That Transform a Basic Tote Bag
These modifications transform the simple tote into a highly personalized daily-use bag:
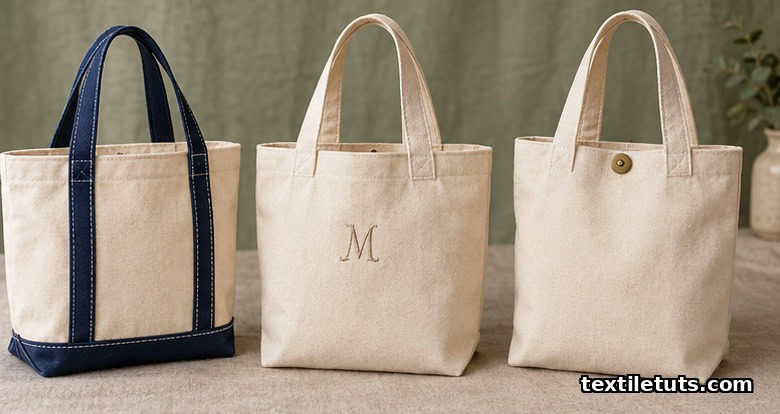
- Add a magnetic clasp or snap button between the straps, centered on the bag front, to keep the opening closed during transit
- Use waterproof canvas for a beach bag that repels water and dries quickly — marine-grade canvas is widely available at fabric stores in 10–12 oz weights
- Line with ripstop nylon for a lightweight water-resistant interior that protects the cotton exterior from moisture inside the bag
- Add an interior key clip or D-ring — sew a small fabric loop with a hardware clip at the top interior center so keys are always retrievable
- Embroider a monogram or design on the front panel before assembly using a simple running stitch or split stitch with six-strand embroidery floss
- Use decorative topstitching in a contrast thread color — orange or cream topstitching on navy canvas, for example — to add a design element through stitching alone
Frequently Asked Questions
How long does it take to sew a tote bag?
A complete tote bag takes 45–60 minutes from cutting to finished seam — making it a single-session project for beginners. Experienced sewists can complete one in 20–30 minutes. The steps that take longest for beginners are strap preparation (12–15 minutes) and accurate cutting (8–10 minutes).
Can I sew a tote bag by hand?
Yes, but it requires strong hand-stitching techniques — a backstitch or running stitch with stitches spaced closely together (5–6 stitches per inch) — and takes 3–4 hours to complete. A machine produces stronger, more even seams that can support heavier loads. Hand-sewn bags are best suited to decorative or lightweight use.
What fabric is best for a tote bag?
Cotton canvas at 10–12 oz weight is the best beginner choice. It is durable, easy to cut and pin, does not slip under the presser foot, and sews cleanly with a standard universal needle size 14/90. Avoid slippery fabrics like satin or silk — these require special feet, needles, and techniques beyond this guide’s scope.
How do I make my tote bag straps stronger?
Use 1-inch wide straps (cut from 3-inch fabric strips folded using the French hem method) rather than thin straps cut from narrower fabric. Sew with a ⅜ inch seam allowance. Backstitch all strap attachment points — three to four reverse stitches at each end of each seam. For heavy loads, add a box X-stitch at each strap corner: sew a second seam perpendicular to the strap seam across the corner, forming an X that distributes load stress across a wider area of fabric.
Learn More Sewing Skills
Now that you have completed your first tote bag, continue building your sewing foundation with these related guides from TextileTuts:
- Complete Sewing Techniques Guide: Straight Stitching and Seam Finishing — Master the foundational techniques referenced in this project, including seam finishing methods that prevent fraying and extend your projects’ lifespan
- How to Thread a Sewing Machine for Beginners — Threading is the first technical skill every sewist must master before producing clean, reliable seams
- Best Fabrics for Beginner Sewing Projects — Not sure what to make next? This guide ranks fabric types by difficulty and helps you select the right material for each skill level
- How to Wash Cotton Canvas Bags — Extend the life of your finished tote bag with proper care, including hand washing, machine settings, and drying recommendations specific to canvas
- Textile Glossary — Bookmark this reference for clear definitions of technical terms including seam allowance, backstitch, topstitching, bias, selvage, hem, straight stitch, and grain
References
- Cotton Incorporated. (n.d.). Cotton Fabric Properties and Sewing Guidelines. CottonWorks Education Platform.
- Threads Magazine. (n.d.). Needle Guide: Choosing the Right Needle for Every Fabric. Threads Magazine.
- American Sewing Guild. (n.d.). Beginner Sewing Project Guidelines. AmericanSewingGuild.org.
- Palmer/Pletsch Associates. (2019). Fit for Your Figure: The Palmer/Pletsch Complete Guide to Sewing Fit. Taunton Press.
- Seamwork Magazine. (n.d.). Bag Construction Techniques: Box Corners and French Seams. Seamwork.com.


