A Complete Guide for Hand Dyeing Yarn for Beginners – Explained!
Before anything else, tell me why you feel the urge of hand-dying yarns whereas you can get it from any notion shop?
Well, I hear you.
The reason why you and I need to dye yarn at home is that the color combination and pattern we strive for doesn’t come handy.
Hence, to attain the solid ombres and vibrant tones you decide to hand dye yarn.
Here, if you haven’t been to any yarn dyeing workshop before or have no prior experience then it’s better to latch on some very basic knowledge about yarn and dye types.
Then you can come to a deduction as in what kind of yarn is apposite for your project and which dye will be suitable for the yarn.
Anyways, as we are discussing hand-dying yarn today, I have lined up a complete guide on how you can hand dye yarn at home step by step including some additional comprehension on yarn dyeing.
Types of Dyes and Their Application
Here, I will articulate the common dye types and each of their applications.
It will help you to acquire a crystal clear idea about high quality fabric dye products and what kind of dyes are suitable for the type of yarn you are anticipating to work on. Also, remember that not all dyes are safe and accommodatable at home.
Some of them are vigorously toxic and incorporates clusters of acid.
Hence, before you determine to hand dye your yarn choose dyes that are environment-friendly, easily applicable, and don’t require professionalism.
1. Natural Dye
No wonder, the natural dye comes first at the list because of its innate quality and benefits. So, basically, natural dye is made out of natural sources or extracted from organic substances. However, in recent days synthetic dyes have replaced natural dyes as they are relatively more cost-effective and reliable.
Yet, there are some of the natural dyes that are still in use depending on diverse circumstances. Plus, this dyes are easy to remove with a dye remover.
2. Synthetic Dye
Well, synthetic dyes are comprised of inorganic or organic compounds. It replaces most of the conventional dyes because of its fair blend of different colors. There are different classes of synthetic dyes. For example, basic, mordant, acid, direct, metal complex, sulfur, vat, etc.
- Acid Dye
If you are hoping to dye wool yarn then you will need to acid dye it because protein yarns require water-soluble dyes. And that’s what acid dye is “ a water-soluble ionic dye”. Fibers like wool, nylon, and silk often bond with acid dyes.
- Direct Dye
Direct dyes are considered as one of the most convenient dyes who wants an effortless and hassle-free dying session, and the reason is simply that direct dye lives on its name. yeah! It can be applied directly to the apparel.
Initially, it’s crucial for fabrics that channel hydrogen bonds.
Moreover, direct dyes eliminate the necessity of using mordant dyes and this Is also one of the reasons why it’s vital and surpasses many dye forms.
However, the crisp and saturation you receive by using a mordant are marvelous, and sadly direct dyes cant even match the surface of it.
This dye just distributes a basic and light color which approves washing as well. Anyways, if you are intending to use direct dyes because it seems too promising for residential use then make sure you choose cotton, linen, rayon, wool, silk, or nylon. These fibers can be dyed with a direct dye blend. However, if you’re looking to dye deep blacks, then pick any dyes from our best black fabric dye review.
- Mordant Dye
These kinds of dyes are used for cotton, wool, or other protein fiber. This works as a binding agent between the fiber and dye.
Also, the difference between mordant dye and direct dye is that direct dyes can be applied without any additional compound or pre-procedures but mordant dye, on the other hand, requires a binding agent. Hence it doesn’t dye directly instead sometimes corresponds with metal salts in order to create insoluble color combinations.
So, these are the most common types of dyes which are vastly available and often used to hand-dye yarns at home.
Let’s check em out!
Things to Ask Yourself Before Hand Dyeing Yarn
Now, after getting a clear insight into different types of dyes and their individual applications it’s time to ask yourself a few questions to clear up the air. Also, to get the ideal match for your yarn it’s important to possess an in-depth idea about the dyes, color combinations, patterns, DIY techniques, etc.
WHAT KIND OF YARN IS APT FOR HAND DYING?
Here when you are intending to get your yarn-dyed at home or by yourself it’s advised to choose plant fiber-based yarn such as cotton, bamboo, hemp, etc.Because they are not only the safest option but also satisfies your expectations. The dye application on cotton yarn is effortless because of its fast absorbent feature. Moreover, cotton yarn is sturdy, breathable, and provides a wide range of variety in their types.The breathability of cotton yarn ensures the user’s comfort and eliminates the risks of skin sensitivities as well.
WHAT’S MY PURPOSE?
The resolution behind your project will narrow down the list of numerous yarns from your mind and lead you towards the one you need.Hypothetically, saying that you want to knit a summer suit, dishcloth, or a scrubby. Now, in this case, your clothing is supposed to be comfortable and capable of absorbing sufficient water. In this regard, again cotton yarn wins the crown.But if you need dyed yarns for crafting winter accessories then undoubtedly wool yarn reigns over cotton or any other yarn types.
WHAT KIND OF DYE I NEED?
The type of yarn you choose for your project will determine the type of dye you require.Now for example, if you are working on a wool yarn or protein-based yarn which are extracted from sheep or other animals including goats and rabbits then you will acid dyes.Any other dyes as in natural dyes won’t are able to soak into wool yarn. so acid dyes with mordant or a natural acid substance like vinegar can help you get through.On the contrary, if you want to dye cotton fibers then natural dyes will be just fine!
CAN I DYE ACRYLIC YARN?
Earlier these days acrylic or polyester yarns weren’t dyeable. In fact, there are still many professional craftsmen and textile experts who don’t prefer acrylic yarn for dying purpose.But in recent days there are plenty of manufacturers who are coming up with newer ideas to construct a suitable dye only for acrylic yarn.On top of that jacquard has recently launched its iDye Poly dyes specifically for nylon and polyester blends. Hence if you have access to these particular dyes which are strategically crafted for polyester then you can dye your acrylic yarns too.
DOES WEIGHT MATTER?
Remember I told you about the yarn dyeing workshop? Well, a few months ago I went to a workshop for learning a few techniques on dyeing yarn with natural spices.So, while discussing this topic I got to acknowledge that in yarn dyeing weight or load capacity doesn’t matter. May it be a bulky pile of yarns or supremely light ones.If your techniques and dye application tactics are right then upholding the weight perimeters is redundant.
CAN I WASH MY YARN?
You can wash your yarn, in fact, you should. Yarn that comes with washing availabilities trumps on other non- washable yarns. Cotton blends or superwash yarn allows machine wash and tumble dry.After figuring out all the questions you will get a concrete image of the things you exactly need.
Quick and Easy Steps for Hand Dyeing Yarn At Home – From Scratch!
Before you commence you can watch a live demonstration of different yarn sanctuary or alpaca farms where rookie hand dyers enroll in yarn dyeing workshops. If that seems tedious and time-consuming then you can directly jump to process with this instruction!
Also, remember that diversity is inevitable as there are plenty of dyeing strategies and they vary from one type to another.
Moreover, the outcome is also different and depends on the process you act upon.
Hence, if you feel anything perplexing or consider the outlined ways inconvenient for you then you are open to options!
Lastly, when you are hand-dyeing make sure you use low-cost yarn dyeing materials as it’s lucrative and ensures the equity.
Step 1: Accumulate the Materials
First thing first you have to grab all the necessary materials and place them in a fairly spacious place where you are hoping to initiate the operation.
The space doesn’t need to be too spacious as long as you aren’t working in a group of a couple of yarns at once. A stable surface with moderate storage availability would be enough. Now lets glance over the materials you will need.
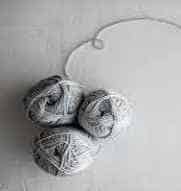
Yarn

As I have already mentioned that natural yarn fiber is one of the ideal choices when it comes to hand dyeing. You can choose whichever yarn count you want. But remember –
For a particulard depth of shade, finer yarns will require more dyes compared to coarser yarns if their weight is the same.
So, with that being said, I will suggest you get cotton or wool yarn in hand from a nearby notion shop. Make sure to inspect the yarn before buying.
However, if you have already made your mind to work on polyester yarn then I will assert some dominance to change your decision. Because trust me! It doesn’t worth your labor.
In fact, the second you smear some color, it immediately peels off from the work surface. Wait! Have you ever applied paint on plastic? Yes, that’s that! The color flakes off instantly. Remember we are not using fabric paint for clothes, we are going with dyes.
So, natural yarn it is!
Containers

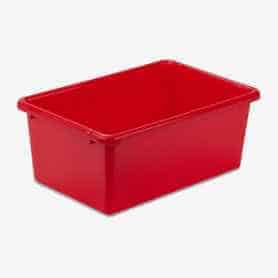
Secondly, you will need a spacious container that can hold the yarn properly. However, if you are working on smaller batches then a small container will also work in order to soak your yarn. hence it depends on the quantity and dimension of your yarn that you are willing to submerge in the dye solution.
Also, soaking containers and painting containers works differently.
For example, if you want a container to paint your yarn then it’s better if you choose a flat-surfaced container. In contrast, if you want to soak your yarn then the container should have enough depth and a siding to hold enough water.
Dye

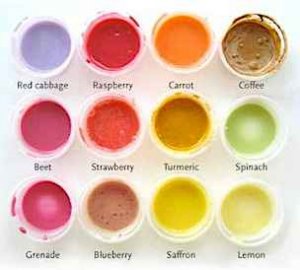
As today we are focusing on inexpensive dye materials I would recommend using natural dyes that can be easily extracted from nettles, avocado skins, onion peels, flowers, and berries. You can also purchase Wilton icing frosting colors that are available in a whole spectrum of different colors. Initially, you can pull over any shade you want. Be it ombre, gradient, or solid.
Moreover, if you are living in the UK region then you can try kool aids food coloring which is not only cost-effective but also ensures permanency.
Acid or Mordant

This material is optional unless you are working on wool or protein-based yarn. so here if you are willing to dye your wool yarn then you need to soak it in an acid bath.
And speaking of acid you might feel intimidating with the aftermaths or the consequences if you fumble! But! it’s not as much scary as you think. If you are using a strong acid, then it’s advised to wear gloves and other safety equipment.
However, if you don’t want to encounter these complexities then you can switch to white vinegar.
Also, some dyes are comprised of acidic elements. In this regard, you don’t need to incorporate more or undergo any acid bath.
One more thing which you might have heard is that associating mordants while soaking your yarn helps to retain the same colors instead of hazing after you apply natural dyes.
Well, it’s true but it’s not something you should include while hand-dyeing at home because of its toxicity. Though vinegar isn’t a source of mordant or doesn’t work like it entirely still it contributes to assuring its color consistency.
Squeeze Bottle

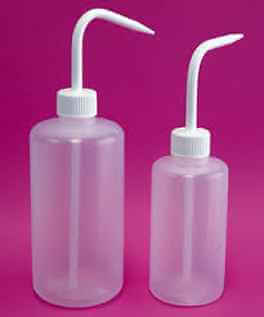
Lastly, you will need a squeeze bottle to mix the dye colors (if you are working on more than one color and want different color in specific patterns)
Step 2: Drown Your Yarn in Vinegar Solution
Take out your container and place your yarn into it. now, gradually pour ample water to immerse the yarn entirely. After that, it’s time to give it an acid bath!
And, in order to do that you have to mix 3 tbs of white vinegar and wait until 30 approximate minutes. It’s important to let it rest for an hour so that the acid solution reaches in every strand of the yarn and becomes well saturated.
Step 3: Prepare the Work Surface
While your yarn is soaking in an acid bath you can take the preparation for the work surface. To prepare it you will need a plastic sheet or a plastic wrap. now spread it all over the table or any stable ground.
Here, you can skip using the plastic wrap if you are working on a messy table. But if your table is clean and you don’t want any stain on it then it’s highly recommended to use plastic sheets.
Step 4: Color Blend
Now it’s time to mix the colors using the dye colour mixing chart.
Grab your dye colors, squirts, spoons, and cups if you want to blend different colors to attain a ombre or gradient pattern on your yarn.
Moreover, while choosing your colors you don’t need to restrict yourself from anything. This process is flexible.
You can try pink, yellow, golden, orange, or a mix of orange teal or aqua. But while mixing those colors use a spoon to maintain the proper measurement of 1 or 2 tsp of each color.
Now, when you are done mixing the dye colors its time to add white vinegar (1tbsp) and warm water (2 cups) into the mix. I have said it once and will say it again then mixing vinegar will ensure that the color stays longer to the fiber.
So, try not to skip this step.
Lastly, penetrate the mixed dye colors in your squirt bottles so that the application comes handy.
Step 5: Time to Tint!
Now as you are done mixing the dye colors its time to pain the yarn. here take out the yarn from the dishpan or the container. Make sure you squeeze out the dripping water as much as you can although it should be a little damp to absorb the color.
So, keep it slightly wet. After that, spread over the slightly damp yarn on the plastic wrap work surface and start adding colors through the squirt bottle. See the reason why you need to use a squirt bottle is to assure that each color goes where it’s supposed to.
Here you can create a grid in your mind or separate the yarn in individual sections if you want different colors in a different area or design them like a multicolor rainbow.
After applying the color with your squirt bottle it’s time to use your fingers to caress the color gently into the fiber so that it sticks and absorbs well.
Moreover, if you want each color to mix with the other on their edges then you can let it overlap by putting some extra color. It will penetrate by itself and merge with another color batch.
Step 6: Apply Heat for Permanency
To obtain a long-lasting color you need to apply heat. Here you will need a microwave and that same work surface to wrap the color-soaked yarn.
After covering the colored yarn properly put it in the microwave and let it sit in medium heat for 2 or 3 minutes. If you are working with a bunch of yarn at once then you can alter the heat setting to high. Once it’s done let it rest until cooled.
Step 7: Wash and Dry
I hope your yarn is already cool by now. Hence, it’s time to wash and dry! Now, take your dish tub or any large container and add enough water in order to wash off the excess color from the yarn.
You can also add shampoo or a few drops of a dishwasher for more effective results. make sure the water is not warm by any chance as it can damage the solidity and distort the color contrast as well.
Now, keep changing the sides of your yarn exactly like you do when washing your clothes. But don’t be so hasty or agitated while doing so. Remain gentle and continue washing until the water drops appear transparent.
Once, you are done rinsing out all the excess hang them outside on a clothesline to dry. Remember that the natural drying process works best when it comes to yarn. Thus, don’t try any other heat drying alternative out of curiosity.
Lastly, when it’s done drying you can now use your color yarn in your project.
FREQUENTLY ASKED QUESTIONS
How can I dye yarn with kool-aid?
To dye with kool-aid you need to follow the instruction that comes with the package. If it’s still vague to you then follow these processes: mix the kool dye powder into warm boiling water and plunge your yarn into it. after that apply heat with your microwave or you can also use the stovetop in order to set the color.
What are the cheapest dyes for yarn?
All-natural dyes, food colorings are affordable for yarn dyeing at home. However, to get the maximum color fastness on polyester yarns, you’ll require a specific dye for polyester fabric, which may cost a little.
Is hand-dyeing yarn profitable?
If you want to jump on the hand dyeing bandwagon and thinking to make a living through it then the answer is no! because if you want to sell them in wholesale then how many skeins you have to hand dye to satisfy the demand and expect a proper wage? I mean you can’t even dye that much yarn let alone rendering them and making a decent living. Hence, it’s better if you limit itself to residential use only.
Is adding white vinegar compulsory?
Well, it’s not compulsory but it’s highly recommended if you yearn for a long-lasting color effect.
What are nettles in hand dyeing?
Stinging nettles were used for medicinal purposes or pain relief purposes back in the days. But nowadays in hand dyeing, you can use it as a botanical dye as it emits a soft green hue.
What are the end-uses of hand dyed yarn?
Well, you can make patterned fabric of different knitting structure, or you can make woven fabrics using manual weaving looms.
Bottom Line
Alright! Seems like we have reached the end. So that was all for your hand dying yarn at home guide. However, if you can try other hand dyeing techniques like speckling, reverse speckle, lotus and merlot, and what not!
The sky is the limit. Always remember that when it comes to playing with the colors its water to go beyond!
REFERENCES

