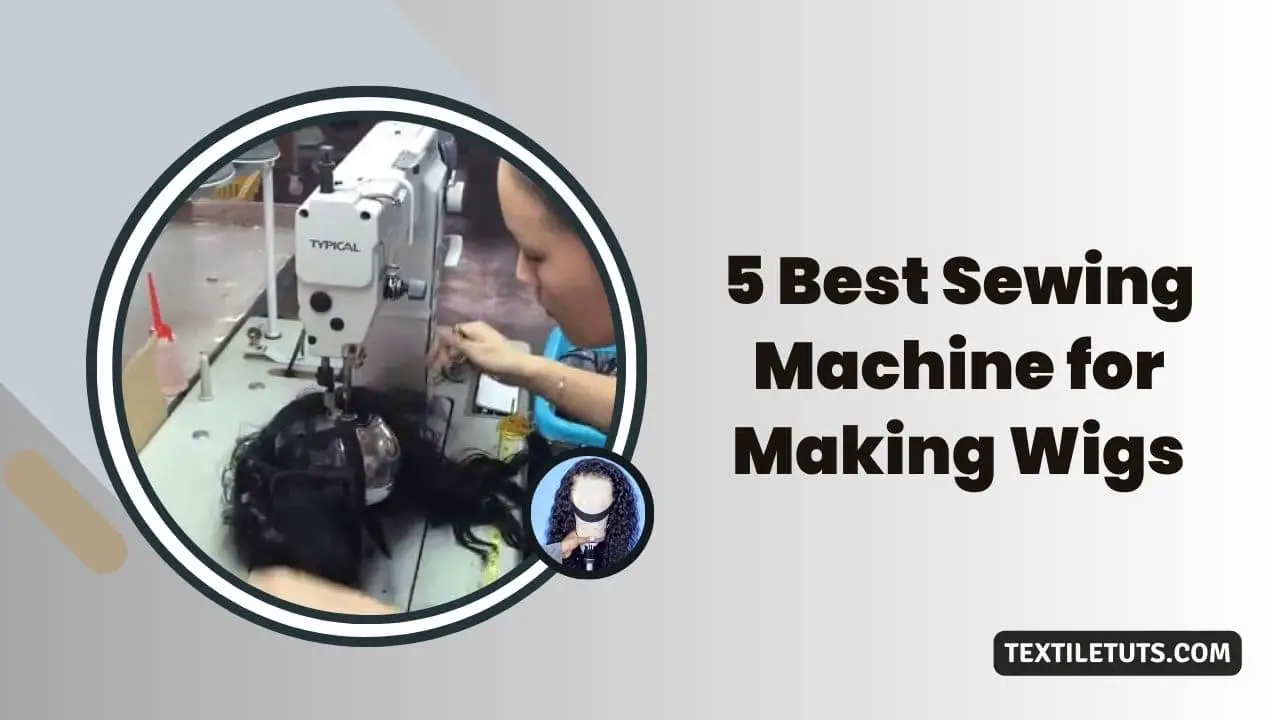
5 Best Sewing Machine for Making Wigs
The Brother CS6000i is the best sewing machine for making wigs, offering 60 built-in stitches including a dedicated zig-zag pattern, an automatic needle threader, jam-resistant bobbin, and a beginner-friendly LCD interface — all at an affordable price point. For faster stitching at 1,100 SPM, the SINGER 4423 is the top alternative, while the Brother PQ1500SL suits professionals needing 1,500 SPM maximum speed with an extended sewing bed for larger projects.
This guide ranks the 5 best sewing machines for wig making based on zig-zag stitching capability, stitch speed, ease of use, and value. Each machine below excels at the two functions essential to wig making: zig-zag stitching for attaching wefts and reverse sewing for securing stitch ends.
Growing up, I watched friends spend hundreds of dollars on wigs for cosplay. When I could not afford one, I made my own using a sewing machine — though my first attempt with an inadequate machine produced poor results. After testing dozens of machines, I identified the models that actually deliver professional-quality wigs.
Quick-Reference: What to Look for in a Wig-Making Sewing Machine
| Feature | Why It Matters for Wig Making | Recommended Spec |
|---|---|---|
| Zig-zag stitching | Essential for attaching hair wefts to the dome cap without damaging hair strands | Must have; adjustable width 5–7 mm |
| Stitch speed | Faster speed = faster project completion; thick wigs slow down slower machines | 850+ stitches per minute (SPM) |
| Reverse sewing | Secures stitch ends so wefts do not come loose | Must have |
| Automatic needle threader | Reduces setup frustration; essential for beginners | Highly recommended |
| Jam-resistant bobbin | Prevents thread tangles mid-project; critical for continuous weft sewing | Top-load drop-in bobbin preferred |
| Presser feet included | Zig-zag and buttonhole feet handle wig-making tasks directly out of the box | Includes zig-zag foot |
The 5 Best Sewing Machines for Making Wigs
These machines excel at wig making due to their built-in stitch styles, ease of use, faster operation, and free arm convenience for smaller projects.
| Machine | Type | Speed (SPM) | Built-in Stitches | Stitch Width × Length | Key Wig-Making Feature |
|---|---|---|---|---|---|
| Brother CS6000i | Computerized | 850 | 60 | 7 mm × 5 mm | LCD display + automatic needle threader; best all-around value |
| SINGER 4423 | Mechanical | 1,100 | 23 | 6 mm × 4 mm | Fastest speed; 60% sturdier motor for thick wigs |
| Brother XM2701 | Mechanical | 800 | 27 | — | Lightest (12.6 lbs); most budget-friendly |
| Brother PQ1500SL | Mechanical | 1,500 max | 155 | 7 mm × 5 mm | Extended sewing bed for larger hair extensions; 7 presser feet |
| JUKI TL-2000Qi | Mechanical | 1,500 | Straight only | 6 mm | Industrial aluminum construction; zero vibration; LED lighting |
1. Brother CS6000i Sewing and Quilting Machine
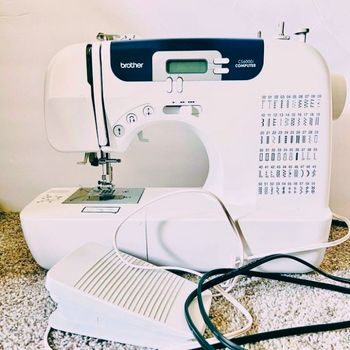
Features
- Type: Computerized
- Speed: 850 Stitches Per Minute
- Built-in Stitches: 60
- Stitch Length x Stitch Width: 5 mm x 7 mm
The Brother CS6000i includes 60 built-in sewing stitches, including decorative stitches. For wig making, you will need the zig-zag stitching style. Select the stitching style by pressing the button on the machine’s body before starting your wig project.
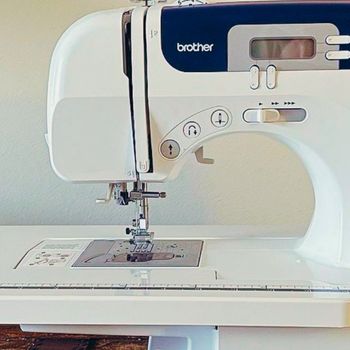
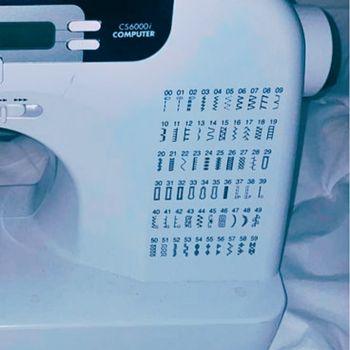
The chosen stitch style appears instantly on the LCD display of the Brother CS6000i. The automatic needle threader eliminates the need to manually thread the needle, making this machine accessible for beginners and experts alike.
The jam-resistant drop-in top bobbin ensures consistent stitching without thread jams. The included presser feet cover buttonhole, monogramming, and zig-zag stitching tasks. This machine delivers professional results for wig making projects.
PROS:
CONS:
2. SINGER 4423 Sewing Machine

Features
- Type: Mechanical
- Speed: 1,100 Stitches Per Minute
- Stitches Number: 23
- Stitch Length x Stitch Width: 4 mm x 6 mm
The SINGER 4423 sewing machine features a sophisticated grey profile. Most households have at least one mechanical sewing machine from Singer. The brand is immensely prominent and represents heavy-duty quilting built to last for years of regular use.
This machine costs more than the Brother CS6000i, but its efficiency delivers excellent value. With 1,100 stitches per minute, the SINGER 4423 completes wig-making tasks in significantly less time.
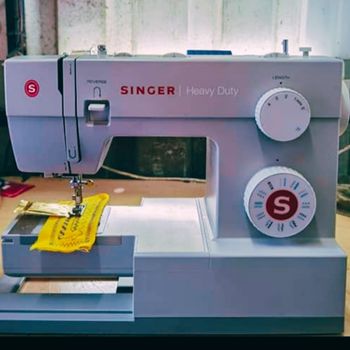
For wig making with the SINGER 4423, you use the zig-zag stitching style. The high speed allows you to complete your wig project quickly and efficiently.
The motor is 60% sturdier than standard models, distributing superior piercing power for thicker seams. When working with multiple layers and thick hair strands, you will not worry about breaking needles. This machine withstands thick strands and completes tasks without frustration. The flat-type sewing bed is ideal for making wigs at a fast rate.
PROS:
CONS:
3. Brother XM2701 Sewing Machine
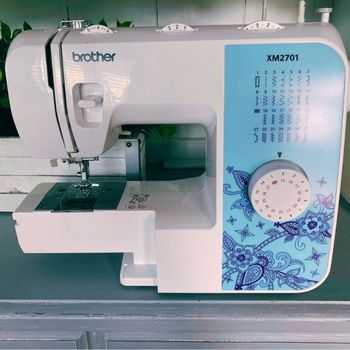
Features
- Type: Mechanical
- Speed: 800 Stitches Per Minute
- Number of Stitches: 27
- Weight: 12.6 lbs (5.7 kg)
The Brother XM2701 weighs only 12.6 pounds (5.7 kg) and offers a highly competitive price point. This lightweight design delivers excellent value for the money.
The lightweight construction benefits you when seeking a portable sewing machine suitable for utility stitches and DIY projects. This machine excels at basic wig-making tasks while remaining easy to transport and store.
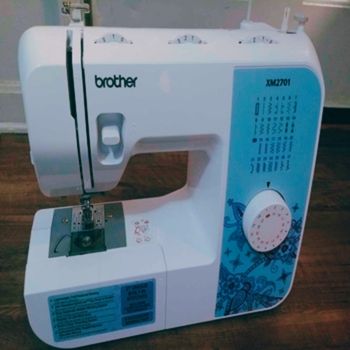
For hair extensions with this machine, you select the zig-zag sewing pattern from the 27 built-in stitches. Once chosen, you push the wefts of your wig through the needle. Within seconds, your wig is ready with stitches that will not come loose.
This economical sewing machine guarantees stable and consistent stitches. Poor stitching causes the best thread for wig making to come loose, but the Brother XM2701 prevents this issue. The included instructional DVD helps you understand the using method and specifications precisely. These features define a quality sewing machine for hair wigs.
PROS:
CONS:
4. Brother PQ1500SL Sewing and Quilting Machine
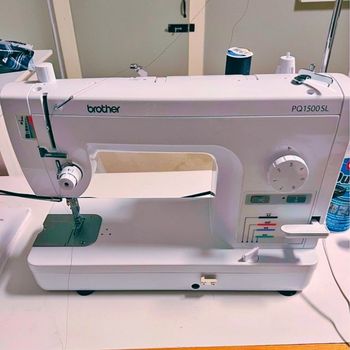
Features
- Type: Mechanical
- Speed: 850 Stitches Per Minute (1,500 maximum)
- Number of Stitches: 155
- Stitch Length x Stitch Width: 5 mm x 7 mm
The Brother PQ1500SL is relatively heavy and carries a higher price tag than other options. For those seeking a budget-friendly machine with storage convenience, this may not be the ideal choice.
However, for wig making with a flexible budget, this machine excels. With a maximum sewing speed of 1,500 stitches per minute, you finish sewing tasks within minutes. The extended sewing bed accommodates wider and longer hair extensions with ease.
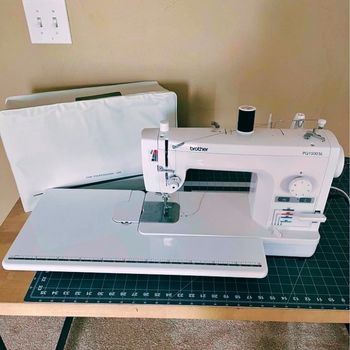
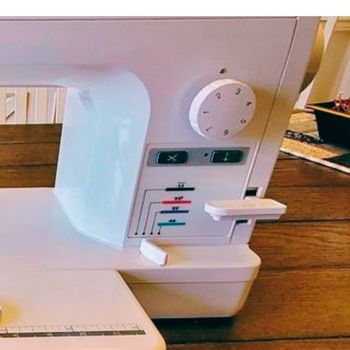
The extension table allows you to work on wider and longer hair extensions. Select the zig-zag sewing style and follow the operating instructions to achieve excellent results.
This machine ranks among the best Brother sewing machines for thick fabrics and serves as an excellent sewing machine for marine vinyl. All your sewing tasks become effortless with this versatile device.
PROS:
CONS:
5. JUKI TL-2000Qi Sewing and Quilting Machine
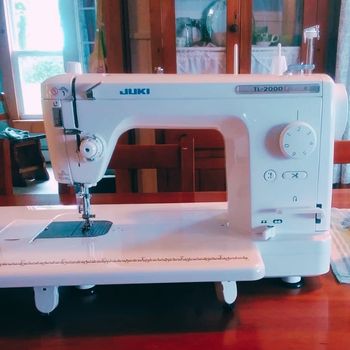
Features
- Type: Mechanical
- Speed: 1,500 Stitches Per Minute
- Built-in Stitches: Straight stitches only
- Stitch Length: 6 mm
The JUKI TL-2000Qi enables one-pedal operation for controlling speed intensity. Pressing the pedal harder increases sewing speed proportionally.
This industrial wig sewing machine delivers utmost control over the entire operation. You complete tasks with precision and ease using the adjustable speed settings.
The wig-making process remains consistent across machines. First, evaluate all parts and configurations of your JUKI TL-2000Qi. Then, locate the zig-zag stitching style on the control panel.
If zig-zag stitching is not immediately visible, consult the instruction manual for guidance. The JUKI TL-2000Qi delivers 1,500 stitches per minute, enabling you to complete projects smoothly. LED lights provide a clear, enhanced view during sewing. Beyond wigs, this machine handles other projects such as the Ellen Griswold white keyhole blouse.
PROS:
CONS:
Wig Making Process Using a Sewing Machine
This section covers the easiest method for making your own wig using a sewing machine. Ensure you understand sewing basics to prevent any inconvenience during the process.
Grab Some Hair
First, gather your hair materials. You can use a frontal or closure, then pair it with several bundles of hair. You may use equal-length strands or longer pieces depending on your preference. A typical configuration uses 2 bundles at 6 inches and 2 bundles at 4 inches in length.
Get a Wig Cap
Next, take a wig cap, which is a mesh dome where you attach the weft. Use a white or metallic marker to draw lines on the cap indicating where you want to attach the weft.
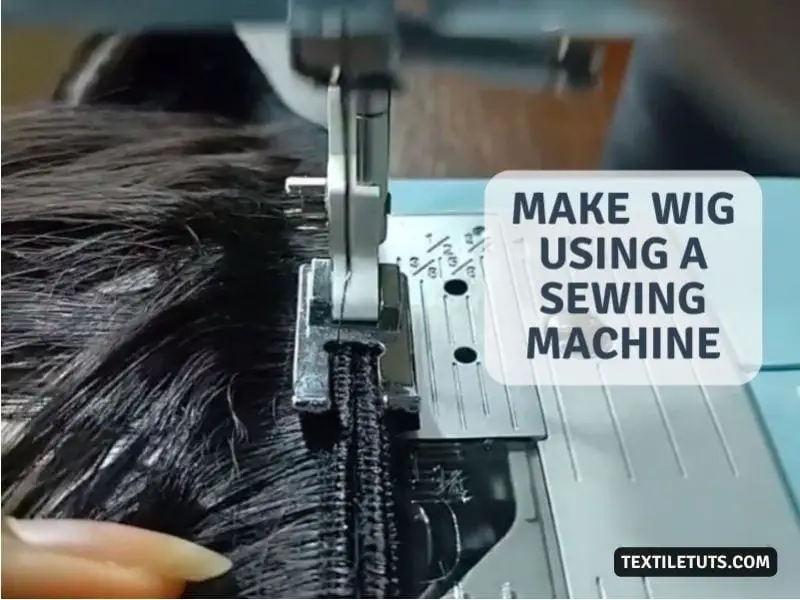
Start Sewing Using the Machine
The most crucial step in machine wig making is doubling the weft. Choose the zig-zag pattern on your sewing machine, lay the doubled weft underneath the presser foot, and proceed with sewing. Continue until you reach the end of the weft. Repeat this process with all hair bundles.
Sewing the Weft or Strand of Hair onto the Mesh Dome Cap
Place the dome cap under the presser foot of your sewing machine. Take the weft and place it on the marked lines of the dome cap. Align everything properly, lower the presser foot, and start sewing using the zig-zag stitching style.
Provide Some Tension
This step is optional but ensures stability. Apply slight tension while stitching hair strands onto the dome cap. Avoid dragging or stretching the cap, as this causes shrinking. Pause periodically to check weft alignment.
Reverse Sewing
If your machine has a reverse sewing function, activate it to secure the ends so they do not come loose. After completing this, cut the weft and thread using the thread cutter.
Take a Mannequin Head
Secure a mannequin head for assembling the wig. Pin down the frontal or closure and hand sew it in place. Sew through both the frontal/closure and the dome cap for a secure attachment. Continue until the frontal or closure is properly attached to the wig.
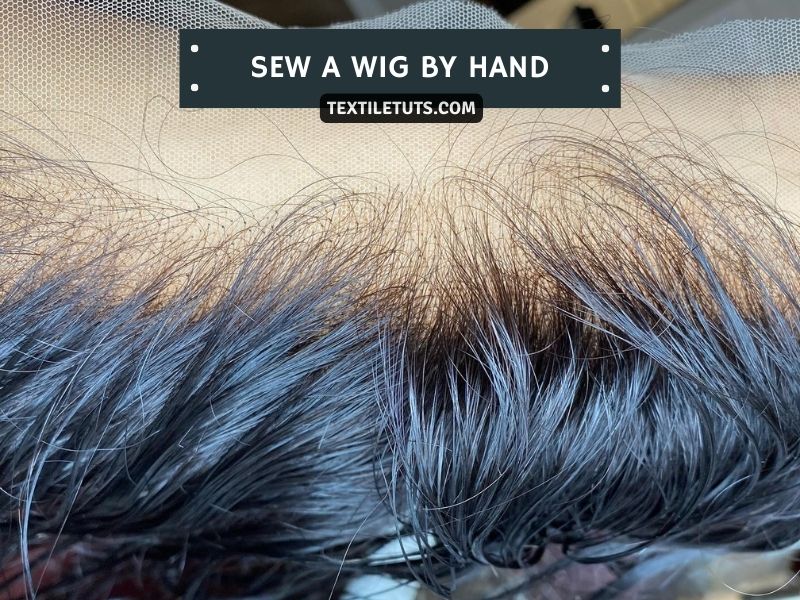
Hand Sewing Wigs: A Step-by-Step Guide
If a sewing machine costs too much for your budget, try this hand-sewing process instead.
What You Need
Prep Your Mannequin Head
Place the dome cap over the mannequin head and ensure it is centered. Use two T-pins at the nape of the wig cap to hold it in place, right where your natural hairline would end.
Attach the Closure or Frontal
Position your frontal or closure on top of the dome cap, centered properly. Pin or clip it in place, keeping the front 1/4 inch in front of the cap. Once secured in the center, pin down the sides working around to the dome cap. Temporarily pin or clip the frontal or closure up and out of the way.
Mark the Weft Placement
Use your marker to draw where you want your wefts sewn. First, trace around the frontal or closure on the dome cap. Then, draw lines to guide your weft placement. If sewing by hand, draw lines slightly closer together than if using a machine. Consider your bundle count when spacing the lines.
Thread the Needle
With your curved needle and thread, cut approximately 30 to 40 cm (roughly an arm’s length) and run the thread through the needle. Ensure the needle and thread are even, then tie two knots at one end to secure them.
Sew the Wefts
Starting at the bottom of the dome cap, align your first weft with the marked line. Sew the weft to the cap, creating a stable knot at the beginning and end of each weft track. Sew through the cap and around the weft track to maintain longevity.
Continue Sewing Following Your Guided Lines
Double knot at the start and end of each row, following your drawn lines for proper spacing. Once you have covered the entire head, untie the frontal or closure and comb the hair together.
Congratulations on Making Your First Wig
Now that you know how to sew a wig by hand, you can create your own custom hairpieces to fit your personal style. Happy wig making!
The Best Thread Type for Wig Making
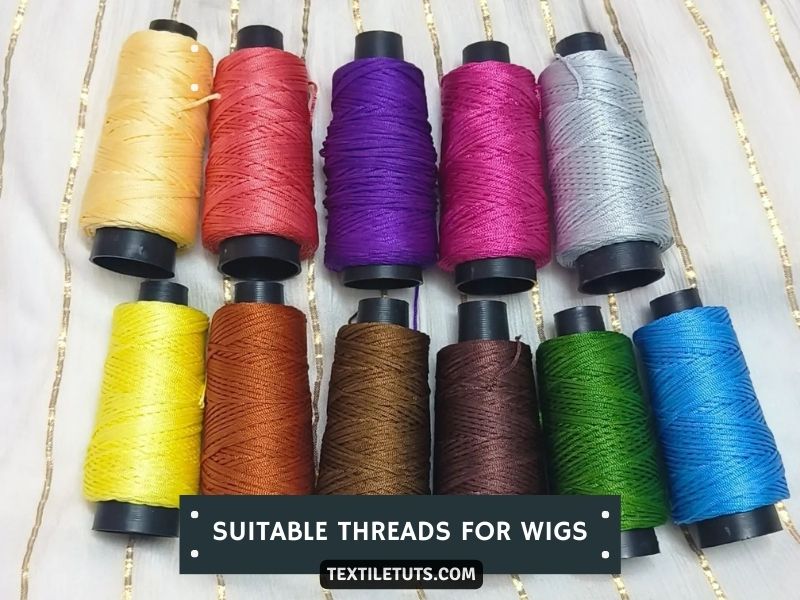
Several thread types work for wig making, including cotton, polyester, and nylon.
You must first understand the requirements of wig making threads.
The key requirements include:
Nylon thread is the best choice for wig making. While it is not as breathable as cotton, the other properties of nylon thread exceed cotton and make it the first choice for most hair stylists.
Polyester threads have a moisture regain of 0.4% compared to nylon’s 4.0%. This makes polyester inferior to nylon for wig making. Additionally, nylon exceeds polyester in strength and durability. These properties make nylon the definitive choice for professional wig making.
Frequently Asked Questions
What is the best sewing machine for making a wig?
Wig making involves both hand sewing and machine sewing. You can sew an entire wig using your hands, but you cannot machine-sew by hand. Since wig making requires zig-zag stitches and reverse stitching, the Brother CS6000i Sewing and Quilting Machine excels in every measurement category. This machine makes the strenuous task of wig making extremely fast and effortless.
What are the 8 different types of sewing machines?
The 8 types of sewing machines include the standard sewing machine, the overlocker, the serger, the cover stitch machine, the heirloom sewing machine, the embroidery machine, the quilting machine, and the specialty sewing machine.
Each type serves a unique purpose for different stitching tasks. An overlocker creates neat seams on fabric edges, while a cover stitch machine hems stretch fabrics effectively.
What are some causes of wig bunching up?
Wig bunching is an annoying problem familiar to many wig wearers. Multiple factors cause this, but improper hair care ranks as the number one reason why wigs bunch up.
Improper care leads to tangling or matting, which causes bunching in certain areas. If the wig is not properly washed and conditioned, it becomes dry and brittle. This causes the fibers to stick together and bunch up.
What is the difference between single and double sewing machines?
A single sewing machine has one needle. A double sewing machine creates smaller, more precise stitches and has different abilities for sewing things together or for decorative purposes. The main difference is that double sewing machines have two needles.
One needle provides limited capabilities compared to the wider stitch on the backside of double machines. Double machines reinforce seams and prevent breaking points in certain fabrics, especially lightweight materials such as denim.
How to sew two wigs together for cosplaying?
Final Thoughts
These five sewing machines represent the best options for making wigs from scratch. By following this method, you can sew wigs using any of these machines. For additional help, leave a comment below.
References
- The following authoritative sources provide additional information on garment manufacturing technology and sewing machine specifications:
- Booth, J. E. (2015). Garment Manufacturing Technology. Elsevier Science. Published by Woodhead Publishing.
- Carr, H., & Latham, B. (2008). Technology of Clothing Manufacture (4th ed.). Wiley-Blackwell.
- Brother Industries, Ltd. (2024). Sewing Machine Technology Guide. Brother USA.
- Singer Company L.L.C. (2024). Sewing Resources and Tips. Singer.


