
Why Does My Sewing Machine Keep Jamming Underneath?
Your sewing machine jams underneath most commonly because of a damaged or incorrectly installed needle, incorrect thread tension settings, lint buildup in the bobbin and hook assembly, improper feed dog alignment, or using the wrong needle size for your fabric type. These issues disrupt the thread loop formation and cause the top thread to tangle with the bobbin thread, creating the characteristic bird’s nest of jammed thread beneath the fabric.
This guide provides step-by-step troubleshooting and maintenance guidance to fix every cause of underneath jamming and keep your machine running smoothly.
The sewing machine is a complex piece of machinery, and there are several specific conditions that reliably cause it to jam. Identifying the root cause is the first step toward a permanent fix.
Quick-Reference: Top 5 Causes of Underneath Jams
Bookmark this checklist for fast troubleshooting whenever a jam occurs.
- Damaged or bent needle — Replace every 6–8 hours of sewing; a damaged needle eye frays thread and creates nodules that lodge in the hook assembly
- Incorrect thread tension — Set top tension to 4–5 for medium fabrics; too loose creates loops, too tight breaks thread
- Clogged bobbin and hook assembly — Clean with a soft brush every 2–3 bobbin changes; lint restricts hook rotation and changes timing
- Wrong needle for fabric — Use size 100/16–110/18 for denim, 60/8–70/10 for silk; mismatched needles deflect and break thread
- Bobbin inserted incorrectly — Must rotate counterclockwise on drop-in bobbins; the latch must fully engage on front-load bobbins
Common Causes of Sewing Machine Jams
The sewing machine is a complex piece of machinery, and there are several specific conditions that reliably cause it to jam. Identifying the root cause is the first step toward a permanent fix.
Damaged Needle
A bent or dull needle is one of the most common causes of jams. A damaged needle deflects the thread path, causing the top thread to loop excessively and tangle with the bobbin thread. According to standard sewing machine maintenance guidance, needles should be replaced after every 6–8 hours of active sewing or immediately after hitting a pin, zip, or other hard object. A damaged needle eye will fray thread and create nodules that lodge in the hook assembly, leading to a jam within 2–3 stitches.
The Needle Is Not Properly Installed
If the needle is not fully inserted into the needle bar, the needle bar will not reach its lowest position, the thread will not catch properly, and the machine will jam within the first few stitches. The needle must be pushed up until it contacts the needle bar screw and then secured. A partially inserted needle creates an offset between the hook timing and the needle eye position, which breaks the thread loop formation on every stitch.
Feed Dogs and Hook Timing
Incorrect timing between the sewing machine’s hook and feed dogs creates jams. When the hook timing is off, the hook fails to catch the top thread loop correctly, which causes the needle thread to wrap around the bobbin case instead of forming a proper lockstitch. Simultaneously, if the feed dogs are set too low, they fail to grip the fabric and allow it to bunch up under the presser foot. If the feed dogs are set too high, they push the fabric forward unevenly, creating gathers that jam at the needle plate.
Thread Tension Imbalance
An imbalance between the top thread tension and the bobbin thread tension is one of the leading causes of jams. The top thread tension on most home sewing machines is controlled by a tension dial that ranges from 0 to 9. Standard tension for medium-weight woven fabrics is typically 4–5. When the tension is too loose (below 2), the top thread floats on the surface without engaging the bobbin thread, creating loops that tangle. When tension is too tight (above 7), the thread snaps against the tension discs and breaks, leaving a jammed nest of broken thread in the bobbin area.
Fabric Type and Thickness
Using an incorrect needle for the fabric causes jams. Denim requires a size 100/16 or 110/18 needle, leather requires a size 90/14 or 100/16 leather needle, and lightweight silk requires a size 60/8 or 70/10 microtex needle. Using a size 80/12 universal needle on denim results in the needle deflecting off the heavy fibers, breaking the thread, and jamming within 3–4 stitches. Thick multi-layer seams (such as in quilt sandwiching or hemming denim) require a Jeans Master or Heavy Duty foot to feed evenly without bunching.
Clogged Hook and Bobbin Area
Lint, thread snippets, and fabric dust accumulate in the hook assembly, bobbin case, and needle plate raceway after every 3–5 hours of sewing. This buildup restricts the hook’s rotation and changes the timing relationship between the hook and needle. Standard industry practice is to clean the bobbin case and hook assembly with a soft brush after every bobbin change or at minimum every 2–3 sewing sessions. Compressed air at 40–60 PSI is recommended for blowing lint from hard-to-reach raceways in the hook assembly.
Step-by-Step: What to Do When Your Sewing Machine Jams
When a jam occurs, immediately disconnect the power (for electric machines) or remove the hand crank (for manual machines) before investigating. Then follow this troubleshooting sequence in order.
Step 1: Inspect the Bobbin Area
Remove the bobbin case and check for tangled thread or lint accumulation in the raceway. Confirm the bobbin is inserted correctly — the bobbin case has a notch that must align with the raceway spring. On drop-in bobbins, confirm the bobbin rotates counterclockwise when pulled.
Step 2: Check the Needle and Thread Path
Remove the needle and inspect it for bends, dull points, or a damaged eye. Replace with a new needle of the correct size for your fabric. Re-thread the top thread from the spool through the tension discs, thread guides, and needle eye — re-threading is required because an existing jam often means the thread has slipped out of the correct path.
Step 3: Remove the Needle and Reinstall
Take the needle out and re-insert it fully into the needle bar until it contacts the needle bar screw. Secure it firmly. Then re-thread the machine completely, ensuring the presser foot is raised (open) so the tension discs are relaxed and the thread seats properly between them.
Step 4: Cut the Thread and Clear the Bobbin
If re-threading does not resolve the jam, cut the thread with scissors near the spool, then pull the remaining thread out from the tension discs, thread guides, and needle. Remove the bobbin case, clear all tangled thread, clean the raceway with a brush, and reassemble everything fresh.
How to Permanently Fix a Jammed Sewing Machine
Once the immediate jam is cleared, address the underlying mechanical issues to prevent the problem from recurring.
Check the Feed Dog and Hook Assembly
Inspect the feed dogs for bent or worn teeth — damaged feed dogs fail to grip fabric evenly and allow it to creep backward under the presser foot. Check the hook assembly for any thread wrapped around the hook post or hook raceway. Remove any debris with a brush. If the feed dogs do not raise when the feed dog lever is activated, the feed dog linkage may be disconnected and requires professional servicing.
Replace or Reinsert the Needle and Bobbin
Replace a bent or dull needle with a new one — do not reuse a bent needle even if it appears straight, as microscopic metal stress fractures weaken it enough to break mid-stitch and potentially damage the hook assembly. Inspect the bobbin case for cracks, a warped tension spring, or a worn bobbin seat. Replace the entire bobbin case if the tension spring shows any visible gap greater than 0.3 mm when closed.
Adjust the Tension Discs
Proper thread tension is set so that both the top thread and bobbin thread lock in the middle layer of the fabric. Test tension by sewing a seam on two layers of fabric and examining the stitches from both sides. If the stitches are too loose, the bobbin thread shows on the top surface — increase the top tension dial by one increment and retest. If the stitches are too tight, the top thread shows on the bottom surface — decrease the top tension dial by one increment and retest. A proper balanced stitch shows equal thread coverage on both sides.
Remove Any Thread Wrapped Around Components
Thread wraps around the bobbin winder, spool pin, or hand wheel after a jam. These wraps create drag that changes effective tension and causes subsequent jams. Inspect all rotating parts and remove any thread caught in or around them before sewing again.
Lubricate Moving Parts
Sewing machines require regular lubrication with machine oil (SAE 15W or SAE 20W) at designated points. Apply 1–2 drops of oil to the hook raceway, the needle bar bushing, and the feed dog pivot points. Wipe away excess oil before sewing — oil that contacts fabric or thread causes staining and thread degradation. Most home sewing machines require oiling every 25–30 hours of use or every 2–3 months with regular use. Never use WD-40 or motor oil, as these have incorrect viscosity and can damage plastic components.
Schedule Professional Servicing
If jams persist after addressing all the above causes, the machine requires professional servicing. Timing issues, a damaged hook, or worn gears cannot be repaired at home. Schedule a professional service every 12–24 months for machines used regularly, or every 36 months for occasional home use.
11 Causes of Bobbin Jamming and How to Fix Each One
Bobbin-related jams account for the majority of sewing machine jamming issues. Here are the 11 most common causes and their definitive solutions.
1. Thread Tension Is Set Incorrectly
Incorrect thread tension causes the bobbin thread to either slack excessively or pull too tightly, creating an uneven stitch that tangles and jams. The top thread tension dial should be set to 4–5 for medium-weight fabrics. If the bobbin thread shows on the top of the fabric, the top tension is too loose. If the top thread is pulled to the underside, the top tension is too tight. Adjust in increments of 0.5 on the tension dial and retest after each adjustment.
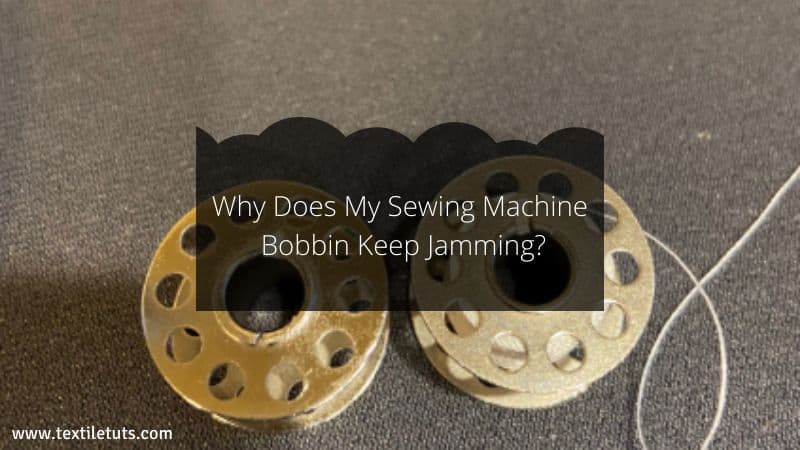
2. Bobbin Is Inserted Incorrectly
An incorrectly inserted bobbin causes immediate jamming on the first stitch. On a oscillating bobbin machine, the bobbin case must snap into the raceway with the latch fully engaged. On a drop-in bobbin machine, the thread must pass under the tension spring with the bobbin rotating counterclockwise. Consult your machine manual for the exact bobbin insertion orientation for your specific model.
3. Bobbin Case Is Dirty
Fibers, lint, and old oil accumulate in the bobbin case and alter the bobbin’s rotational friction. Clean the bobbin case with a soft-bristled brush (a new, clean paintbrush works well) after every 2–3 bobbin changes. Do not use compressed air inside the bobbin case as it can force debris into the hook bearing and worsen the jam.
4. Wrong Size Bobbin
Using an incorrect bobbin size for your machine causes the bobbin to sit too high or too low in the case, disrupting the thread tension geometry. Class 15 bobbins are used in most standard home sewing machines. Class 66 bobbins are used in many vintage machines. Check your manual for the exact bobbin type. Using a bobbin that appears to fit but is the wrong type (e.g., a Class 15J in a machine designed for a Class 15L) causes intermittent jams that are difficult to diagnose.
5. Needle Is Damaged or Bent
A bent needle creates an asymmetric thread loop that the hook cannot catch, resulting in a jam within 1–3 stitches. Even if a bent needle does not immediately jam, it accelerates hook wear by 300–400% because the needle deflects laterally and strikes the hook on every rotation. Replace damaged needles immediately.
6. Feed Dogs Are Damaged
Damaged feed dogs fail to move fabric forward at the correct rate, causing the fabric to stall under the presser foot and jam at the needle plate. Serrated feed dog teeth that are worn down to less than 0.5 mm in height cannot grip fabric reliably. Replace worn feed dogs through a qualified technician — feed dog replacement requires disassembly of the needle plate carrier.
7. Machine Is Not Oiled Properly
An inadequately lubricated hook assembly creates resistance that changes hook timing by 2–5 degrees, enough to cause consistent jamming. Apply SAE 15W sewing machine oil at the hook raceway bearing every 25–30 hours of sewing. Do not over-oil — excess oil drips onto fabric and creates stains, and pooled oil in the hook assembly collects lint and creates a more severe jam than before.
8. Fabric Is Too Thick for the Needle
Sewing thick fabric with an insufficient needle causes the needle to deflect and break thread on every stitch. For heavy denim (10–14 oz per square yard), use a size 100/16 or 110/18 needle with a Jeans foot. For leather (0.6–1.2 mm thickness), use a size 90/14 leather needle and a Teflon foot. Reduce presser foot pressure to the lowest setting when sewing heavy layers to allow the feed dogs to grip without pushing the fabric forward unevenly.
9. Stitch Width or Length Is Set Too Tight
Setting the stitch length below 1.5 mm on lightweight fabric causes the machine to over-stitch and bunch the fabric, creating a jam. Set stitch length to 2.0–2.5 mm for medium-weight fabrics and 3.0–3.5 mm for lightweight fabrics. When sewing thick layers, a longer stitch length (3.5–4.0 mm) allows the feed dogs to grip and advance the fabric without overloading the needle.
10. Machine Is Threaded Incorrectly
Threading errors — skipped thread guides, thread placed above the tension discs, or an unthreaded bobbin — cause jams that look identical to mechanical failures. Re-thread the machine completely from the spool every time a jam occurs. Raise the presser foot lifter before threading so the tension discs open and the thread seats properly between them.
11. Skipped Stitches Indicate Needle Position Problems
Skipped stitches indicate the needle is not reaching its lowest position or the hook is not timing with the needle correctly. This is caused by the needle not being inserted fully into the needle bar or by hook timing being off. Turn the hand wheel toward you until the needle is in its lowest position — the needle should be centered in the needle plate hole. If the needle appears off-center, remove it, reinsert it fully, and test again. If skipping persists, the hook timing requires professional adjustment.
How to Prevent Bobbin Jamming: Maintenance Checklist
Preventing bobbin jams requires regular maintenance and correct operating practices. Follow this checklist to keep your machine running jam-free.
Check Thread Tension and Bobbin Case Regularly
Test your stitch balance on a scrap of your project fabric before starting any new project. When upper thread tension is too loose, the bobbin thread appears on the right side of the fabric. When upper thread tension is too tight, the bobbin thread does not appear at all or the top thread breaks. Adjust the tension dial in 0.5 increments and retest until both threads interlock in the middle of the fabric. Inspect the bobbin case for lint and debris at every bobbin change.
Match Needle Size and Type to Fabric
Using the correct needle for your fabric is one of the most effective ways to prevent jams. The following table shows recommended needle sizes and types for common fabric weights.
| Fabric Weight | Typical Use | Recommended Needle Size | Needle Type |
|---|---|---|---|
| Sheer / lightweight | Silk, organza, chiffon | 60/8 – 70/10 | Microtex / Sharp |
| Lightweight | Quilting cotton, lawn, voile | 75/11 – 80/12 | Universal |
| Medium weight | Cotton, linen, rayon | 80/12 – 90/14 | Universal |
| Heavy weight | Denim, canvas, upholstery | 100/16 – 110/18 | Jeans / Heavy Duty |
| Knits / stretch | Jersey, spandex, swimwear | 75/11 – 90/14 | Ballpoint / Stretch |
| Leather | Full-grain leather, suede | 90/14 – 100/16 | Leather / Wedge |
Use the Correct Type of Bobbin
There are two main bobbin types: front-load (or side-load) bobbins that sit in a removable bobbin case, and drop-in bobbins that slide into a built-in holder. Class 15 and Class 66 are the most common home sewing machine bobbin sizes. Using the wrong bobbin type causes the bobbin to sit at an incorrect height, disrupting the thread loop geometry and causing consistent jams. Verify the bobbin type in your machine manual before purchasing replacement bobbins.
Avoid Sewing Too Many Layers at Once
Sewing more than 4–6 layers of medium-weight fabric at a single seam causes the needle to deflect laterally, the thread to break, and the fabric to bunch at the needle plate. When hemming thick fabrics like denim, sew one pass, then reset the fabric so the original seam feeds at the front rather than attempting to power through all layers simultaneously. Reduce presser foot pressure to 50–60% for multi-layer seams.
Keep the Machine Clean
Clean the bobbin case, hook assembly, and needle plate at every bobbin change. Use a clean soft-bristled brush to remove lint from the raceway. Apply a single drop of SAE 15W machine oil to the hook raceway bearing after cleaning. Wipe down the machine exterior with a microfiber cloth to prevent dust from settling on the thread path and tension discs.
Use High-Quality Thread
Low-quality thread sheds excessive lint that clogs the tension discs and hook raceway, causing jams. Use 100% polyester or 100% cotton mercerized thread from a reputable brand. Cheap thread has inconsistent twist levels, which causes it to slip through tension discs unpredictably. Replace thread spools that show fraying, excessive lint, or discoloration from age — thread deteriorates after 2–3 years of storage, especially in humid conditions.
Schedule Regular Professional Servicing
Even machines that appear to work correctly can develop timing issues that cause intermittent jams. A qualified technician can check hook timing, feed dog alignment, and tension disc wear during a routine service. Schedule professional servicing every 12 months for machines used weekly, or every 24 months for machines used monthly.
How to Install a Bobbin Correctly
The bobbin is an essential part of the sewing machine — without it, the machine cannot form a lockstitch. Installing it correctly prevents the majority of jamming issues.
Step 1: Wind the Bobbin Evenly
Wind the bobbin until it is 80–90% full — over-wound bobbins create excessive tension that causes bird’s nests and jams. The wound thread should be tight and even with no loose loops near the edges. Uneven bobbin winding is one of the most common causes of bobbin-related jams.
Step 2: Insert the Bobbin into the Housing
For front-load machines, place the bobbin in the bobbin case with the thread unwinding counterclockwise. The thread end should pass through the bobbin case tension spring and exit through the first thread guide. For drop-in bobbins, place the bobbin in the holder with the thread unwinding counterclockwise and pull the thread through the slot under the tension blade.
Step 3: Pull the Thread Through the Tension Spring
Thread tension for the bobbin is controlled by a small spring in the bobbin case. Pull the thread under the tension spring with the correct tension — the thread should pull with slight resistance but not bind. On most machines, a properly tensioned bobbin thread should unspool with a faint audible tone rather than going slack.
Step 4: Thread the Top Thread and Test
After installing the bobbin, re-thread the top thread completely and sew 5–6 test stitches on a scrap of your project fabric. Examine the stitches from both sides — both threads should appear in the middle layer of the fabric with no loops, tangles, or skipped stitches. If the test stitches are balanced, you are ready to sew.
Step 5: Troubleshoot Common Bobbin Problems
If the bobbin thread shows on the top, the top tension is too loose — increase the top tension dial by 0.5 increments. If the top thread shows on the bottom, the top tension is too tight — reduce the top tension dial by 0.5 increments. If both threads appear on the surface, the bobbin is inserted incorrectly or the bobbin case tension spring is damaged.
How to Prevent Sewing Machine Jams: Maintenance Schedule
Regular maintenance prevents the majority of sewing machine jams before they occur. Follow this maintenance schedule to keep your machine in peak condition.
Clean After Every 8–10 Hours of Sewing
Remove lint from the bobbin case, hook assembly, and needle plate area with a soft brush after every 8–10 hours of sewing. Do not use canned air inside the hook raceway — the propellant gas condenses into liquid that corrodes the hook bearing within weeks. A clean, dry brush is the safest and most effective tool for this task.
Avoid Excessive Pressure on the Presser Foot
Applying excessive downward pressure on the presser foot when starting a seam causes the fabric to compress and bind against the needle plate, creating a jam. Hold the thread tails lightly behind the needle and allow the feed dogs to advance the fabric at their own pace. For slippery fabrics like silk or satin, use a walking foot or even-feed foot to prevent the fabric from creeping backward.
Match Needle and Thread to Fabric
Using mismatched needle and thread for your fabric is a leading cause of jams. Heavy fabrics require heavy-duty needles and thicker thread (tex 30–tex 40). Lightweight fabrics require fine needles (size 60/8–75/11) and thin thread (tex 14–tex 20). Using a size 90/14 needle with thread that is too fine for the fabric causes the needle to deflect and create an irregular loop that the hook misses.
Test Fabric Compatibility Before Starting
Always sew a 10-stitch test on a scrap of your project fabric before beginning the actual seam. This test reveals tension issues, needle compatibility problems, and feed problems before they ruin your project. Fabers that are too thick for the machine’s feed system will show gathering or puckering in the test seam — address this by changing the needle size, reducing layers, or switching to a walking foot before proceeding.
Read and Follow the Machine Manual
Every sewing machine model has specific threading paths, tension ranges, and bobbin types. The manual provides the correct sequence for threading and the manufacturer’s recommended tension settings for different fabric types. Deviations from the correct threading path are a leading cause of jams that look identical to mechanical failures.
Inspect and Replace Worn Parts Regularly
Inspect the needle for dullness or damage before every project — a bent or dull needle accelerates hook wear and can damage the needle plate or hook assembly beyond repair. Replace the needle after every 6–8 hours of sewing. Inspect the bobbin case tension spring for wear every 3–6 months — a worn spring with a gap greater than 0.3 mm causes inconsistent bobbin tension and intermittent jams.
Schedule Professional Servicing
Even machines that appear to function normally develop subtle timing drift that causes intermittent jams. Professional servicing every 12–24 months for regularly used machines includes hook timing verification, feed dog alignment, tension disc inspection, and lubrication of internal mechanisms. Machines used heavily (more than 10 hours per week) should be serviced every 6–12 months.
Proper Storage Practices for Sewing Machines
Proper storage extends the life of your machine and prevents jams caused by dust, moisture, and component degradation.
Store in a Dust-Free, Climate-Controlled Environment
Store the machine in a dedicated cabinet, hard-shell case, or under a close-fitting dust cover. Avoid storing near windows where humidity and sunlight can degrade plastic components and cause thread to deteriorate. Ideal storage temperature is 15–25°C (59–77°F) with relative humidity below 60%. Temperature fluctuations cause condensation inside the machine that promotes corrosion of the hook bearing and electrical contacts.
Clean Before Storing
Clean the machine thoroughly before long-term storage — lint and thread snippets attract moisture and create a paste that corrodes hook raceways. Remove the bobbin and store it separately. Apply a light coating of machine oil to the hook raceway, needle bar, and feed dog pivot points before storing for more than one week.
Disconnect from Power When Not in Use
Unplug the machine when not in use to prevent electrical surges from damaging the motor and circuit boards. This also eliminates the risk of accidental starts that can injure fingers or damage the needle assembly.
How to Adjust Thread Tension on a Sewing Machine
Thread tension is one of the most critical settings on a sewing machine. Incorrect tension is the cause of the majority of jamming and stitching problems. Here is the definitive procedure for setting tension correctly.
Step 1: Consult the Machine Manual First
Every machine has a different tension dial numbering system and recommended ranges for specific fabric types. The manual provides the manufacturer’s baseline settings. Standard home sewing machine tension dials are numbered 0–9, with 4–5 being the default for medium-weight fabrics.
Step 2: Clean the Throat Plate and Needle Area
Thread tension can appear incorrect when lint accumulation in the throat plate creates drag on the bobbin thread. Remove the needle plate and brush out all lint from the feed dog area and raceway. Replace the throat plate and test the stitches before adjusting the tension dial.
Step 3: Adjust the Tension Dial
Set the tension dial to 4 (default) for medium-weight woven fabrics. To increase tension, turn the dial toward a higher number. To decrease tension, turn the dial toward a lower number. On most machines, the effective tension range spans numbers 1–9. Changes of 0.5 increments produce audible differences in thread pull — use small adjustments and test after each one.
Step 4: Test the Stitches on Scrap Fabric
Sew a test seam on two layers of fabric identical to your project fabric. Examine the stitches from both sides. A properly balanced stitch shows the needle thread and bobbin thread interlocked in the middle of the fabric with neither thread dominating the surface. If the bobbin thread shows on the top, reduce top tension. If the top thread pulls to the underside, increase top tension.
Step 5: Fine-Tune Until Both Threads Are Balanced
Adjust in 0.5 increments on the tension dial and re-test after each adjustment. The goal is a smooth, even stitch line with no loops, puckers, or thread-showing on either surface. Document the correct tension setting for each fabric type you use frequently.
How to Install a Presser Foot on a Sewing Machine
Using the correct presser foot prevents jams by ensuring even fabric feeding. Follow these steps to install a presser foot correctly.
Step 1: Disconnect Power
Unplug the machine before changing the presser foot to prevent the motor from accidentally starting and causing injury.
Step 2: Remove the Existing Presser Foot
Raise the presser foot lifter and push the presser foot release lever (located on the back of the presser foot holder) to release the foot. Slide the foot off the presser foot shaft.
Step 3: Align the New Foot with the Presser Foot Shaft
Hold the new presser foot with the flat side facing the presser foot holder. Align the crosswise notch on the foot shank with the horizontal pin on the presser foot holder.
Step 4: Lower the Presser Foot and Secure
Lower the presser foot lifter so the foot clicks into place on the shaft. Give the foot a gentle tug to confirm it is seated. Reconnect the power and test-sew 3–4 stitches on scrap fabric before beginning your project.
How to Lubricate a Sewing Machine
Regular lubrication prevents jams caused by mechanical resistance and component wear. Use only SAE 15W or SAE 20W sewing machine oil — these viscosities are specifically formulated for the close-tolerance bearings in sewing machine hook assemblies.
Step 1: Check the Oil Level Before Adding
On machines with an oil sight window, confirm the oil level is between the minimum and maximum marks. On machines without a sight window, remove the needle plate and look inside the hook raceway — the hook bearing should appear evenly coated with oil, not dry and not flooded.
Step 2: Apply Oil Only at Designated Points
Apply 1–2 drops of oil at each designated lubrication point — typically the hook raceway bearing, the needle bar bushing, and the feed dog pivots. Consult your machine manual for the specific oiling points for your model. Applying oil at non-designated points can drip onto fabric or thread and create stains.
Step 3: Clean the Oil Reservoir Every 6–12 Months
Remove old oil from the reservoir every 6–12 months using a lint-free cloth. Old oil oxidizes and becomes gummy, which increases drag in the hook assembly and can change hook timing. After cleaning the reservoir, add fresh SAE 15W oil.
Step 4: Change Oil Every 12–24 Months
Drain and replace machine oil every 12–24 months for machines used regularly. Oxidized and contaminated oil increases mechanical resistance and is one of the leading causes of hook assembly jams in older machines. After changing the oil, sew a test seam to confirm smooth operation before resuming normal projects.
How to Thread a Sewing Machine Correctly
Correct threading is essential — an improperly threaded machine jams on the very first stitch. Follow this sequence exactly.
Step 1: Raise the Presser Foot Lifter
Raise the presser foot lifter fully (this is the large lever at the back of the machine) so the tension discs open and the thread can pass between them without engaging the tension spring. This step is critical — threading with the presser foot down is the single most common threading error.
Step 2: Place the Spool on the Spool Pin
Place the spool on the spool pin with the thread unwinding in the direction specified by your machine (counterclockwise for most machines). Pull 15–20 cm of thread off the spool before threading into the first thread guide.
Step 3: Pass the Thread Through the Tension Discs
Guide the thread between the tension discs — you should feel slight resistance as the thread seats between the disc surfaces. Pull gently on both sides of the thread to confirm it is gripped by the tension discs. If the thread passes without resistance, the presser foot is still raised and the thread has not seated properly.
Step 4: Thread Through All Guides and the Needle Eye
Follow your machine’s thread guide diagram exactly — thread passes through each guide in sequence. Finally, insert the thread through the front of the needle eye from left to right (or as specified by your machine) and pull 10–15 cm of thread through to the back of the needle.
Step 5: Turn the Hand Wheel to Catch the Thread
Hold the thread tail and turn the hand wheel toward you (clockwise) through one full rotation. The needle bar rises, the take-up lever catches the thread, and the thread loop appears above the needle. Pull the thread loop upward and hook it through the bobbin case or under the finger that guides it to complete the threading path. Sew a test seam before starting your project.
How to Clean a Sewing Machine Thoroughly
A thorough cleaning every 25–30 hours of sewing prevents the lint accumulation that causes the majority of jams. Follow this complete cleaning procedure.
Step 1: Unplug the Machine
Disconnect the power cord before any cleaning or maintenance to prevent accidental motor starts.
Step 2: Remove Thread and Fabric Residue
Remove all thread from the spool pin, tension discs, thread guides, and needle. Remove any fabric scraps from the needle plate, presser foot, and feed dog area.
Step 3: Remove and Clean the Needle Plate
Remove the needle plate (usually two small screws) and brush out all lint from the feed dog teeth, feed dog slots, and needle plate opening. Use a dry, soft-bristled brush — never use a metal tool that could scratch the feed dog serrations.
Step 4: Clean Inside the Bobbin Case and Hook Assembly
Remove the bobbin and bobbin case. Brush lint from the hook raceway, hook bearing surface, and bobbin case tension spring. If there is old dried oil residue, apply a single drop of fresh oil to the hook raceway bearing and rotate the hook by hand to distribute it. Wipe away excess with a lint-free cloth.
Step 5: Reassemble and Test
Reinsert the bobbin and bobbin case, replace the needle plate, and insert a fresh needle. Re-thread the machine completely and sew a test seam to confirm smooth, jam-free operation before resuming your project.
Other Common Sewing Machine Problems
Beyond jamming, sewists encounter several other recurring problems that affect stitch quality and machine longevity.
Machine Sewing Backward
When a machine sews in the reverse direction, the stitch selector lever is engaged in reverse mode, the reverse lever is stuck, or the stitch width mechanism is damaged. On most machines, the reverse lever returns to neutral when released — if it does not spring back, it requires cleaning or repair. Sewing in reverse with a straight stitch for more than 2–3 stitches at a time places reverse stress on the stitch mechanism and can damage the reverse stitch linkage over time.
Skipped Stitches
Skipped stitches indicate the needle thread is not being caught by the hook, which causes jams if left unaddressed. The three most common causes are a dull or incorrectly inserted needle, incorrect threading, or incorrect presser foot pressure. Replace the needle, re-thread the machine, and test before resuming your project.
Broken Stitches
Broken stitches result from excessive tension (above 7 on a 0–9 dial for most machines), a needle size too small for the thread weight, or a damaged needle eye that frays thread. Reduce tension, change to a larger needle, or replace a damaged needle to resolve this issue.
Frequently Asked Questions
Why does my bottom bobbin keep getting jammed?
Bottom bobbin jams occur when the bobbin tension is incorrect, the bobbin is inserted incorrectly, or lint accumulates in the bobbin case. The bobbin tension spring should apply enough resistance that the bobbin unspools with a faint tone when pulled — if it falls freely, the spring is worn. Clean the bobbin case, confirm correct bobbin insertion, and adjust the top tension dial to 4–5 before testing.
Why does my bottom thread keep jamming?
Bottom thread jams are caused by incorrect tension, incorrect needle size, or the thread tangling around the bobbin case. Set the top tension dial to the middle position (4 on most machines) as a starting point. If tension is correct, check that the needle size matches the fabric weight — using a needle that is too small for heavy thread causes the thread to bind in the needle eye and loop around the bobbin case.
Why is my top thread getting tangled in the bobbin area?
Top thread tangling in the bobbin area occurs when the machine is threaded incorrectly, the presser foot is down during threading, or the top tension is set too low. Re-thread the machine completely with the presser foot raised, set tension to 4–5, and test on scrap fabric. If tangling persists, the bobbin case tension spring may be damaged and requires replacement.
How do I know if my bobbin tension is correct?
Test bobbin tension by hanging the bobbin case by its thread end — it should remain suspended and not spin or unspool when held still. If it spins freely, the bobbin tension spring is too loose. If it does not unspool at all when shaken gently, the tension is too tight. Adjust the small screw on the bobbin case by 1/8 turn at a time until the bobbin hangs suspended without spinning.
What tension setting should I use for standard sewing?
The standard tension setting for medium-weight woven fabrics (cotton, quilting cotton, linen) is 4–5 on a 0–9 dial. Reduce tension to 2–3 for lightweight fabrics like silk and chiffon. Increase tension to 6–8 for heavyweight fabrics like denim, canvas, and upholstery. Always test on scrap fabric from your actual project before sewing — fabric weight varies within categories and adjustments may be needed.
Final Thoughts
Jammed sewing machines are a solvable problem in nearly every case. The root causes — incorrect tension, a damaged or wrong needle, lint accumulation, and improper threading — are all preventable and fixable with basic maintenance knowledge. By cleaning your machine regularly, replacing needles at the correct interval, using the correct needle and bobbin for your fabric, and testing stitches before each project, you will dramatically reduce the frequency of jams.
The most effective maintenance practice is to clean the bobbin case, hook assembly, and feed dog area after every 8–10 hours of sewing. Combined with annual professional servicing, this routine keeps hook timing accurate and prevents the mechanical issues that cause the most severe and frustrating jams. Store your machine in a clean, dry environment, and it will serve you reliably for years to come.
References
- Wikipedia contributors. (2025). Sewing machine. Wikipedia, The Free Encyclopedia.
- Singer. (2024). Sewing Tips: Threading and Tension Guide. Singer.
- Brother International. (2024). Support and Troubleshooting. Brother Industries, Ltd.
- American Society for Testing and Materials. (2023). ASTM International — Textile Standards. ASTM International.
- U.S. Consumer Product Safety Commission. (2023). Sewing Machine Safety Information. CPSC.


