
How to Sew a Skirt: A-Line, Pencil, and Wrap Styles

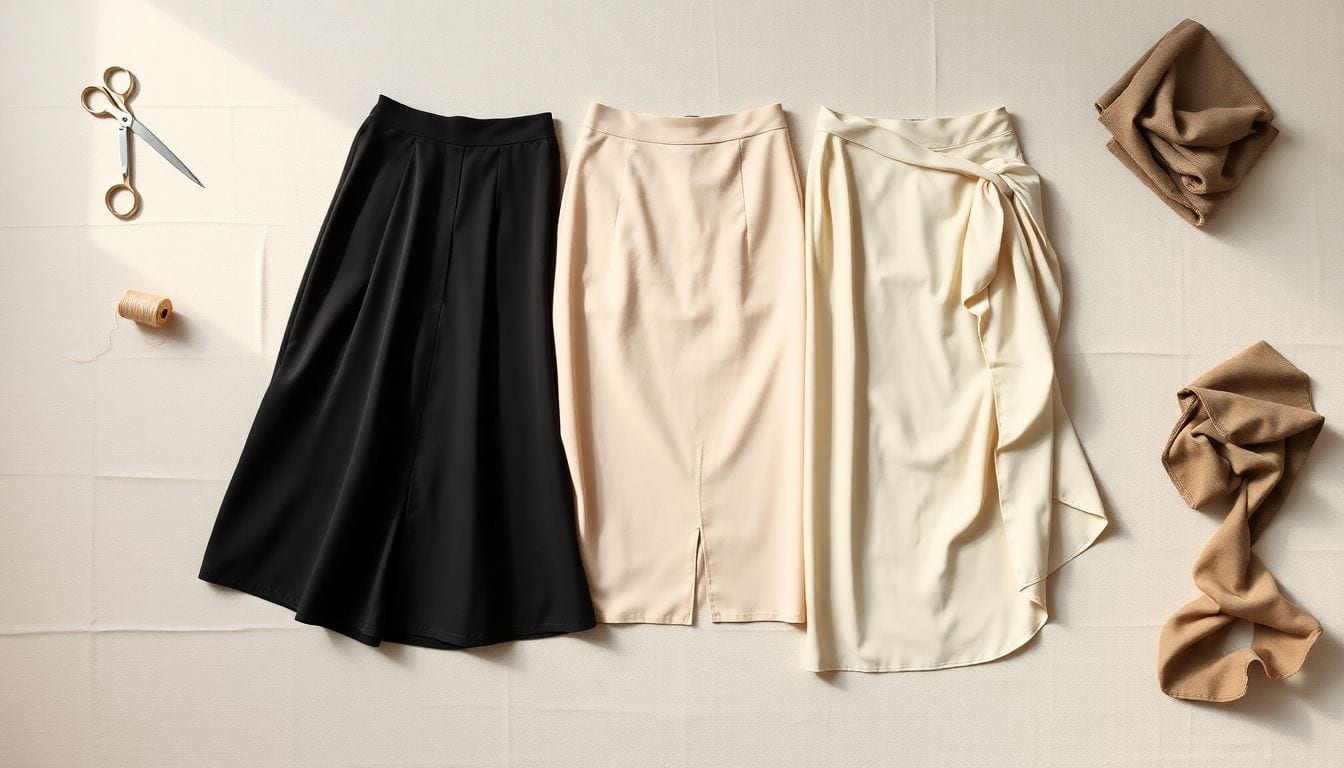
Darts, seams, zippers, waistbands, and hems form the core construction sequence shared by A-line, pencil, and wrap skirts. A-line skirts flare gently from waist to hem, pencil skirts taper at the knee with a narrow hem, and wrap skirts cross at the waist with overlapping panels tied at the side. All three can be sewn in 2–4 hours with intermediate sewing skills and 1.5–2 yards of medium-weight fabric like cotton, linen, or rayon.
Choosing the Right Skirt Silhouette for Your Body Type and Skill Level
The three classic skirt silhouettes — A-line, pencil, and wrap — each use the same core construction techniques with variations in grain, darts, and closures. Choosing the right silhouette depends on your body type, skill level, and intended use. Each style has distinct characteristics:
- A-line: Flatters most body types, beginner-friendly, flows away from hips, ideal for cotton and linen. The gentle flare creates movement without adding bulk at the hips, making it the most forgiving fit for beginners.
- Pencil: Fitted through hips and thighs, narrows at the knee, professional and sleek, requires accurate hip measurements. The straight, narrow cut creates a polished, office-appropriate silhouette but demands precision in fitting — particularly around the hip curve and back crotch length.
- Wrap: Adjustable waist tie, flatters curvier figures, can be layered year-round, quickest to fit. The overlapping front panels make it exceptionally adaptable to weight fluctuations, and the tie closure eliminates the need for zippers in some versions.
Tools and Materials Needed
Successful skirt construction requires specific tools at each stage. Using the correct tools prevents common fitting and construction problems. Gather these supplies before starting:
- 1.5–2 yards of medium-weight woven fabric (cotton, linen, rayon, or blend)
- Matching thread (polyester for synthetic fabrics; cotton-wrapped polyester for natural fibers)
- Zipper foot or invisible zipper (8–9 inch regular or invisible zipper)
- Paper pattern or self-drafted pattern pieces: front, back, waistband
- Fabric scissors, pins, hand-sewing needle
- Iron and ironing surface
- Sewing machine with straight stitch and zigzag capabilities
- Walking foot (for preventing wavy seams in slippery or stretchy fabrics)
- Blind hem foot (for professional-quality hems)
- Rolled hem foot (optional, for pencil skirts in sheer fabric)
Taking Accurate Measurements
Accurate measurements are the foundation of a well-fitting skirt. Even small errors — especially in hip circumference and back crotch length — can render a pencil skirt unwearable. Here’s how to measure each dimension correctly:
- Waist: Measure around the natural waistline, keeping the tape snug but not tight. This is typically the narrowest part of the torso, usually sitting at or just above the navel. Add 5/8 inch seam allowance to your waist measurement for construction.
- Hip: Measure around the fullest part of the hips — typically 7–9 inches below the waist, depending on your torso length. Add 5/8 inch seam allowance. For pencil skirts especially, this measurement must be precise; a skirt that’s too tight at the hip cannot be altered to fit without rebuilding the entire garment.
- Length: Measure from waist to desired hem: mini (2-4 inches above the kneecap), knee-length, midi (calf), or maxi (floor). Wear the shoes you plan to pair with the skirt when measuring, as heel height significantly affects the final hem length.
- Back crotch length: Essential for pencil skirts. Measure from waist to where the buttocks meet the thighs at the center back. This measurement determines how smoothly the back of the pencil skirt will drape — an incorrect back crotch length causes the hem to swing up at the center back when sitting.
Cutting Your Fabric
Fabric preparation before cutting is non-negotiable. Washing eliminates residual sizing and prevents post-construction shrinkage that could distort your finished skirt. Drying and pressing ensure accurate cutting on a flat, stable surface. For more details on fabric selection, see our fabric comparison guide.
Cutting on the grain — with the lengthwise warp threads running parallel to the selvage — produces a skirt that hangs straight and maintains its shape. However, the A-line’s gentle flare benefits from a slight bias cut: 15–20 degrees off the grain shifts the drape direction, creating fluid movement without the extreme cling of a full bias cut. To learn more about grain and bias cutting, see our grain-line and bias cutting tutorial.
- Wash, dry, and press fabric before cutting to eliminate shrinkage and any chemical finishes
- Cut two front panels, two back panels, a waistband strip, and facings if your pattern calls for them
- For A-line skirts, cutting flare pieces on a slight bias (15–20 degrees off grain) improves drape and movement
- Mark all notches, darts, and fold lines with chalk or a washable fabric marker — these guide every subsequent construction step
Sewing the A-Line Skirt
The A-line skirt is the most forgiving of the three styles and an ideal starting point for intermediate sewers building their silhouette mastery. The construction sequence — darts, seams, zipper, waistband, hem — applies directly to pencil and wrap skirts with style-specific modifications. Unlike pencil skirts, A-line skirts require less hip ease and omit the kick pleat.
Step 1: Sew the Darts
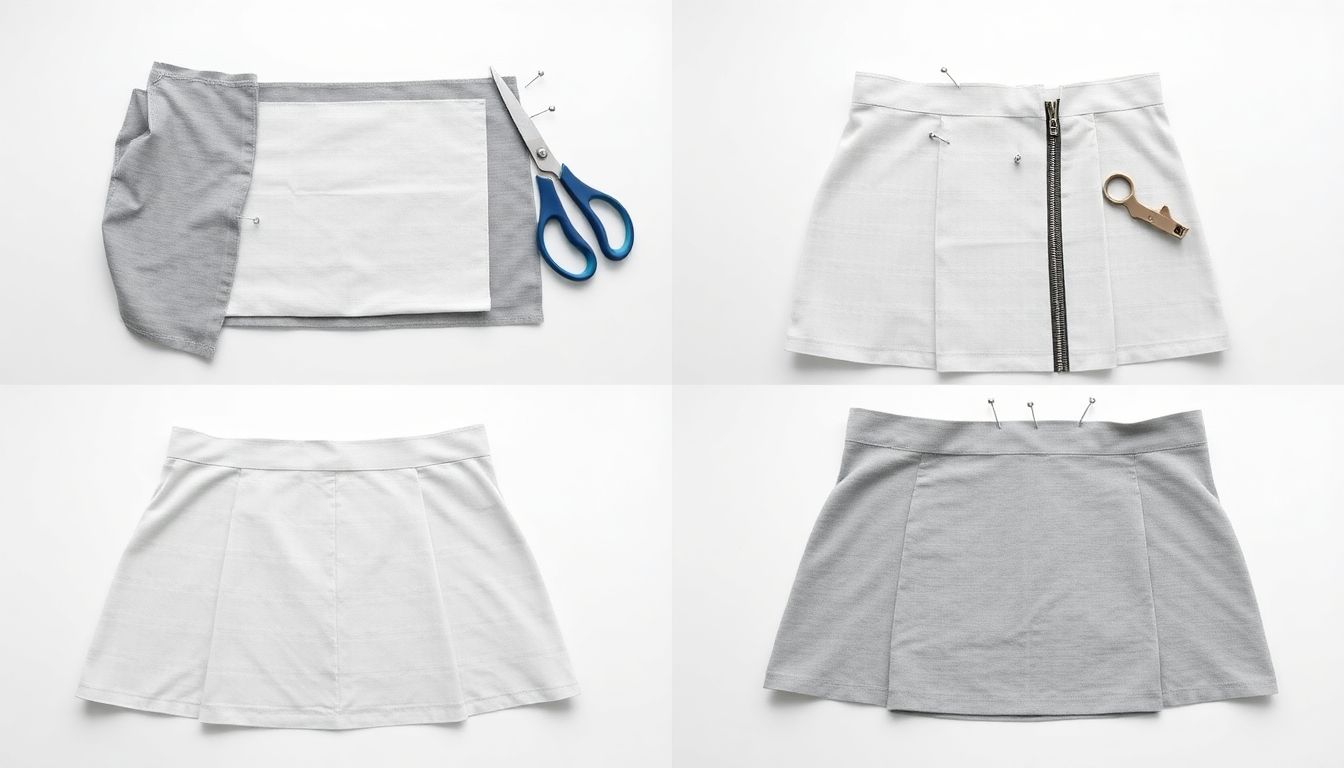
Darts are triangular folds that shape a flat fabric panel to follow the body’s curves. Without darts, a skirt would hang like a flat rectangle — pouching at the bust and clinging at the waist. For the A-line, pin each front and back dart with right sides together, then sew from the waist edge toward the hip point, tapering to a point at the end. Do not backstitch at the point — leave the threads long and hand-knot them to prevent a hard lump.
Press all darts before proceeding. Back darts press toward the center back; front darts press down toward the center front. Press each dart over a ham or tightly rolled towel to maintain the curved shaping — pressing flat against the ironing board flattens the dart and defeats its purpose.
Step 2: Join Side Seams
With right sides together, pin the front to the back at each side seam, matching all notches carefully. The side seam is where the A-line’s subtle flare begins — pinning at the notches ensures the flare is evenly distributed. Sew from waist to hem with a consistent 5/8 inch seam allowance.
Finish the seam allowances together (not individually) using one of three methods: a zigzag stitch over the raw edges, serging, or pinking with shears. For medium-weight cotton and linen, pinking is fast and effective. For rayons and slippery fabrics, serging prevents edge fraying better than zigzag. Finish the seam, then press it open using seam roll or a narrow ham to prevent the seam allowance from showing through to the right side.
Step 3: Install the Zipper
The invisible zipper is the preferred closure for A-line skirts because it disappears completely into the seam when installed correctly. An invisible zipper foot has two rails that straddle the zipper coils; as you stitch, the foot pushes the coils flat against the tape, concealing them. For detailed zipper installation techniques, see our zipper foot types and installation guide.
To install: first interface the seam allowance where the zipper will sit to prevent stretching. Pin the zipper face-down to the back seam allowance, with the zipper tape against the fabric and the coils on the seam line. Stitch using the invisible zipper foot — the left rail of the foot runs against the right needle wall of the coils. The zipper should start 5/8 inch below the waist seam, which positions the waistband’s lower edge just above the zipper stop. Stitch down one side, reposition the fabric, and stitch the other side. Close the remainder of the center back seam below the zipper with a standard straight stitch.
As an alternative, a centered or lapped zipper installed with a regular zipper foot produces a more visible but equally secure closure. A centered zipper has the tape sandwiched between two seam allowances stitched together; a lapped zipper has one side lapped over the other. Both are appropriate when the fabric is too thick for an invisible zipper foot to function smoothly.
Step 4: Attach the Waistband
Cut the waistband on the grain — cutting on the bias causes it to stretch and gap at the sides. The standard width is 2 inches tall (which finishes to 1 inch) by your waist measurement plus 1 inch for overlap and seam anchoring. If your waist-to-hip ratio creates a significant curve at the side seam, cut the waistband with a slight concave curve at the bottom edge to follow the body’s angle.
Press the waistband in half lengthwise with wrong sides together to create a crease line. Then open it flat, and with right sides together, pin the raw edge of the waistband to the skirt’s waist edge, matching centers and notches. The 1-inch overlap extension at the closure should extend beyond the zipper by approximately 1/2 inch. Sew with 1/2 inch seam allowance, trim the seam to 3/8 inch to reduce bulk, clip any curves, and turn the waistband to the inside. Press the seam toward the waistband, then fold along the crease line so the folded edge meets the stitching line. Edgestitch the folded edge from the right side, catching the seam allowance underneath for a clean, professional finish.
Step 5: Finish the Hem
Hang the completed skirt for 24 hours before hemming. The sewn seamstress’s maxim — “hang for a day before you hem” — exists because fabric relaxes under its own weight, causing the hem to shift unevenly. After hanging, try on the skirt with the intended shoes to verify length.
For the A-line, a double-fold hem (also called a blind hem) works well: turn up 5/8 inch, press, turn again 1.5 inches, press and pin. From the right side, use a blind hem foot to stitch — the foot has a blade that catches the fold while the needle stitches into the seam allowance only, making the stitching nearly invisible. Alternatively, hand-stitch using a blind hem stitch: take a tiny catch stitch through the main fabric, then skip 1/4 inch and pick up a single thread from the fold. Repeat around the hem.
Sewing the Pencil Skirt
The pencil skirt’s fitted silhouette demands closer attention to hip ease, back crotch length, and hem width. Where the A-line forgives measurement imperfections within a range of 1–2 inches, the pencil skirt’s narrow cut means errors are immediately visible and uncomfortable. The additional construction steps — a kick pleat and a narrow hem — preserve the walking stride in longer lengths. Compared to A-line skirts, pencil skirts require more precise hip measurements and a contoured waistband.
Step 1: Adjust for Fitted Silhouette
Pencil skirts require closer hip measurements than A-line skirts. If your hip circumference is significantly larger than your waist, you may need to take in the side seams slightly more than the standard 5/8 inch — but remove no more than 1/4 inch per side at the hip to avoid distorting the hang. Make a muslin test garment before cutting fashion fabric.
If your pencil skirt falls below knee length, add a 2–3 inch kick pleat at the center back hem. Without a kick pleat, a long pencil skirt restricts walking stride severely — the hem will ride up with every step. Cut a narrow rectangle at the hem allowance (below the hem stitching line) at the center back seam before sewing. When the skirt is constructed, press the pleat along the marked line and stitch a small inverted triangle reinforcement at the top of the pleat to prevent the point from tearing under stress.
Step 2: Sew Seams and Kick Pleat
Sew the center back seam first, leaving the zipper opening unstitched — the zipper installation opening typically runs from 5/8 inch below the waist to the desired zipper length. Then sew the side seams. For the kick pleat: press the pleat along the pre-marked line, then stitch the triangle reinforcement at the top of the pleat using a small, tight zigzag or a hand-stitched bar tack. The triangle’s point should not extend past the hem stitching line. Press the pleat open from the wrong side.
Step 3: Install Zipper and Waistband
The zipper and waistband techniques are the same as for the A-line skirt. However, pencil skirts frequently use a contoured waistband — cut with a slight curve at the center back to follow the body’s natural backward tilt at the waist. Cutting this section on the bias (across the back width rather than along it) allows the waistband to flex slightly, preventing gaps at the center back.
Step 4: Narrow Hem for Pencil Skirts
The pencil skirt’s tapered silhouette requires a narrower hem than the A-line — typically 5/8 inch or less — to preserve the clean line from hip to knee. A wide hem on a pencil skirt disrupts the visual taper and can make the hemline appear bulky. For medium-weight fabrics, a 1/2 inch double-fold hem is appropriate. For sheer or delicate fabrics like silk charmeuse or chiffon, use a rolled hem foot or hand-roll the edge for the most unobtrusive finish.
Sewing the Wrap Skirt
The wrap skirt differs fundamentally from A-line and pencil styles: instead of a separate back panel and front panels joined at side seams, a wrap skirt is constructed from two asymmetric front panels that overlap at the center front and tie at the sides. This design offers the easiest fit adjustment — the tie accommodates a wide range of waist sizes — and eliminates the need for a back zipper in many versions. Unlike pencil skirts, wrap skirts do not require a contoured waistband or kick pleat.
Step 1: Cut Panels with Overlap Allowance
The front panels of a wrap skirt are cut asymmetrically: one panel is cut 2 inches longer at the center front to create the underlap, which prevents the skirt from opening when bending or sitting. The underlap panel also provides coverage when the overlapping panel shifts. Cut tie strips at each side waist — these are cut on the bias (45-degree angle to the selvage) to allow the ties to wrap and knot flexibly around the body. Each tie should be 1 inch wide by 24–30 inches long to allow sufficient length for tying.
Step 2: Assemble the Panels
Sew the side seams with a 5/8 inch seam allowance, finishing the edges together as with the A-line. For lightweight fabrics — chiffon, voile, silk — a French seam (a self-enclosing seam that encapsulates raw edges) produces the cleanest, most durable finish: sew with wrong sides together at 1/4 inch, trim, press the seam to one side, fold and sew again at 3/8 inch enclosing the raw edges. Serge or zigzag is acceptable for medium and heavy weights.
Step 3: Attach Ties and Finish Waist
Fold each tie strip in half lengthwise with right sides together, stitch along the long edge and one short end, turn right side out using a loop turner or bodkin, and press flat. The finished tie should be 1/2 inch wide. Attach each tie to the waist edge at the side seam intersection, extending 24–30 inches past the side seam for tying. The waist edge itself is finished with a facing or bias binding — a full waistband is omitted on wrap skirts to prevent bulk at the crossover point. Bias binding, cut on the true bias at 1 inch wide and folded over the raw edge twice, creates a clean, flexible finish that lies flat at the crossover.
Step 4: Hem the Wrap Skirt
Wrap skirts often have an angled hem — lower at the front corner of the underlap panel and higher at the back corner — which follows the natural diagonal of the wrap design. To hem an angled edge, press the hem up along the cutting line, hand-hemming each section individually rather than attempting to machine-stitch a straight hem across an angled edge. For stretchy jersey wrap skirts, a twin needle produces a stretchable, professional-quality hem that won’t pop stitches when the fabric stretches. When hemming pointed corners — the front corner of the overlap panel — always notch the seam allowance at the point by trimming 1/4 inch from each side of the point at a 45-degree angle. This removes bulk and allows the point to sit crisp and flat rather than puckering.
Common Sewing Mistakes and Fixes
These issues appear frequently across all three skirt styles. Recognizing the root cause prevents repeat corrections and saves time:
| Mistake | Why It Happens | How to Fix |
|---|---|---|
| Gaping waistband | Waist measurement too small, or darts not pressed correctly toward the seam | Let out side seam by 1/8 inch at the waist; re-press darts so they fold toward the center back seam, not outward |
| Wavy seams | Fabric stretched while sewing — the feed dogs pull the bottom layer faster than the presser foot guides the top layer | Use a walking foot to advance both fabric layers evenly; hold fabric taut but not stretched as you sew |
| Crooked hem | Skirt hangs unevenly after construction due to inconsistent seam allowance or asymmetric ease distribution | Hang the finished skirt 24 hours before hemming to let fabric relax; trim the hem to even after hanging |
| Gap at center back zipper | Zipper installed too loosely — the coils create a gap between the zipper teeth and the seam | Re-stitch the zipper with tighter presser foot pressure, or hand-baste the zipper in place first to test fit before machine stitching |
| Pencil skirt too tight at knees | Not enough wearing ease — standard 1/2 inch total ease at the hip was interpreted too tightly | Add 1/4 inch to each side seam at the hip; for longer pencil skirts, add a kick pleat to preserve stride |
When to Use Each Skirt Style
Each silhouette has an ideal use case that leverages its particular proportions and movement:
- A-line: Casual wear, beginner projects, lightweight fabrics, spring and summer temperatures, pear-shaped figures. The A-line’s flare balances narrower shoulders and hips by adding visual width at the hem, creating a proportionately balanced silhouette. It layers well over turtlenecks and tights in cooler weather.
- Pencil: Professional attire, structured fabrics (denim, twill, ponte), hourglass and straight figures, office-to-evening. The pencil skirt’s column effect is slimming when paired with fitted tops or tucked blouses. In ponte or scuba knit, it transitions from business to dinner without looking out of place.
- Wrap: All figures and occasions, adjustable fit, postpartum or weight fluctuations, jersey and woven fabrics. The wrap’s adjustability makes it the most versatile wardrobe piece — tighten the ties for a polished look, loosen for comfort. It is the most forgiving of the three styles during pregnancy, weight gain, or bloating.
Fabric Recommendations by Skirt Type
Fabric weight and drape directly affect how each silhouette falls and moves. Choosing the correct fabric for each style prevents disappointment at the fitting stage. For a comprehensive fabric comparison, see our fabric guide.
| Skirt Style | Best Fabrics | Fabrics to Avoid |
|---|---|---|
| A-line | Cotton lawn, linen, rayon, cotton voile (lined), silk chiffon (lined) | Heavy upholstery fabric (stiff, won’t drape), leather or faux leather (too stiff without drastic style modification) |
| Pencil | Cotton twill, ponte knit, denim, gabardine, scuba knit | Very sheer fabrics (challenging to hem narrowly), slippery satins (difficult to cut and sew accurately without experience) |
| Wrap | Viscose, rayon, jersey, silk charmeuse, cotton sateen | Stiff non-draping weaves (defeat the purpose of a wrap design that relies on fluid movement) |
Medium-weight woven fabrics between 4–6 ounces per square yard work best across all three styles. Heavier fabrics like denim (10–14 oz) require a heavier needle (size 100/16), slower machine speed, and a walking foot to prevent shifting. Lighter fabrics like chiffon (2–3 oz) need a new sharp needle (size 60/8), pin placement within the seam allowance to avoid marking, and a reduced presser foot pressure to prevent the fabric from being pushed ahead of the needle.
Frequently Asked Questions
How long does it take to sew a skirt?
A simple A-line skirt takes 2–3 hours for a beginner with basic sewing experience. Pencil and wrap skirts take 3–4 hours due to fitting adjustments and closures. The zipper installation typically adds 30–45 minutes for first-timers.
Can I sew a skirt without a pattern?
Yes — you can draft a basic skirt pattern using your measurements and graph paper. The simplest method: draw a rectangle for the front panel (hip width by length), add dart intake at the waist, and mirror for the back. An online skirt sloper or fitting shell makes this more accurate.
What size zipper do I need for a skirt?
A 7–8 inch invisible or regular zipper fits most skirts. For pencil skirts with a narrow hip, a 6 inch zipper may be necessary. Always buy a zipper 1–2 inches longer than your opening to allow for installation adjustment.
How do I know if my skirt will fit after sewing?
Cut a muslin or cheap fabric mockup first — this is a test garment that lets you adjust the fit before cutting your fashion fabric. Check hip ease, dart placement, and length on the muslin. For A-line and wrap skirts, make a muslin before cutting expensive fabric.
References
- Claire B. Shaeffer. (2008). The Career Center: Professional Pattern Techniques. Shaeffer Studios.
- David Page Coffin. (2012). Shirtmaking: Developing the Skill for a Fine-Fit Shirt. Taunton Press.
- Jennifer Heynan. (2010). Sewing Basics: Creating a Tailored Wardrobe. Creative Publishing International.
- Mood Designer Fabrics. (2024). Sewing Resources and Fabric Guides. Mood Fabrics.
- The Threads Magazine Editors. (2023). Sewing Techniques and Pattern Fitting. Taunton Press.


