
Why Is My Vinyl Peeling Off Shirts?

Vinyl peeling off shirts results from improper application, incorrect heat settings, or inadequate wash care. The primary causes include insufficient heat press temperature (below 120°C/250°F), washing in water exceeding 40°C (104°F), using harsh detergents, and applying vinyl to incompatible fabric surfaces.
This guide identifies every factor that causes vinyl to lift from fabric and provides actionable solutions to prevent peeling. By following these specifications, you will achieve vinyl applications that withstand 50+ wash cycles without separation.
All the Reasons Why Your Vinyl Is Peeling Off Shirts
Vinyl peeling originates from application errors, environmental exposure, or material incompatibility. Each cause has specific technical parameters that determine whether the bond holds or fails.
Temperature Changes
PVC vinyl begins heat distortion at 60°C (140°F) and degradation at 70°C (158°F). When ambient or wash temperatures exceed these thresholds, the adhesive layer loses structural integrity. Flexible PVC can contain up to 85% plasticizer by mass, and thermal expansion causes this plasticizer to migrate, weakening the bond.
Poor Quality Adhesive
Budget vinyl products use adhesive with lower glass transition temperatures (Tg). Quality HTV adhesives maintain bond strength between -20°C to +60°C (-4°F to 140°F). Low-quality alternatives fail below 5°C (41°F) or above 45°C (113°F).
Improper Application
Heat transfer vinyl requires precise application at 120–150°C (250–300°F) for 10–15 seconds with medium-firm pressure. Below 110°C (230°F), the adhesive does not fully melt and bond. Above 165°C (329°F), the vinyl substrate degrades and the adhesive carbonizes.
Rough Surface Texture
Nylon, ripstop, and synthetic blends with raised weaves create air gaps between the vinyl adhesive and fabric fibers. The bond requires complete surface contact—any texture exceeding 0.5mm creates a peel point where separation begins.
Surface Contamination
Fabric finishes, sizing chemicals, and accumulated body oils create a barrier layer. A lint-free surface with 70% isopropyl alcohol wipe removes contaminants. Allow the surface to dry completely—moisture beneath the adhesive creates instant delamination.
Incorrect Backing Removal Speed
Peel the carrier sheet at a 45–165° angle at 2.5–5 cm per second (1–2 inches per second). Rapid removal creates sheer forces that lift edges before the adhesive fully sets. Slow, angled peeling distributes stress evenly across the bond line.
Excessive Press Pressure
Over-compressing squeezes adhesive away from the bond zone. The correct pressure is 30–40 psi for flat press or hand iron application. Excessive force also compresses fabric fibers, reducing their ability to grip the adhesive layer.
UV Exposure
Ultraviolet radiation breaks chemical bonds in polyurethane and PVC films. PVC photodegradation releases hydrochloric acid (HCl) above 70°C (158°F) under UV exposure. After 200–500 hours of direct sunlight, tensile strength decreases by 30–40%.
Moisture Exposure
Water at 40°C (104°F) or higher swells fabric fibers and loosens adhesive grip. Polyester blends are particularly susceptible—moisture causes fiber swelling up to 5% of fabric weight, creating mechanical stress at the bond line.
Material Age
Adhesive performance degrades over time. Unused HTV stock has a shelf life of 6–12 months when stored at room temperature (20–25°C / 68–77°F). Heat-activated adhesives lose 15–25% bond strength after expiration, even when stored correctly.
These factors explain vinyl peel failures. Inspect each variable in your application process to identify where the bond broke down.
Vinyl Peeling After Washing: Causes and Solutions
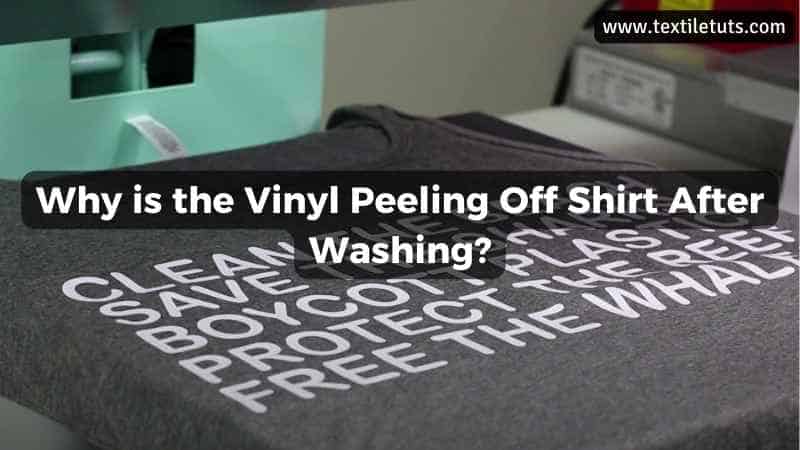
Vinyl separates from fabric after laundering when wash conditions exceed material tolerances. The temperature, detergent chemistry, and mechanical action all contribute to bond failure.
Wrong Vinyl Type for the Application
Two vinyl categories exist: Heat Transfer Vinyl (HTV) and adhesive vinyl. HTV bonds thermally to fabric at 120–150°C (250–300°F) and tolerates machine washing when correctly applied. Adhesive vinyl bonds only to the surface and fails within 5–10 wash cycles regardless of application quality.
| Vinyl Type | Application Method | Bonding Temperature | Wash Durability | Best Use |
|---|---|---|---|---|
| Heat Transfer Vinyl (HTV) | Heat press or iron | 120–150°C (250–300°F) | 50–75 wash cycles | Fabric garments, textiles |
| Adhesive Vinyl | Peel-and-stick, no heat | Room temperature | 5–10 wash cycles | Hard surfaces, crafts, signage |
| PU HTV (premium) | Heat press | 130–150°C (266–300°F) | 75+ wash cycles | Cotton, blends, performance wear |
| PVC HTV (economy) | Heat press | 120–140°C (248–284°F) | 15–30 wash cycles | Casual wear, one-time designs |
Fabric Softener Residue
Fabric softeners deposit cationic surfactants on fabric fibers, creating a hydrophobic barrier. This coating reduces surface energy by 15–25 dynes/cm, preventing adhesive wetting. Liquid fabric softener reduces adhesive bond strength by 40–60% in a single wash cycle.
Harsh Detergent Chemicals
Detergents with high pH (above 10.5) degrade adhesive polymers. Phosphate-free detergents often use zeolite builders that precipitate onto fabric and create abrasive particles. Enzyme-based detergents digest protein adhesives if the vinyl uses casein or albumin binders.
Excess detergent (more than 2 tablespoons per load) leaves surfactant residue that attracts soil particles. These particles embed in the adhesive edge, creating a wedge effect that initiates peeling.
Abrasive Washing Action
Top-loading agitator machines create 150–300 rubbing cycles per wash. The mechanical stress on vinyl edges reaches 5–15 N/cm². Front-loading machines reduce this to 30–80 cycles with gentler tumbling action. Brush scrubbing generates 50–100 N/cm² locally—enough to tear vinyl edges immediately.
Water Temperature Exceeding Safe Thresholds
Wash water above 40°C (104°F) activates adhesive softening beyond the reversible bonding range. At 50°C (122°F), bond strength drops to 30% of original. At 60°C (140°F), PVC vinyl enters its heat distortion zone, and peeling begins within 5 cycles.
Wash vinyl-printed garments in water at 30–40°C (86–104°F) maximum. Cold water (20–25°C / 68–77°F) preserves adhesive integrity for 50+ wash cycles.
Low-Quality Vinyl Substrate
Budget vinyl uses thinner polyurethane films (20–50 micrometres) with lower elongation ratings (100–150%). Quality HTV films are 75–100 micrometres thick with 300–500% stretch recovery. Thin vinyl cracks at fold points and delaminates from edges within 10–15 washes.
Quality vinyl feels smooth and consistently thick across the entire sheet. Flex the corner—quality material returns to flat; budget vinyl holds permanent creases.
How to Prevent Vinyl Peeling After Washing
Follow these care specifications to maximize vinyl bond lifespan:
- Wash in cold water — Set your washing machine to 20–30°C (68–86°F). The gentle cycle uses 40–60 liters of water versus 60–80 liters for normal cycles, reducing mechanical stress. Turn garments inside out—this reduces abrasion on the vinyl surface by 70–80%.
- Use mild detergent — Select detergents labeled “free and clear” or “gentle.” These formulations have pH between 6.5–8.0 and omit enzymes, optical brighteners, and phosphate builders. Use 1–2 tablespoons maximum per load—excess detergent leaves residue that attracts abrasive particles.
- Avoid fabric softener entirely — Skip fabric softener in the wash and the dryer. If static cling is problematic, add 1/2 cup white vinegar to the rinse compartment—vinegar at 5% acidity removes detergent residue without depositing cationic surfactants.
- Air dry or use low heat — Tumble dry on low heat (maximum 50°C / 122°F) or air dry on a clothes rack. Heat exceeds PVC distortion threshold at 60°C (140°F). Air drying extends vinyl lifespan by 2–3x compared to machine drying.
- Turn garments inside out — This reduces direct abrasion on the vinyl surface by 70–80% during both washing and drying cycles.
Critical Vinyl Application Specifications
These key parameters determine whether your vinyl bond succeeds or fails—apply and care for vinyl-printed garments within these tolerances.
| Parameter | Correct Range | Failure Threshold | Why It Matters |
|---|---|---|---|
| Application Temperature | 120–150°C (250–300°F) | Below 110°C (230°F) | Adhesive does not fully melt and bond below threshold |
| Press Time | 10–15 seconds | Under 8 seconds | Insufficient time for adhesive activation |
| Press Pressure | 30–40 psi | Over 50 psi | Excessive pressure squeezes adhesive away from bond zone |
| Wash Temperature | 20–40°C (68–104°F) | Above 40°C (104°F) | Adhesive softens beyond reversible bonding range |
| Dryer Temperature | 40–50°C (104–122°F) | Above 60°C (140°F) | Exceeds PVC heat distortion zone |
| Carrier Peel Angle | 45–165° | Below 30° (too shallow) | Shallow angles create sheer forces that lift edges |
| Detergent pH | 6.5–8.0 | Above 10.5 | High pH degrades adhesive polymers |
Vinyl Wrinkle Repair After Washing
Vinyl designs develop wrinkles and creases after laundering when the fabric shifts and the vinyl does not flex with it. These wrinkles respond to controlled heat reapplication.
Heat Press Method
Set your heat press to 150°C (302°F)—the upper end of the HTV application range. Place parchment paper over the vinyl design. Press at medium pressure for 10–12 seconds. This re-melts the adhesive without damaging the vinyl substrate.
Hair Dryer Technique
Hold a hair dryer at 10–15 cm (4–6 inches) from the vinyl surface. Use medium heat (approximately 50–60°C / 122–140°F at the surface). As the vinyl warms and becomes pliable, smooth wrinkles gently with a soft cloth. Do not touch the vinyl directly with the dryer.
Ironing Method
Turn the garment inside out. Set the iron to synthetic/acrylic temperature (approximately 110–130°C / 230–266°F). Place parchment paper over the design. Iron in 5-second intervals with no steam. Lift the iron between intervals to prevent scorching.
Steam Treatment
Hold a handheld steamer 15–25 cm (6–10 inches) from the garment. Steam relaxes fabric fibers and vinyl simultaneously. After steaming, lay the garment flat and smooth wrinkles by hand. Allow to air dry completely before handling further.
Nail Polish Edge Seal
Apply a thin coat of clear nail polish along vinyl edges that are lifting. This seals the edge against moisture penetration and prevents further peeling. Reapply after each wash cycle if edges remain problematic.
Tumble Dryer Method
Place the wrinkled garment in the dryer with 2–3 clean tennis balls or dryer balls. Set to low heat (40–50°C / 104–122°F) for 15–20 minutes. The tennis balls create gentle percussion that relaxes fabric and vinyl simultaneously without applying direct heat.
Peeling Vinyl Repair Methods
Peeling vinyl edges respond to several repair approaches depending on the severity of the damage.
| Method | Difficulty | Durability | Best For |
|---|---|---|---|
| Clear nail polish | Easy | Temporary (3–5 washes) | Minor edge lifting, quick fixes |
| Heat reapplication | Medium | Permanent (if done correctly) | Lifted corners, small peeling areas |
| Fabric adhesive | Medium | Permanent (24hr cure) | When heat press is unavailable |
| Sewing edge stabilization | Advanced | Very durable | Larger peeling areas, stretchy fabrics |
| Re-vinylation over existing | Medium | Depends on underlying bond | Small peeling areas only |
Clear Nail Polish Application
Apply one coat of clear nail polish along the peeling edge. The polish creates a flexible seal that prevents further edge lift. Allow to dry for 2 hours before wearing or washing. Reapplication after 3–5 washes maintains the seal.
Sewing Edge Stabilization
For larger peeling areas, use a fine needle and clear thread to stitch along the vinyl edge. The thread physically prevents further lifting. Use 10–12 stitches per centimeter (25–30 stitches per inch) for adequate hold without damaging the vinyl.
Heat Reapplication
Lift the peeling corner, clean beneath with isopropyl alcohol, and reapply heat. Set an iron to 150°C (302°F), place parchment paper over the area, and press firmly for 15 seconds. This reactivates the original adhesive and re-bonds the vinyl.
Fabric Adhesive Products
Permanent fabric adhesives rated for stretch (such as E6000 Fabri-Fuse or Permacolor Flex) bond vinyl to fabric when heat reapplication is not feasible. Apply a thin bead beneath the peeling edge, press firmly, and allow 24 hours cure time before washing.
Re-vinylation Over Existing Design
Apply a new layer of vinyl directly over the old, peeling layer when the underlying vinyl is fully adhered. This works for small peeling areas. For large-scale peeling, remove the old vinyl completely and reapply fresh material to ensure proper bond.
Recommended Detergents for Vinyl Printed Garments
Specialized detergents preserve vinyl adhesive integrity. These options have pH-balanced formulas that clean effectively without degrading bond strength.
| Detergent | Type | pH | Bleach | Best For |
|---|---|---|---|---|
| Woolite Delicates | Liquid | 7.0 | None | Daily wear, cold wash |
| Ivory Snow | Powder/Liquid | 6.5–7.0 | None | Sensitive skin, no residues |
| Dreft Stage 2 | Liquid | 7.5 | None | Baby garments, gentle cleaning |
| Persil ProClean Gentle | Liquid | 7.0–7.5 | None | Stain removal, color safety |
| Tide Free and Gentle | Liquid | 6.5–7.0 | None | Low-residue, dye-free |
Frequently Asked Questions
What Fabric Composition Works Best for Vinyl Application?
100% cotton provides the optimal surface for vinyl bonding. The smooth cotton weave creates complete adhesive contact. Cotton-polyester blends (65/35 ratio) work well with lower application temperatures (140°C / 284°F) to prevent polyester shrinkage. Pure polyester requires special vinyl formulated for synthetic fibers and application at 130°C (266°F).
How Do You Apply Vinyl to Multi-Layer Garments?
Multi-layer applications require transfer tape to hold each vinyl piece in position. Apply each layer sequentially from bottom to top, using heat press between layers to set each piece before adding the next. For collared shirts, apply vinyl to the collar first, then the chest area, using a pressing pillow to maintain pressure on curved surfaces.
Can Peeling Vinyl Be Reused After Removal?
Once vinyl separates from fabric, the adhesive bond is permanently compromised. The adhesive remains on the fabric surface or the vinyl backing—not both. Attempting to reapply used vinyl produces a weak bond that fails within 1–3 wash cycles. Fresh vinyl material provides reliable, long-lasting results.
What Should You Do if Vinyl Lifts During Application?
If vinyl lifts during weeding or application, stop immediately. Re-clean the exposed fabric area with 70% isopropyl alcohol. Allow to dry completely. Apply a thin layer of temporary adhesive spray (such as KK 100 or HeatnBond) to the back of the vinyl. Re-press at 150°C (302°F) for 15 seconds with firm pressure.
What Is the Expected Lifespan of Vinyl Printed Garments?
Quality HTV applied correctly to 100% cotton at proper settings (150°C / 302°F for 15 seconds, medium pressure) withstands 50–75 wash cycles before visible degradation. Polyester blends reduce this to 30–50 cycles. Budget vinyl or improper application begins failing within 5–15 wash cycles.
Summary
Vinyl peeling results from application errors, wash condition violations, or material quality issues. The critical parameters are: application temperature of 120–150°C (250–300°F), wash temperature below 40°C (104°F), mild detergent with pH 6.5–8.0, and no fabric softener.
Quality vinyl (75–100 micrometres thickness, polyurethane composition) applied to 100% cotton using correct heat press settings provides 50–75 wash cycles of service life. Budget materials or application errors reduce this to 5–15 cycles.
Follow the care specifications in this guide to maximize the lifespan of your vinyl-printed garments and maintain bond integrity through repeated laundering.
References
- Wikipedia. (2025). Heat Transfer Vinyl. Wikimedia Foundation.
- Wikipedia. (2025). Polyvinyl Chloride. Wikimedia Foundation.


