Quilt Basting: Everything You Need to Know
How to Sandwich a Quilt Using Spray Baste: The Complete Guide
Spray basting is the fastest and most popular method for sandwiching a quilt—lay your backing fabric (wrong side up) on a clean, flat surface, position batting on top, then add your quilt top (right side up). Working from the center outward, spray temporary adhesive between each layer, allowing 2–5 minutes for the bond to set before quilting. This method holds all three layers securely together and prevents shifting, puckering, and uneven seams during machine or hand quilting.
Quilt basting is one of the most critical steps in the quilting process. It secures all three layers of fabric—the backing, batting, and quilt top—together and prevents them from shifting during quilting. Without proper basting, your quilt layers will shift, causing puckering, uneven seams, and a finished project that lacks the professional polish you deserve.
Quick-Reference: Key Spray Basting Specifications
| Specification | Recommendation |
|---|---|
| Spray distance | 8–10 inches (20–25 cm) from fabric surface |
| Drying time before quilting | 2–5 minutes (allow full cure for best results) |
| Batting size extra | 2–4 inches larger than quilt top on all sides |
| Backing fabric extra | 4–6 inches larger than batting on all sides |
| Pin spacing (if also pinning) | Every 3–4 inches in grid pattern |
| Adhesive effectiveness window | 6–12 months when stored properly |
Understanding the Quilt Sandwich: Your Three Layers
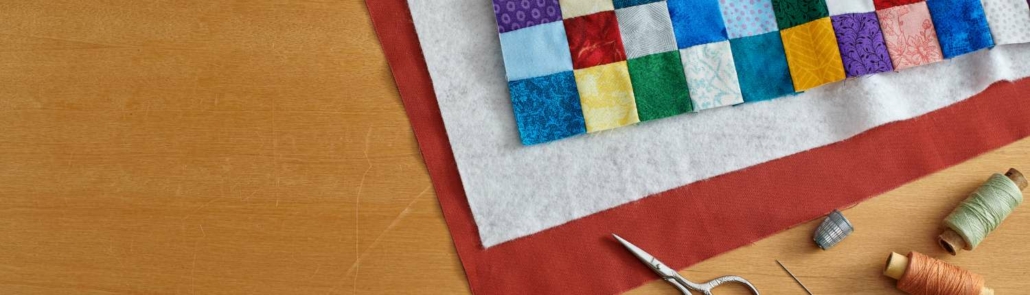
The term “sandwich” refers to the three distinct layers that make up every quilt. The backing fabric is the bottom layer, typically a single piece of fabric cut larger than the quilt top. The batting is the middle layer that provides warmth, loft, and texture. The quilt top is the decorative front layer featuring your pieced or appliquéd design. All three layers must be properly secured together for successful quilting.
How to Sandwich a Quilt Using Spray Baste: Step-by-Step
Spray basting is the fastest and most popular method for holding quilt layers together. Lay your backing fabric on a clean, flat surface with the wrong side facing up. Smooth out any wrinkles using your hands or a lint roller. Next, carefully position your batting on top, ensuring it lies flat and wrinkle-free. Finally, add your quilt top with the right side facing up. Working from the center outward, spray a light coating of temporary adhesive between each layer, allowing the layers to bond securely before quilting.
Lay all fabrics on a clean, flat surface and smooth from the center outward to prevent wrinkles and ensure proper alignment.
How Long Does Quilt Basting Spray Remain Effective?
Quilt basting spray typically remains effective for approximately 6 to 12 months when stored properly in a cool, dry location. The adhesive bond begins to degrade over time, so most quilters complete their quilting within a few weeks to a few months of basting. Humidity, temperature fluctuations, and exposure to direct sunlight can accelerate the degradation process. Always check the manufacturer’s recommendations, as formulations vary between brands.
Top Temporary Spray Adhesives for Quilting and Embroidery
Two products consistently outperform others in the quilting community for temporary fabric bonding. These spray adhesives are specifically formulated for fabric-to-fabric and fabric-to-paper applications without leaving residue or damaging delicate fibers.
Odif USA 505 Spray
Odif USA 505 is the industry standard for temporary fabric adhesion in quilting and embroidery. It provides a strong, even hold without bleeding through fabric or gumming up needles. The formula bonds fabric to fabric, fabric to paper, and fabric to stabilizer without discoloration. It evaporates completely without leaving sticky residue and washes out cleanly from finished projects.
Sulky KK200 Temporary Spray Adhesive
Sulky KK200 is specifically engineered for fabric-to-fabric bonding and excels when working with delicate materials. It prevents puckering and distortion that can occur with other adhesives. The fine-mist spray provides even coverage and won’t stain or damage even the most sensitive textiles. Quilters particularly favor it for hand quilting projects where a repositionable hold is essential.
How to Remove Spray Adhesive Residue from Fabric
When you need to remove spray adhesive from fabric—whether from overspray, repositioning, or post-project cleanup—several methods work effectively depending on the adhesive type and fabric sensitivity.
Heat Method with Hair Dryer
Hold a hair dryer approximately 12 inches (30 cm) away from the fabric and apply heat until the adhesive softens. Once the adhesive becomes tacky, wipe it away using a clean, lint-free cloth or soft brush. This method works best for fresh adhesive residue and is safe for most fabric types.
Goo Gone Adhesive Remover
Apply Goo Gone liberally to the affected area and allow it to penetrate for 2 to 5 minutes. Gently rub the adhesive away using a cloth or soft-bristled brush. Rinse thoroughly with cool water to remove any remaining residue, then launder according to fabric care instructions. Always test on an inconspicuous area first.
Acetone for Synthetic Fabrics
Dab acetone onto a cotton ball and gently apply it to the adhesive. Allow it to sit for 1 to 2 minutes before wiping away the dissolved adhesive. Warning: Acetone can damage natural fibers like cotton, wool, and silk, and may dissolve certain synthetic fabrics. Always test first and use with caution.
Quilt Basting Methods Compared: Spray, Pins, Thread, and More
Every basting method has distinct advantages and trade-offs. Your choice depends on your project size, quilting technique, timeline, and personal preference. This comparison table summarizes the key differences.
| Method | Speed | Cost | Best For | Drawbacks |
|---|---|---|---|---|
| Spray Adhesive | Fast (10–15 min for twin-size) | $$ per project | Machine quilting, medium-to-large quilts | Chemical odor, ventilation required |
| Safety Pins | Slow (45–60 min for twin-size) | $ (reusable) | Hand quilting, delicate fabrics | Time-consuming, pins can shift |
| Thread Basting | Slow (1–2 hours for twin-size) | $ (minimal) | Historical technique, heirloom projects | Most time-intensive method |
| Quilt Clips | Moderate (20–30 min for twin-size) | $$ (one-time purchase) | Small projects, portable quilting | Limited coverage per clip |
| Double-Sided Tape | Fast (10–15 min for twin-size) | $$ per project | Small quilts, quick repairs | Can leave residue, not repositionable |
| Elmer’s Washable Glue | Moderate (20–30 min for twin-size) | $ (low cost) | Budget projects, temporary hold | Requires complete drying time |
Is Basting Actually Necessary for Every Quilt Project?
Basting is not strictly required for every quilt, but it is highly recommended for most projects. Basting keeps your quilt top and batting from shifting as you sew, making it easier to achieve precise stitching lines. Without basting, the three layers can bunch up under your needle, creating puckers, tucks, and uneven seams that are difficult or impossible to fix after quilting. Some experienced quilters skip basting for very small projects like pot holders or when using specialized quilting machines with built-in layer-stabilization features.
DIY Quilt Basting Spray Recipe: Make Your Own at Home
You can create a simple quilt basting spray using household ingredients. While not as effective as commercial products, this DIY version works adequately for lightweight projects and costs significantly less.
- ½ cup distilled water (236 mL)
- ¼ teaspoon liquid dish soap (1.2 mL)
- ¼ teaspoon cornstarch (1.2 mL)
- Optional: 3–5 drops lavender or peppermint essential oil for fragrance
Combine all ingredients in a small spray bottle and shake vigorously for 30 seconds until fully mixed. Spray a light, even coating onto your batting from approximately 8 to 10 inches away. Apply to the center first, then work outward. The mixture remains effective for approximately 1 to 2 weeks when stored in a sealed container at room temperature.
Alternatives to Spray Adhesive for Basting Your Quilt
If you prefer to avoid spray adhesives due to chemical sensitivity, cost, or availability, several proven alternatives exist for securing your quilt layers.
Safety Pins
Safety pins are the most traditional and widely available basting method. Use 1.5-inch to 2-inch safety pins placed every 3 to 4 inches throughout the quilt. Start pinning from the center and work toward the edges, keeping tension even on all layers. This method requires the most time but produces excellent results and works for all quilt sizes.
Thread Basting
Thread basting uses long running stitches—typically ¼ to ½ inch in length—to secure layers together. Stitch through only the top layer and batting, leaving the backing free. Space stitches approximately 4 inches apart in a grid pattern. This technique has been used for centuries and creates a very secure hold without any risk of adhesive residue.
Quilt Clips
Quilt clips resemble large plastic clothespins and clip over the edge layers without piercing the fabric. They apply 2 to 3 clips per foot around the perimeter, with additional clips in the center for larger quilts. Clips work especially well for wall hangings and table runners where you want to avoid any marks from pins.
Double-Sided Seam Tape or Masking Tape
Apply ½-inch wide double-sided tape along the edges and center seams of your quilt layers. Remove the backing and press firmly to adhere. Masking tape (1.5-inch width) placed between layers at the edges also works but provides less hold than adhesive tape. Note: Test tape on scrap fabric first—some tapes can leave residue or damage delicate fabrics.
Staple Gun (Not for Finished Quilts)
Using a staple gun with ¼-inch wide staples to attach layers to a wooden frame is a fast method used primarily in production quilting or for basting to a frame. This method creates permanent holes and should only be used for wall hangings or table runners where staple marks won’t be visible in the finished piece.
How to Remove Basting Pins and Threads from Finished Fabric
Carefully remove basting stitches or pins one at a time to avoid distorting your freshly quilted layers. For thread basting, use a seam ripper or small scissors to cut each stitch, then gently pull the thread free. For safety pins, unfasten and remove one pin at a time, working from center outward. After removing all basting materials, press your quilt top gently with an iron on a low setting to smooth any remaining wrinkles or creases.
How to Pin a Quilt for Machine Sewing: Proper Spacing
- Gather 1.5-inch to 2-inch straight pins, a tape measure, and quilting needles. You will also need batting cut at least 6 inches wider and longer than your quilt top, and backing fabric cut 4 to 6 inches larger than the batting on all sides.
- Begin pinning in the center of the quilt and work outward toward the edges. Place pins every 3 to 4 inches in a grid pattern. Leave at least a 6-inch border of extra batting and backing beyond the quilt top edge to allow for adjustment and prevent the layers from pulling away during quilting.
- After pinning the entire quilt, trim the batting and backing fabric so they are even with each other and with the quilt top edges. The excess material has served its purpose of preventing the layers from shifting during the pinning process.
Batting Size Requirements: How Much Larger Should Batting Be?
Batting should be cut at least 2 to 4 inches larger than your finished quilt top on all sides. Most quilters prefer to cut batting 4 inches extra on each side for larger quilts (queen and king size) and 2 to 3 inches extra for smaller projects like baby quilts and wall hangings. This excess allows for shifting during the quilting process and ensures the batting doesn’t peek out from the finished edges.
What Is Batting? Understanding the Middle Layer of Your Quilt
The middle piece of fabric in a quilt is called batting, also referred to as wadding or filler. Batting provides the quilt’s warmth, loft (thickness), and texture. It is typically made from cotton, polyester, wool, or bamboo fibers, or blends thereof. Cotton batting is the most popular choice for its breathability and traditional feel. Polyester batting offers more loft and is hypoallergenic. Wool batting provides exceptional warmth with minimal weight. Bamboo batting is an eco-friendly option with natural antibacterial properties.
Does Spray Basting Wash Out of Finished Quilts?
Most quilt basting sprays are permanent once the quilt is laundered. The adhesive does not wash out in water. However, the spray’s bond weakens over time, and washing your finished quilt will dissolve any residual starch or carrier agents in the adhesive. Some quilters report that the adhesive eventually breaks down after multiple wash cycles, but the spray is not designed to be fully removable. Always check the specific product label for washing instructions.
Sewing Through Spray Adhesive: Is It Safe?
Yes, you can sew through spray adhesive without any issues, provided the adhesive is completely dry before you begin sewing. Most products require 2 to 5 minutes of drying time after application. If you sew while the adhesive is still tacky, it will coat your needle, accumulate in the needle’s groove, and eventually cause skipped stitches or thread breakage. Allow full drying time and your machine will sew through the adhesive layers cleanly.
Is Odif 505 Spray Adhesive Toxic or Hazardous?
Odif USA 505 is classified as a low-toxicity adhesive when used as directed. It contains petroleum solvents that can cause eye and skin irritation with prolonged exposure. Always use in a well-ventilated area and avoid breathing the spray mist. The product carries a CA Prop 65 warning for users in California. Keep out of reach of children and pets. While not acutely toxic, some users with chemical sensitivities may experience respiratory irritation. Alternatives exist for those with severe chemical sensitivities.
Using Fabric Glue as a Basting Alternative
Fabric glue can be used to adhere fabrics together, though it is not ideal for traditional quilt basting because it creates a permanent bond. Elmer’s washable school glue diluted with water (3 parts water to 1 part glue) creates a temporary bond that washes out after quilting. Apply the diluted glue using a sponge brush in a thin, even layer. Allow it to dry completely (typically 30 to 60 minutes) before quilting. This method works well for small projects and hand quilting practice pieces.
Can You Iron Over Fabric Glue Without Damaging Your Project?
You can iron over fabric glue safely, but you must use a low-heat or no-heat setting (synthetic fabric setting) to avoid damaging both the fabric and the glue. Do not use steam, as moisture combined with heat can reactivate certain glues. Test on a scrap piece first to confirm the glue can withstand your ironing temperature. Some fabric glues are specifically formulated to be permanent after ironing—always check the product label for heat resistance specifications.
Spray Basting for Hand Quilting Projects
Spray basting is an excellent choice for hand quilting because it holds layers securely without the risk of pins shifting or falling out while you work. Apply spray to the batting layer, then carefully position the quilt top and backing. Allow the adhesive to become tacky before beginning to quilt. Some quilters report that light ironing (on low heat without steam) after basting helps set the adhesive and prevents shifting during extended hand quilting sessions.
How to Baste a Large King-Size Quilt Efficiently
Basting a king-size quilt (approximately 90 × 108 inches) requires adequate space and a helper for best results. Work on a clean floor, starting with the backing fabric smoothed flat. Roll the batting loosely and unroll it progressively while smoothing onto the backing. Add the quilt top last, smoothing from center outward. For machine quilting, spray baste is the fastest method—budget 20 to 30 minutes for the basting process. For hand quilting, use safety pins placed every 4 inches throughout for maximum security.
Safety Pins vs. Basting Pins: Key Differences
Understanding the difference between safety pins and basting pins helps you choose the right fastener for your project. Both serve the same basic function but have distinct characteristics.
Basting Pins
Basting pins are longer (typically 2 inches or more) with a curved or bulb-shaped head that makes them easier to grasp and remove. They are specifically designed for temporary fabric holding and have a dull point that is less likely to pierce or damage fabric. Basting pins typically cost more than safety pins but are considered more ergonomic for extended basting sessions.
Safety Pins
Safety pins are shorter (1 to 1.5 inches) with a straight, narrow head. They are more likely to pierce fabric but less likely to fall out due to their spring-loaded closure. Safety pins are less expensive and more widely available, making them the choice for quilters who basting large projects on a budget.
Why Quilting Pins Have Curved or “Curbed” Heads
Quilting pins with curved or “curbed” heads feature a slight indentation or curve on the side of the head that prevents the pin from rolling away and provides a more comfortable grip when inserting and removing. This design helps keep the fabric from slipping off the pin during the basting process. The curved head also makes pins easier to see on busy fabrics and reduces the risk of accidentally stabbing yourself during removal.
Using Starch to Baste Quilt Layers
Spray starch can serve as a basting aid, though it provides less hold than dedicated adhesive sprays. Spray starch lightly between your quilt layers and allow it to dry for 5 to 10 minutes before handling. The starch stiffens the layers slightly, helping them stay aligned during quilting. Test on a scrap first—some starch formulations can cause discoloration on certain fabrics. Starch is best suited for wall hangings and decorative pieces that won’t require frequent washing.
What Quilt Basting Spray Actually Does to Your Layers
Quilt basting spray creates a temporary, repositionable bond between fabric layers using a combination of adhesive compounds and carrier solvents. The spray evaporates as it dries, leaving the adhesive slightly tacky. This tackiness holds layers securely while still allowing minor repositioning if needed. The bond is strong enough to prevent shifting during machine or hand quilting but weak enough to be overcome by the quilting needle passing through all layers.
Using Elmer’s Glue for Quilt Basting
Elmer’s washable glue diluted 3:1 with water creates a budget-friendly basting alternative. Apply the mixture in a thin, even layer using a sponge brush or roller. Allow it to dry completely—typically 30 to 60 minutes—before quilting. The bond holds throughout the quilting process and washes out when you launder the finished quilt. This method is particularly useful for hand quilting projects where you want a temporary hold that won’t shift during extended stitching sessions.
Using Denim as a Quilt Backing or Batting Alternative
Yes, denim works excellently as a quilt backing or even as a batting substitute for heavy, structured quilts. Heavyweight denim (12 to 15 ounces per yard) provides warmth and structure similar to traditional batting when layered with a cotton quilt top. Denim is extremely durable and creates quilts suited for high-use items like table runners, placemats, and heavily used bed quilts. Pre-wash denim to remove excess dye and prevent color bleeding in your finished project.
Final Tips for Successful Quilt Basting
Regardless of which basting method you choose, success depends on proper preparation. Always work on a clean, flat surface larger than your quilt. Ensure all three layers are smooth and wrinkle-free before securing them together. For spray basting, maintain 8 to 10 inches distance between the spray nozzle and fabric for even coverage. For pin basting, start in the center and work outward to prevent ripples and tucks. Take your time with basting—the extra minutes spent now will save hours of frustration later when you are quilting your layers together.
References
- Wikipedia Contributors. (2025). Quilting. Wikipedia.
- Missouri Star Quilt Company. (2024). Quilting Techniques and Resources. Missouri Star Quilt Company.
- The Spruce Crafts. (2024). Quilting Guides and Patterns. The Spruce Crafts.
- CottonWorks. (2024). Quilting Knowledge Center. Cotton Incorporated.


