How To Dye A Wool Coat?
To dye a wool coat, wash the fabric and soak it in water at 100°F (38°C). Use an acid dye or protein-based dye formulated for wool, mix according to package directions, and submerge the coat completely. Gradually raise the bath temperature to 180–200°F (82–93°C) and maintain it for 30 minutes until the fibers absorb the dye and the water reaches a steaming state.
Wool is a protein fiber that requires careful temperature control and specific dye formulations to achieve uniform color without damage. The process takes 30–60 minutes depending on the desired color depth, and following these steps produces professional-quality results at home.
Wool Coat Dyeing Quick-Reference: Temperature and Time
| Stage | Temperature | Duration | Purpose |
|---|---|---|---|
| Pre-soak | 100°F (38°C) | 15–30 minutes | Saturate fibers for uniform dye uptake |
| Heat ramp | 100°F → 180–200°F (38°C → 82–93°C) | 15–20 minutes | Gradual temperature increase prevents felting |
| Dye bath | 180–200°F (82–93°C) | 30–60 minutes | Maximum color absorption and colorfastness |
| Initial rinse | 120°F (49°C) | Until clear | Remove excess dye without thermal shock |
| Final rinse | Cold water | 3–5 cycles | Close fiber cuticles and set color |
| Air drying | Room temperature | 24–48 hours | Prevent UV fading and fiber stress |
Difficulties You’ll Face While Dyeing a Wool Coat
Wool is not the easiest fabric to dye and customize. The fiber is sensitive and reacts to chemicals, temperature fluctuations, and moisture levels.
Before you submerge your wool coat in dye, consider several factors. The following complications frequently arise when dyeing a wool coat:
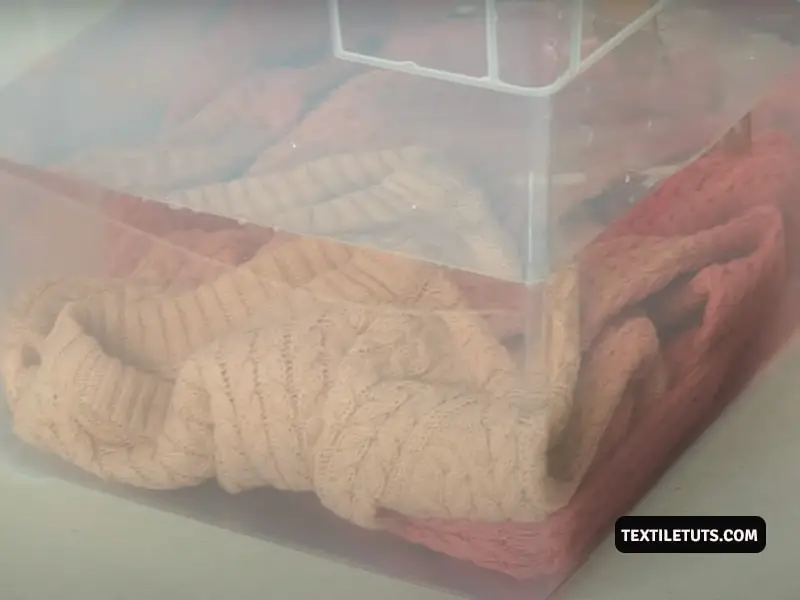
Fabric Shrinkage
Wool shrinks when exposed to temperatures above 200°F (93°C) combined with agitation and moisture. All three factors are present during the dyeing process.
Without careful handling during submersion, the coat shrinks and becomes misshapen. The garment then no longer fits and appears distorted. The scale-like structure of wool fibers (cuticle cells) activates and locks together when exposed to heat, moisture, and mechanical action—a process called felting.
Chemical Damage
Selecting the correct dye type for your wool coat prevents fiber damage. Some coats contain 100% natural wool, while others blend wool with synthetic fibers.
Natural wool fibers consist of keratin protein, which reacts poorly to harsh chemicals. Mixed wool blends incorporate synthetic fibers such as nylon, cotton, or linen. The non-keratin fibers provide structural stability that protects the wool backbone during dyeing.
Check the garment tag to determine whether the coat contains fully natural or blended fabric before purchasing dye. Blended fabrics typically require different dye formulations than 100% wool.
Changes in Texture
Dyeing alters the surface texture of wool, frequently resulting in a rougher or scratchier feel. This occurs because the dye opens the fiber cuticles and modifies the protein structure.
The texture change becomes problematic when the coat contacts bare skin. A coat that felt soft before dyeing may require a lining or base layer after the process.
Color Bleeding and Uneven Dyeing
Some dyes lack colorfastness, causing the color to bleed or fade after 5–10 washes. Low-quality dyes produce inconsistent results within the first three wash cycles.
Wool fibers vary in diameter (typically 15–25 microns) and porosity, creating inconsistent dye uptake. Some areas of the coat absorb more dye than others, resulting in a patchy or streaked appearance. Fiber variation across the garment creates a mottled effect that appears within 30 minutes of submersion.
Wool Coat Dyeing Process – A Step-by-Step Guide
Now that you understand the pre-dyeing considerations, follow the step-by-step process. Implement these instructions and incorporate the pro tips to achieve professional-quality results.
Step One – Gather the Necessary Items
To dye a wool coat, gather the following materials before beginning:
Once you have assembled all items, proceed to the next step.
Step Two – Wash and Soak the Wool Coat
Wash the coat thoroughly before dyeing. Dirt, oils, and fabric finishes create barrier layers that produce uneven color patches. Use a wool-safe detergent at 100°F (38°C) maximum, and rinse until the water runs clear.
After washing, soak the coat in lukewarm water at 100°F (38°C) for 15–30 minutes to fully saturate the fibers. Gently press the coat to remove excess water without wringing or twisting. This pre-saturation step ensures the wool accepts dye uniformly during submersion.
Pro Tip
Retain the pre-wash water to create the dye bath. Some dyers report that reusing this water improves color uptake and reduces shrinkage risk by maintaining consistent mineral content.
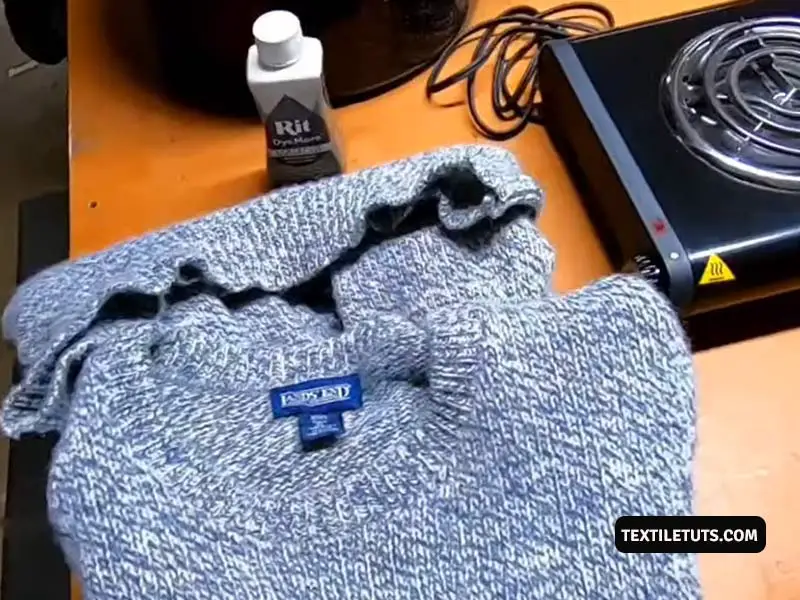
Step Three – Choose the Right Dye
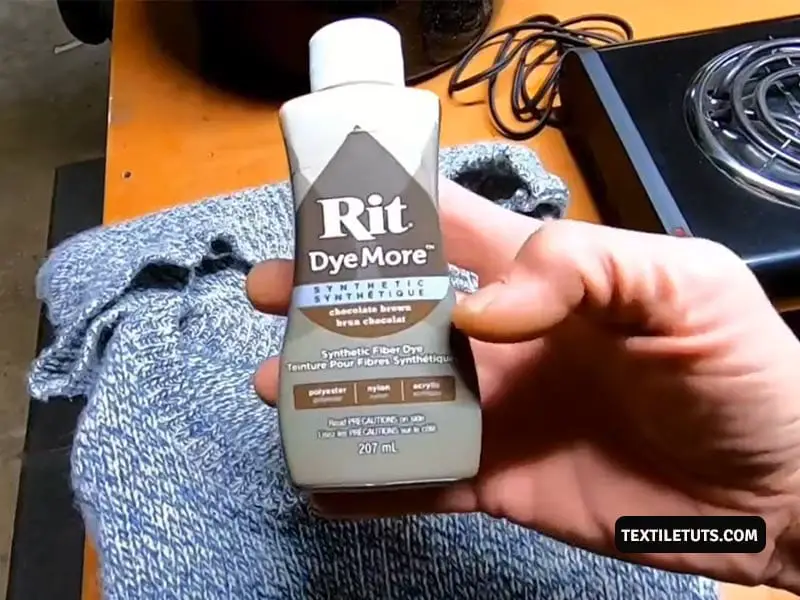
Different wool types require specific dye formulations. Select a dye specifically formulated for natural protein fibers. Acid dyes and Rit All-Purpose Dye both bond effectively with wool keratin.
Rit All-Purpose Dye contains a combination of direct dyes and acid dyes that penetrate wool fibers. For deeper, more colorfast results, use a dedicated acid dye such as Jacquard Acid Dye, which produces wash-fastness ratings of 4–5 on a 5-point scale.
Select the correct color and shade based on the garment’s original hue. Wool is a protein fiber and takes dye differently than plant-based fibers—darker shades typically produce more saturated results on light-colored wool.
Step Four – Prepare the Dye Liquor
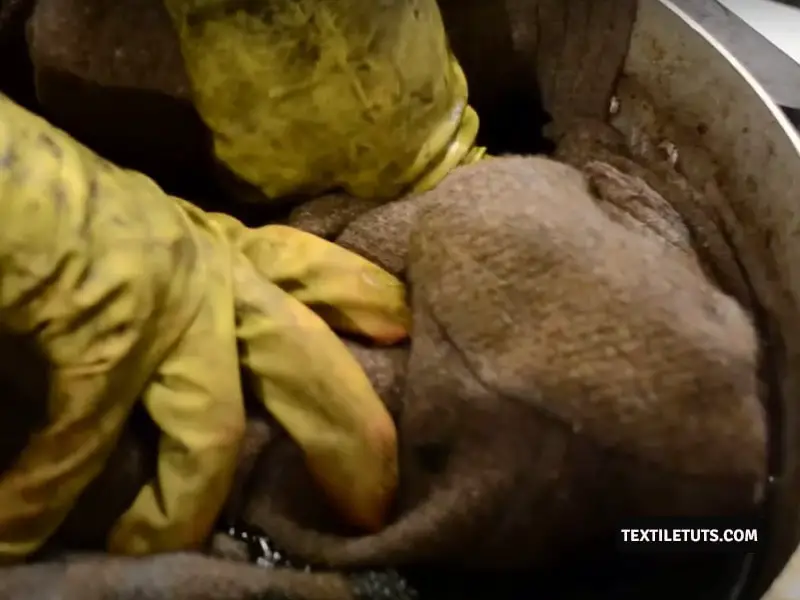
Put on temperature-resistant gloves and a face mask before handling dye powder or liquid concentrate. Follow the dye package instructions to prepare the solution.
Rit dye manufacturers recommend using two powder dye packets or one liquid dye bottle for every 2 pounds (0.9 kg) of fabric weight. Mix the dye with hot water (minimum 140°F / 60°C), then combine 4 cups of this dye solution with 1 cup of white vinegar in a separate container before adding it to the main dye bath. The vinegar lowers the pH to approximately 4.5–5.0, which opens the wool fiber cuticles for optimal dye absorption.
Pro Tip
Test the dye solution on a fabric scrap or paper towel before applying it to the coat. Apply a small amount and rinse after 5 minutes to evaluate color intensity and evenness.
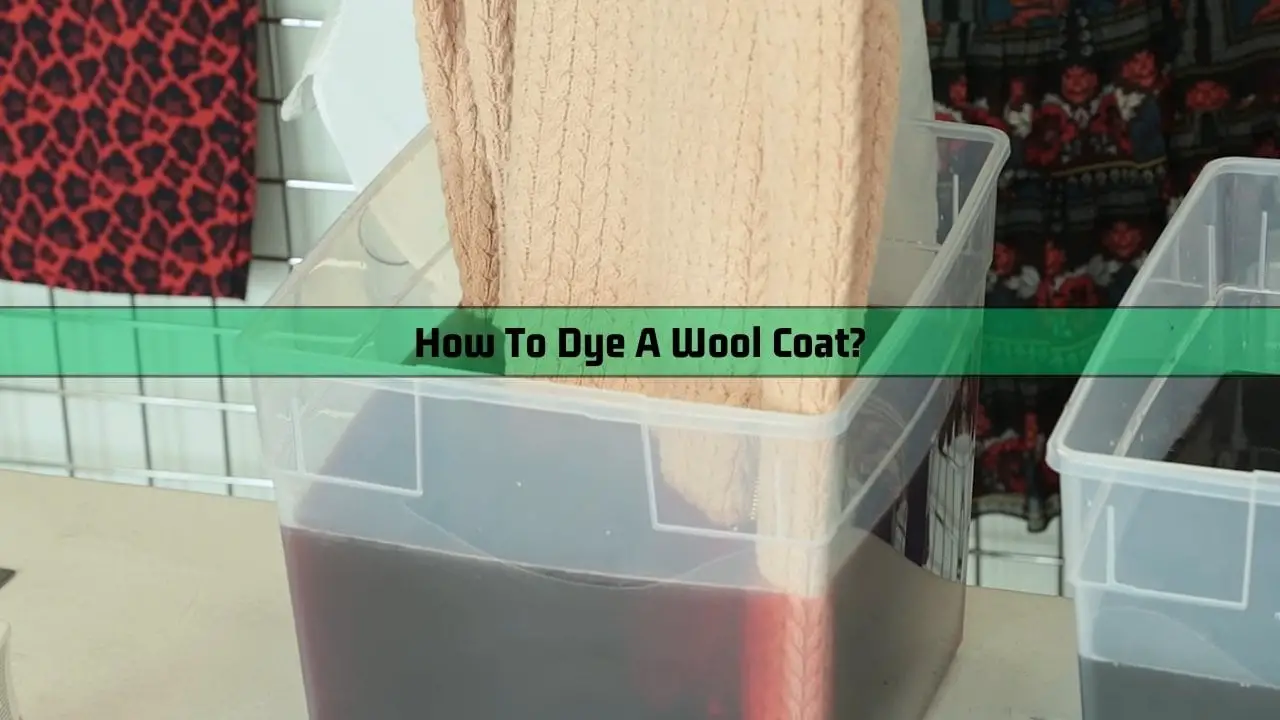
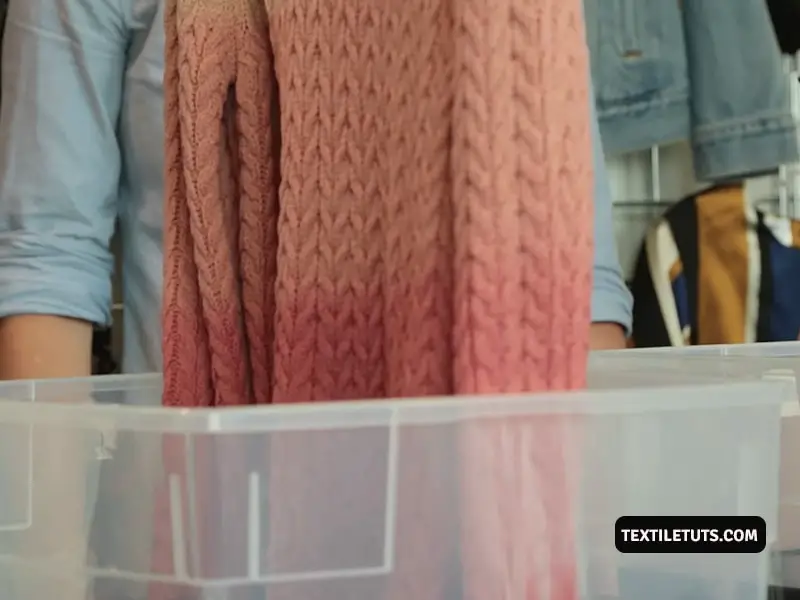
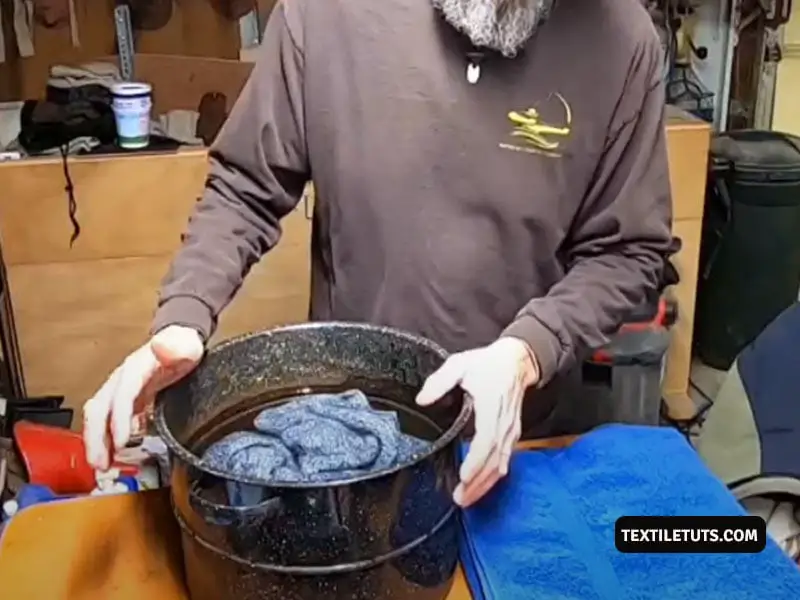
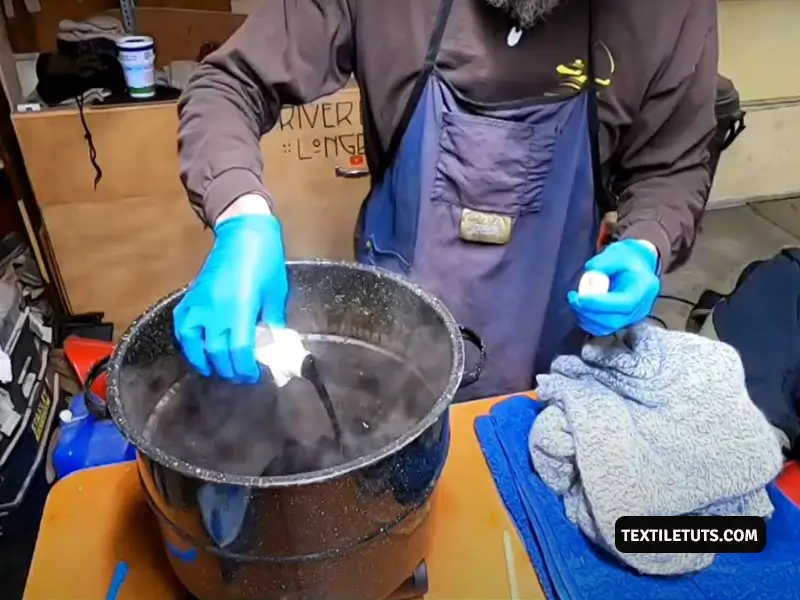
Step Five – Dip the Coat in Dye Liquor
Fill a dye pot with sufficient water to submerge the coat completely. Add the prepared dye-vinegar solution and stir thoroughly. Place the pre-soaked coat into the bath and ensure full submersion.
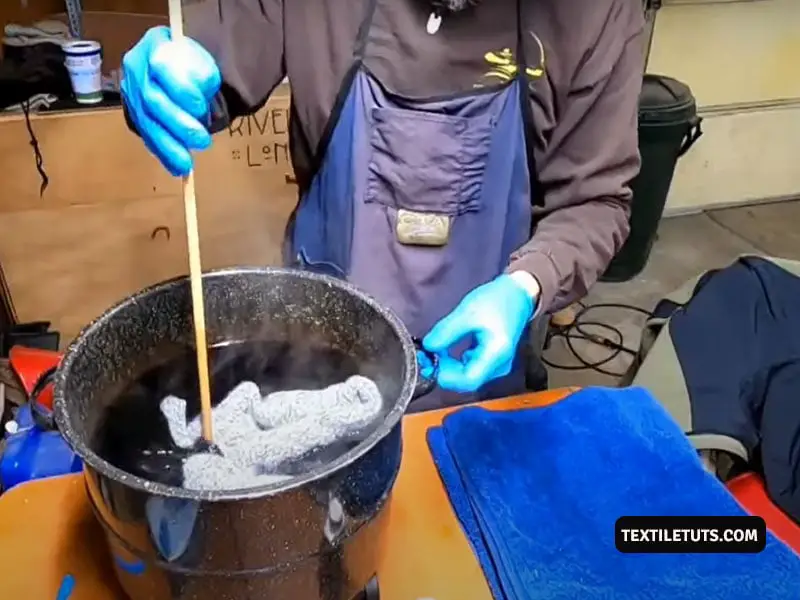
Raise the bath temperature gradually from 100°F (38°C) to 180–200°F (82–93°C) over 15–20 minutes. Never pour hot water directly into the bath, as rapid temperature changes cause wool to felt and shrink. Maintain the maximum temperature for 30 minutes.
Stir the coat gently every 5 minutes to ensure even dye distribution. The total dyeing time ranges from 30 to 60 minutes, depending on the desired color depth. Deeper shades require the full 60 minutes at maximum temperature.
Step Six – Rinse and Dry
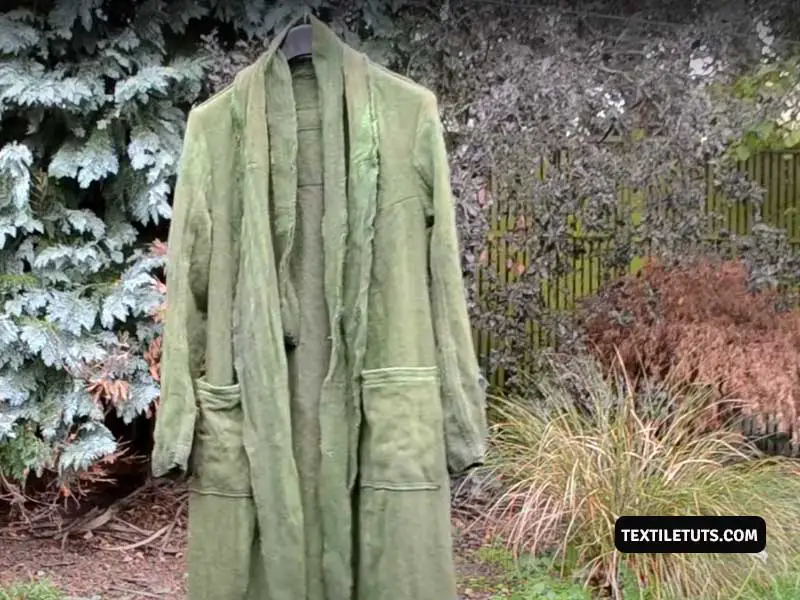
Remove the coat from the bath once it reaches the target color. Rinse it initially with warm water at 120°F (49°C), then gradually reduce the temperature to cold water over 5 minutes. Continue rinsing until the water runs completely clear, which typically requires 3–5 rinse cycles.
Hang the coat on a padded hanger or lay it flat on a clean towel to dry. Keep the coat away from direct sunlight, which causes color fading at a rate of approximately 10–15% per hour of UV exposure. Allow 24–48 hours for complete air drying.
Differences Between Dyeing Wool and Hemp Fabric
Yes, the same dyeing process works for both wool and hemp fabric, though key material differences exist. Wool absorbs dye at 180–200°F (82–93°C) due to its open fiber structure, while hemp requires higher temperatures of 200–212°F (93–100°C) because of its dense cellulose composition.
The primary challenge with hemp lies in its natural resistance to color absorption. Hemp fibers contain pectin and waxes that repel water-based dyes. Pre-washing with soda ash (sodium carbonate) at 1 tablespoon per gallon of water removes these barriers and improves dye uptake by up to 40%.
Wool uses acid dyes that bond with protein structures, while hemp requires fiber-reactive dyes that form chemical bonds with cellulose. The additional chemical preparation step for hemp adds 30–45 minutes to the overall process.
Conclusion
You now know how to dye a wool coat correctly. The technique involves selecting the appropriate dye, raising the temperature gradually to 180–200°F (82–93°C), and maintaining consistent agitation throughout the 30–60 minute dyeing cycle.
Follow the steps outlined above to dye your wool coat safely and effectively. Test the dye on a concealed area of the garment—such as the interior hem or cuff—before applying it to the entire surface. Consult the dye manufacturer’s instructions for exact ratios and timing specifications.
With proper preparation and attention to temperature control, you achieve a uniformly colored wool coat that maintains its texture and fit for years of additional wear.
References
- Rit Dye. (2024). Rit Dye Website – Fabric Dyeing Products and Instructions. Rit Dye.
- Wikipedia Contributors. (2024). Dyeing – Wikipedia. Wikimedia Foundation.
- Wikipedia Contributors. (2024). Wool – Wikipedia. Wikimedia Foundation.
- Wikipedia Contributors. (2024). Fabric – Wikipedia. Wikimedia Foundation.


