Can Tailors Add Slits To Dresses? – Sizzling Fashion Trends
Professional tailors add slits to dresses routinely as a standard alteration service, and the process typically takes 30 to 60 minutes depending on fabric type and finishing technique. The alteration involves cutting along an existing seam—usually the side seam or back seam—and finishing the raw edges to prevent fabric unraveling. Critical factors determining success include the dress material composition, precise slit placement, and the overall garment design.
This guide covers the complete process of adding slits to dresses, professional tailor expectations, fabric selection criteria, available slit styles, and essential care maintenance procedures.
How Tailors Add Slits to Dresses: The Professional Process
Professional tailors add slits to dresses by cutting an opening along the existing seam—typically the side seam or back seam—and finishing the raw edges to prevent fabric unraveling. The process requires precision measurement, proper cutting technique, and appropriate edge finishing based on the fabric’s specific properties.
Here is the standard professional process tailors follow when adding slits to dresses:
Find a Skilled Tailor
Look for a tailor with documented experience in dress alterations and demonstrated expertise in garment construction techniques. Request before-and-after photos of previous slit alteration work.
Choose the Location and Length of the Slit
Determine the slit location (side, front, or back) and desired length. Standard slit lengths include knee-length openings measuring approximately 6 to 8 inches from the hem, mid-thigh openings measuring 10 to 12 inches, and high slits extending 14 to 18 inches or higher.
Discuss Your Preferences
Communicate your vision and preferences clearly. Professional tailors provide expert guidance on which slit styles complement specific dress designs and body types.
Try on the Dress
The tailor conducts a thorough fitting session to assess garment drape, identify the optimal seam for slit placement, and determine precise positioning based on the client’s measurements and preferences.
Make Adjustments
The tailor marks the dress with precise chalk lines indicating the slit’s exact location and length. Additional alterations—such as taking in or letting out the waist—may be necessary to maintain proper proportions after the slit is added.
Adding the Slit
The tailor carefully cuts the fabric along the marked seam, then finishes the edges using the appropriate technique for the specific fabric type—typically a ¼-inch double-fold hem for woven fabrics or a zigzag overlock stitch for knit fabrics.
Final Fitting
A final fitting confirms the slit falls at the correct height, allows comfortable movement, and achieves the desired aesthetic. Minor adjustments ensure the finished result matches client expectations.
Preparing and Choosing a Dress for Slit Customization
Successful slit customization requires careful dress selection and thorough preparation. Several critical factors determine whether a particular dress suits this alteration.
Follow this step-by-step guide for optimal results:
Select the Right Dress
Choose dresses made from fabrics that respond well to slit alterations. Flowing fabrics such as silk, satin, chiffon, and jersey work exceptionally well because they drape naturally and allow comfortable movement. Silk fabric possesses a triangular cross-section measuring 5 to 10 micrometers wide, creating its characteristic natural sheen. Satin, constructed with four or more fill yarns floating over each warp yarn, offers excellent draping qualities. Body-hugging sheath and pencil dresses also accommodate slits effectively when the placement and length complement the garment’s original design.
Dress Length
The dress must provide sufficient fabric below the intended slit length. Midi dresses—typically falling between the calf and ankle—accommodate modest knee-length slits measuring 6 to 8 inches from the hem. Maxi dresses work well for higher slits reaching mid-thigh or above. A dress shorter than 40 inches in total length may not permit a practical slit without compromising coverage.
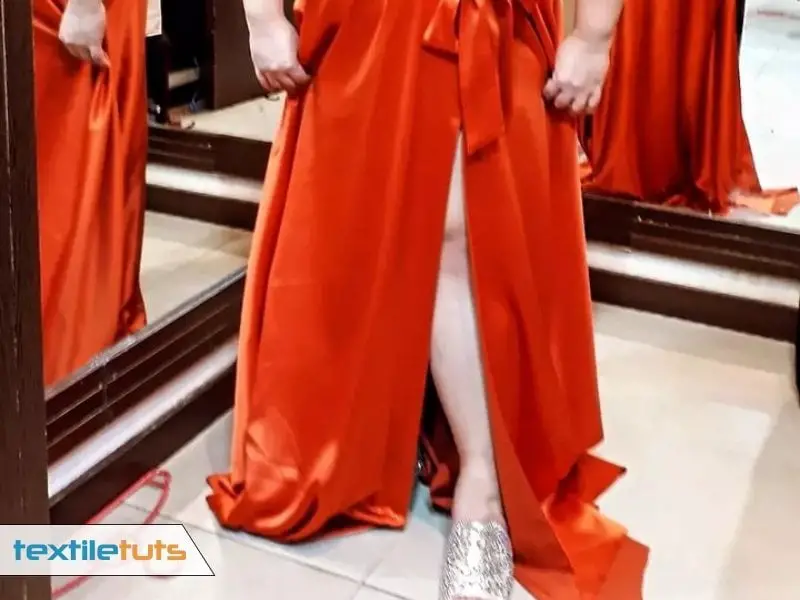
Slit Location
Side slits represent the most common and versatile option, positioned along the natural seam where the side seam meets the hem. Front slits create a dramatic focal point and work particularly well on formal gowns. Back slits offer an elegant surprise element visible primarily when the wearer turns or moves. Each location requires different construction techniques and finishing approaches.
Slit Length
Standard slit lengths fall into three categories: modest slits extending 6 to 8 inches above the hem for knee coverage; mid-thigh slits measuring 10 to 12 inches for statement-making elegance; and high slits reaching 14 to 18 inches or higher for maximum drama and freedom of movement. Higher slits often require additional interior lining or built-in shorts for practical coverage and comfort.
Consult with a Professional Tailor
Seek consultation with an experienced tailor who specializes in dress alterations. Professional tailors assess fabric condition, identify potential challenges such as existing seam placements or pattern alignments, and recommend the most suitable slit style for your specific garment and body proportions.
Fabric Matching
Dresses featuring patterns, prints, or directional weaves require careful pattern alignment at the slit opening. Professional tailors match fabric patterns meticulously at the seam to maintain visual continuity and design integrity.
Trial Fitting
Request a trial fitting during which the tailor pins the proposed slit location and length. This session allows you to visualize the final result, test mobility, and request adjustments before any permanent cutting occurs.
Finishing Options
Discuss edge finishing options with your tailor. Clean hemming creates a minimalist edge. Rolled hems work well for lightweight fabrics. Facings provide structural reinforcement and a polished interior appearance. The chosen finish depends on fabric weight, drape characteristics, and desired aesthetic.
Comfort and Movement
Test comfort thoroughly during fittings by walking, sitting, bending, and climbing stairs. The slit must permit full range of motion without creating gaps or unintended exposure. Pay particular attention to sitting, as thigh-high slits can shift significantly when transitioning from standing to seated positions.
Accessorizing
Consider how accessories interact with your chosen slit style. Strappy heels elongate the leg line beautifully with high slits. Statement jewelry draws attention to neckline rather than hem. Built-in shorts or slip dresses provide practical coverage for more daring slit lengths during active events.
Slit Length Quick-Reference Guide
Use this quick-reference guide to choose the right slit length for your dress and occasion:
| Slit Type | Length from Hem | Best For | Coverage Level |
|---|---|---|---|
| Modest / Knee-Length | 6–8 inches | Work events, conservative formal occasions, midi dresses | Full knee coverage |
| Mid-Thigh | 10–12 inches | Cocktail events, evening wear, statement styling | Upper thigh visible |
| High / Thigh-High | 14–18+ inches | Red carpet, formal galas, fashion-forward events | Minimal coverage — built-in shorts recommended |
DIY Tailoring Process: Adding Slits to Dresses
Adding slits to dresses successfully requires fundamental sewing skills, appropriate tools, and meticulous attention to fabric-specific techniques. Follow this detailed guide for professional-quality results:
Materials Needed
Step 1: Choose the Dress
Select an appropriate dress for slit modification. Flowy fabrics such as silk charmeuse, satin, chiffon, and single jersey (120 to 220 GSM) work best. Avoid stiff fabrics that will not drape naturally around the slit opening.
Step 2: Determine the Slit Location and Length
Try on the dress and mark your desired slit position using fabric chalk. Common placements include the side seam (most common), center front, or center back. Mark both the starting point and the desired length, typically 6 to 18 inches depending on your preference.
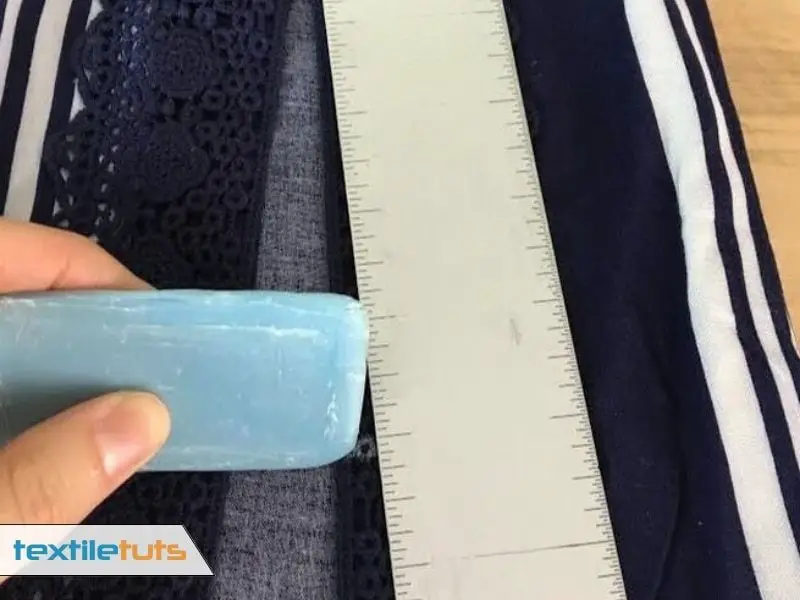
Step 3: Measure and Mark
Use a measuring tape to ensure symmetrical placement on both sides of the dress. Mark the slit length precisely, accounting for the ¼-inch seam allowance on each side. Accurate measurement prevents uneven slits that create an unprofessional appearance.
Step 4: Create a Slit Template (Optional)
For precise, identical slits, create a cardboard template matching your desired slit dimensions. Position the template along the marked seam line and trace carefully. This approach ensures consistency when creating double slits on both sides.
Step 5: Pin the Dress
Carefully pin both layers of fabric together along the marked slit line, ensuring the marks align perfectly on both sides. Pins should be placed every 2 to 3 inches for secure positioning during cutting.
Step 6: Cut the Slits
Using sharp fabric scissors, cut along the marked line carefully. Cut only one layer at a time to maintain control and precision. Never cut through both layers simultaneously, as this risks creating uneven slit edges.
Step 7: Finish the Edges
- Fold the raw edge under exactly ¼ inch and press firmly with a warm iron to create a crisp fold line.
- Fold the edge under another ¼ inch, ensuring the first fold is completely hidden, and press again.
- Pin the double-folded edge in place at 3-inch intervals to secure the hem before sewing.
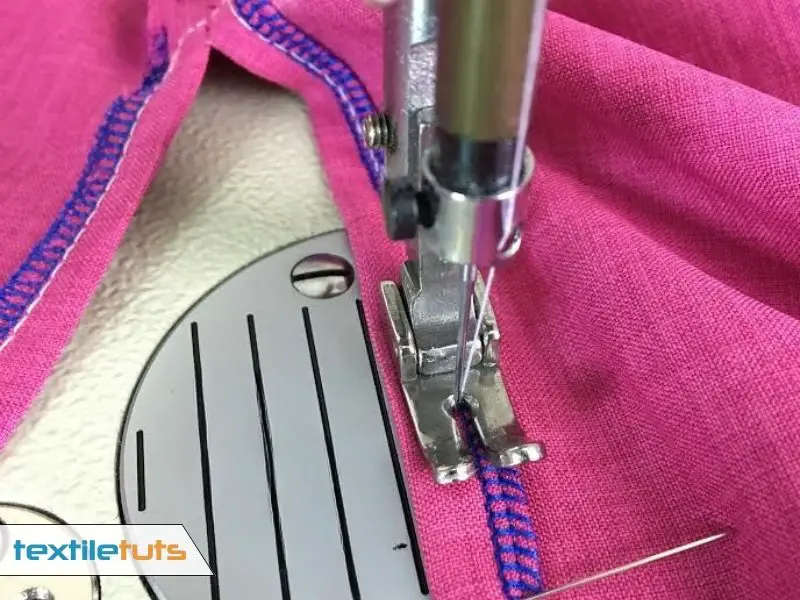
Step 8: Sew the Slits
- Use a sewing machine with zigzag stitch capability or hand-sew with a slip stitch for delicate fabrics.
- For woven fabrics, apply a zigzag stitch along the raw edge before folding to prevent unraveling during wear and washing.
- Sew from the top of the slit downward, backstitching ½ inch at both the beginning and end for secure reinforcement.
Step 9: Press the Slits
After sewing, press the completed slits with an iron set to the appropriate temperature for your fabric type. Use a pressing cloth between the iron and delicate fabrics such as silk or satin to prevent scorching and shine marks.
Step 10: Final Fitting
Try on the completed dress and test the slits thoroughly. Walk, sit, bend, and move through your full range of daily activities. Check that the slits hang evenly, maintain comfortable coverage, and do not gap or stretch excessively during movement.
Congratulations on successfully adding custom slits to your dress. Inspect the finished seams for any loose threads or areas requiring touch-up, and make any necessary final adjustments before wearing your modified garment.
Care and Maintenance of Slit Dresses
Proper care and maintenance preserve both the appearance and structural integrity of slit dresses. Different fabric types require specific care approaches to prevent damage during cleaning and storage.
Hand Washing or Gentle Machine Wash
Check the garment’s care label for manufacturer specifications. Hand washing minimizes stress on slit seams and prevents damage from agitator action. When machine washing is necessary, select the gentle cycle with cold water (maximum 30°C/86°F) and place the dress inside a mesh laundry bag for protection against tangling and mechanical damage.
Use Cold Water
Always use cold water between 65°F and 85°F (18°C to 30°C) for washing slit dresses. Hot water causes fabric shrinkage—unwashed silk may shrink up to 8%, and dry cleaning can still shrink delicate chiffon fabrics by approximately 4%. Cold water preserves fiber strength and color vibrancy, particularly important for silk which loses approximately 20% of its tensile strength when wet.
Avoid Harsh Detergents
Use mild detergents specifically formulated for delicate fabrics. Avoid bleach containing chlorine, which destroys silk fibers on contact. For silk dresses, use enzyme-free detergents designed specifically for protein-based fibers. Harsh chemicals degrade fabric structure and can cause discoloration around the slit edges where light exposure concentrates.
Spot Cleaning
Address localized stains immediately using targeted spot cleaning. Apply a small amount of mild soap directly to the stained area, gently working the solution into the fabric with fingertips. Test any cleaning product on an inconspicuous area first to verify colorfastness and fabric compatibility.
Dry Cleaning (if necessary)
Dresses made from silk, satin, or structured fabrics with built-in linings typically require professional dry cleaning. Chiffon fabrics—whether silk or synthetic—fray easily and benefit from professional handling that prevents edge deterioration during cleaning.
Air Drying
After washing, gently squeeze excess water from the fabric without wringing or twisting, as these actions stretch and distort the garment structure. Lay the dress flat on a clean, absorbent towel and allow it to air dry away from direct sunlight. Never hang slit dresses from the slit area, as this causes permanent stretching and distorts the original silhouette.
Ironing
Set the iron to the low heat setting appropriate for your fabric type—typically one to two dots on the temperature dial for silk and delicate synthetics. Iron the dress inside out to protect both the exterior fabric surface and the slit seam construction. Never iron directly over completed slits, as direct heat creates permanent creases that are difficult to remove.
Store Properly
Hang slit dresses on padded hangers in a climate-controlled closet maintained between 60°F and 75°F (15°C to 24°C) with 40% to 50% relative humidity. Ensure adequate spacing between garments to prevent crushing and fabric bunching around the slit areas. For long-term storage, cover dresses with breathable cotton garment bags to protect against dust while allowing air circulation.
Avoid Sharp Objects
Satin fabrics are particularly prone to snagging from sharp objects, jewelry, and rough surfaces due to their floating yarn construction where four or more fill yarns pass over each warp yarn. Remove jewelry before dressing and be mindful of rough textures on chairs, bags, and accessories that can catch on slit edges and create pulls or runs.
Types of Slits Available for Customization
Tailors and dress designers offer numerous slit styles, each creating a distinct aesthetic and level of openness. Understanding the characteristics of each type helps in selecting the most appropriate option for your garment and occasion.

Side Slit
The side slit ranks as the most popular and versatile option, positioned along the natural side seam. This style typically begins at the hem and extends 6 to 18 inches upward. Side slits offer excellent mobility and work appropriately for both casual and formal occasions.
Front Slit
The front slit runs along the center front seam from the hem upward. This dramatic style ranges from subtle knee-length openings measuring 6 to 8 inches to daring high-slit designs extending 14 to 18 inches or more. Front slits create a focal point and work exceptionally well on formal evening gowns.
Back Slit
The back slit runs along the center back seam, providing an elegant surprise element visible primarily when the wearer turns or moves. This option maintains a classic front appearance while offering enhanced mobility and a hint of sophistication during movement.
Thigh-High Slit
The thigh-high slit extends from the hem to the upper thigh, typically 14 to 18 inches above the hemline. This bold statement style appears frequently in evening gowns, cocktail dresses, and red-carpet fashion. This style typically requires additional interior coverage such as built-in shorts or a slip dress for practical wear.
Asymmetrical Slit
The asymmetrical slit creates visual interest through diagonal placement, beginning at one side and angling upward toward the opposite side. This contemporary style adds movement and dimension, particularly effective on flowing fabrics that capture the diagonal line during wear.
Slit with Underlay
The underlay slit provides coverage through a secondary fabric layer visible beneath the main slit opening. The underlay can match the dress fabric exactly or contrast for added visual interest. This construction provides modesty and comfort while maintaining the aesthetic effect of a high slit.
Double Slit
The double slit features matching openings on both sides of the dress, providing a fashion-forward, symmetrical look. This high-fashion style appears frequently in designer collections and red-carpet gowns, offering exceptional mobility and a dramatic visual impact.
Curved Slit
Instead of a straight vertical opening, the curved slit follows a gentle arc along the garment’s contour. This feminine style softens the overall appearance and creates elegant movement as the wearer walks. Curved slits require expert pattern matching when working with printed or directional fabrics.
Slit with Ruffles or Fringes
Decorative elements such as ruffles or fringes along the slit edges add texture and visual interest. Ruffled slits create a playful, romantic aesthetic, while fringed slits offer movement and a bohemian vibe. These decorative treatments work best on lightweight fabrics that drape and flow naturally.
Layered Slits
Layered slits incorporate multiple openings at varying heights, creating dimension and visual complexity. This advanced tailoring technique suits designer garments and formal gowns where unique construction details enhance the overall design statement.
Fast-Track Alteration Services for Adding Slits to Dresses
Many professional tailors offer rush alteration services for clients with time constraints. Express services typically complete slit alterations within 24 to 48 hours for an additional fee ranging from 50% to 100% of the standard alteration cost. When selecting fast-track services, confirm the tailor’s experience level and request documentation of previous rushed alterations to ensure quality results under accelerated timelines.
Final Words
Professional tailors add slits to dresses as a standard alteration service, leveraging specialized skills and equipment to transform garment designs. Communicating your desired slit length and placement clearly ensures results that meet expectations. The tailor’s technical expertise—including precise measuring, careful cutting, and proper edge finishing—determines the final quality and durability of the alteration.
Understanding fabric properties helps in making informed decisions about slit customization. Silk fabric loses approximately 20% of its tensile strength when wet and may shrink up to 8% if unwashed. Satin’s floating yarn construction creates its characteristic sheen but requires careful handling to prevent snags. Chiffon frays easily and benefits from French seams or bias-bound edges during slit construction.
Proper slit construction enhances both the aesthetic appeal and functional comfort of a dress, creating a customized garment that reflects individual style preferences while maintaining professional-quality construction standards.
References
- Wikipedia. (2024). Silk – Wikipedia. Wikimedia Foundation.
- Wikipedia. (2024). Satin – Wikipedia. Wikimedia Foundation.
- Wikipedia. (2024). Chiffon (Fabric) – Wikipedia. Wikimedia Foundation.
- Wikipedia. (2024). Jersey (Fabric) – Wikipedia. Wikimedia Foundation.
- Wikipedia. (2024). Tailoring – Wikipedia. Wikimedia Foundation.


