Basic Woven Shirt Fabric Consumption Calculator for Sewists
Are you a home sewist looking for an easier solution to calculating fabric consumption for basic woven shirt projects? If so, then you’re in luck!
This blog post has all the information that you need to help take the hassle out of estimating how much fabric is required for your project.
You can easily calculate if you have enough fabric on hand or if it’s time to make a shopping trip! Read on and see how simple it is to use our own basic shirt fabric consumption calculator!
Basic Woven Shirt Fabric Consumption Calculator
| Component | Area |
|---|---|
| Body | |
| Sleeve | |
| Collar | |
| Cuff | |
| Back Yoke | |
| Placket |
Required Fabric Area:
Required Fabric Length:
Will the Fabric Consumption Calculator Work for 90% Cotton 10% Polyester Fabric?
Yes, the fabric consumption calculator will work for 90% cotton 10% polyester fabric. It’s crucial to accurately calculate the yardage needed for sewing projects. Using a cotton polyester blend guide can help determine the appropriate amount of fabric required for any project.
How to Use Our Shirt Consumption Calculator?
It’s pretty straightforward if you have already dabbled in the world of sewing. You need to insert the measurements of different components of your shirt in the above fields. We have added default allowances for every component. You can adjust them however you like.
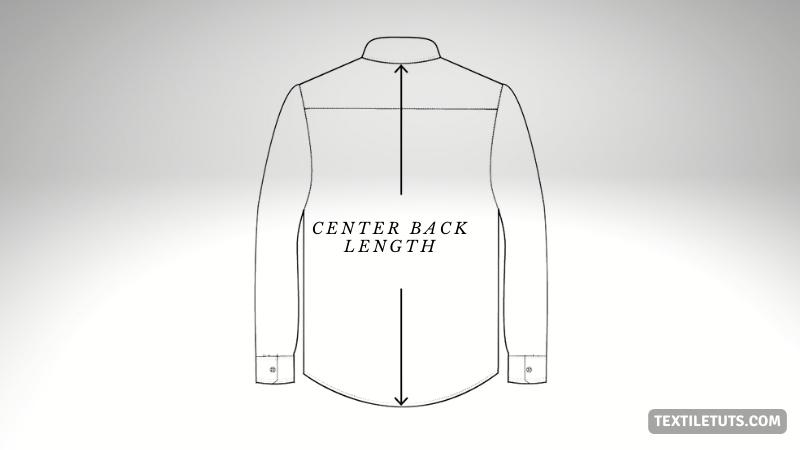
1. Center Back Length
Use a measuring tape, to measure the center back length as seen in the image below (collar to hem). If you are measuring this on a person, then measure the distance between his neck and the point where he’d want the shirt to end.
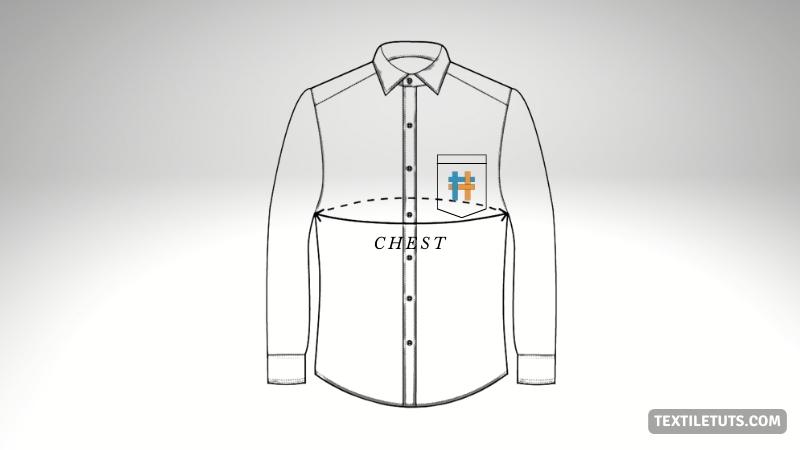
2. Chest
Measure the chest width by taking a circumference measurement of your shirt.
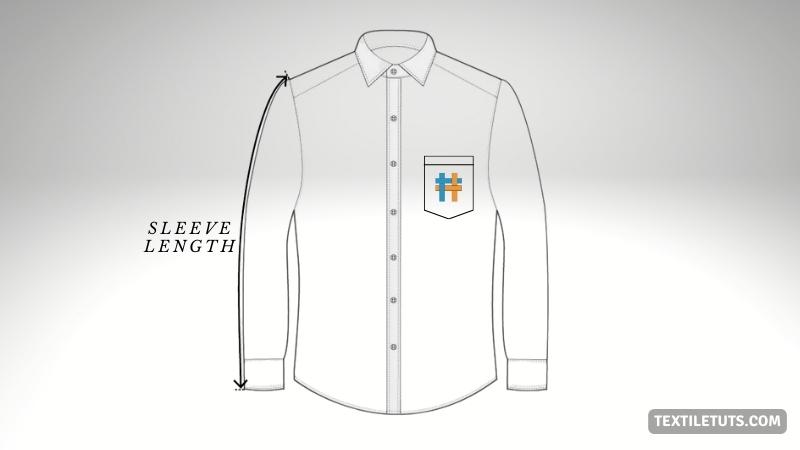
3. Sleeve Length
The sleeve length is the distance between the shoulder seam and the end of your cuff. Measure this on a shirt (or person) to get exact measurements.
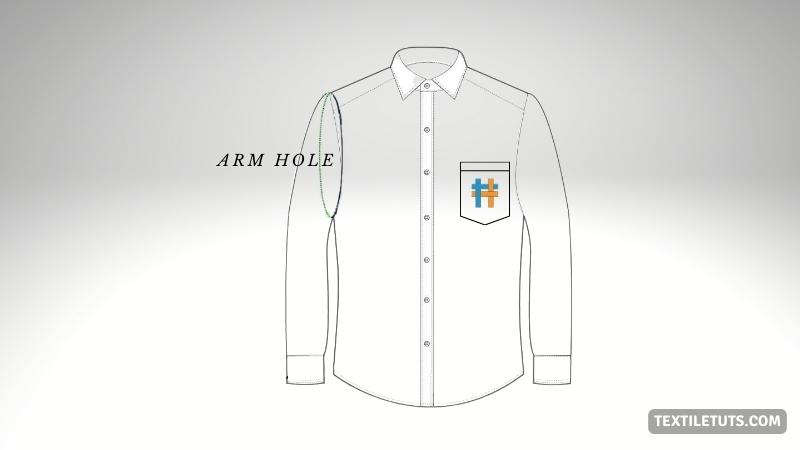
4. Arm Hole
For measuring arm hole, you need to measure the circumference of the sleeve attachment point.
5. Collar Length and Collar Height
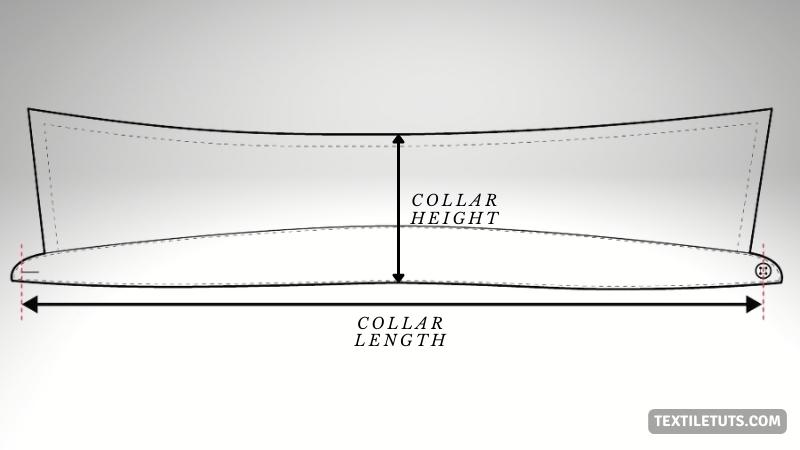
Measure the length of the shirt’s collar by measuring the length of the base plate of your collar.
For collar height, calculate the distance from the base of your neck to the top of your collar.
6. Pocket Width and Pocket Height
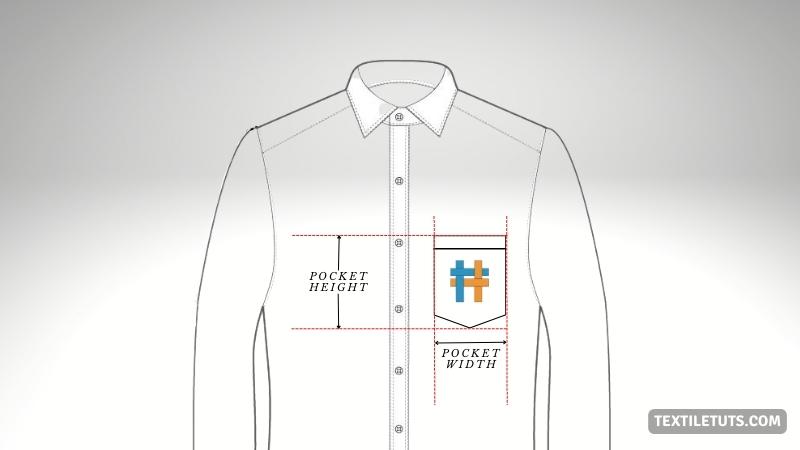
Pocket width is the distance between the sides of your pocket and pocket height is the distance from the top to bottom of your pocket.
7. Cuff Length and Cuff Width
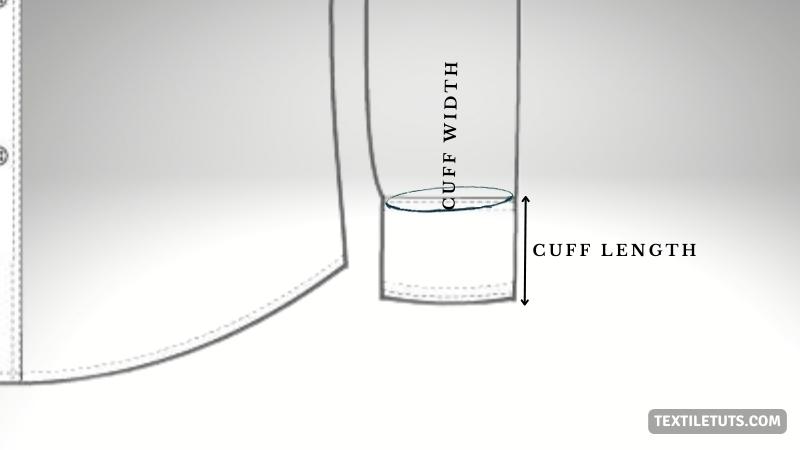
For measuring the cuff width, we need to measure the circumference of the cuff. And for cuff length, find the distance between the two end-points of your cuff like the image below.
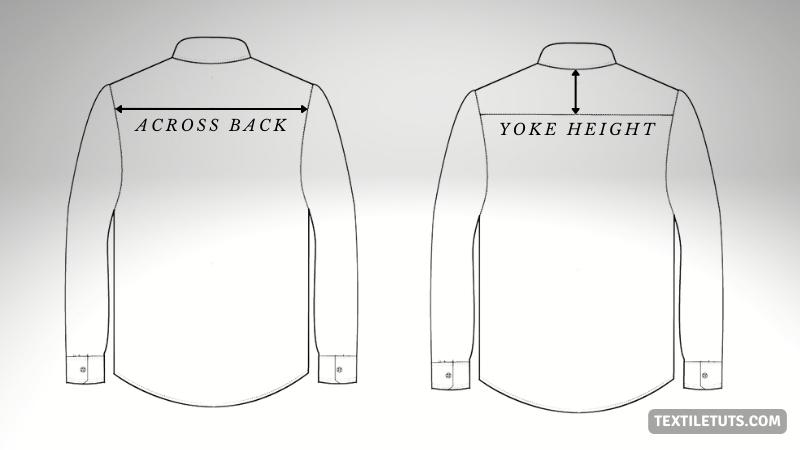
8. Across Back and Yoke Height
Measure the width of your shirt across the back, from seam to seam. This measurement is usually taken at shoulder blade level.
Now, take a vertical measurement from the shoulder seam down to where the yoke meets up with the body of the shirt. This distance is equal to your yoke height.
9. Placket Length and Placket Width
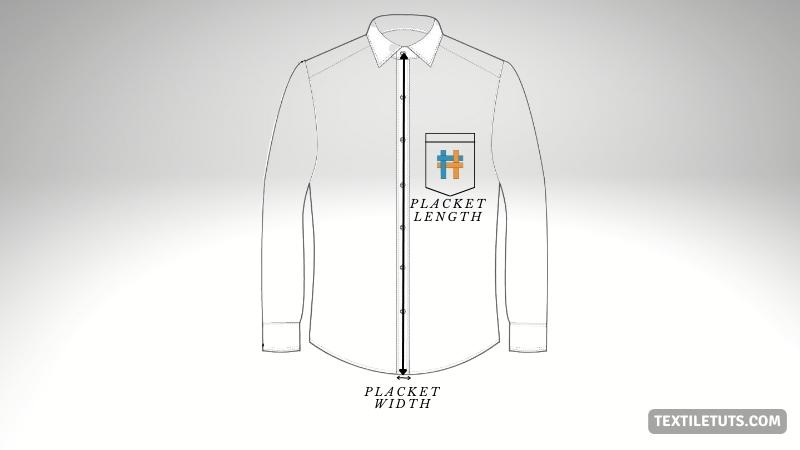
The placket is the area between the shirt’s collar and its buttons. Measure its length from the backside of the collar down to the bottom edge of the buttonhole. Measure its width from one side of the placket across to the other side.
10. Fabric Wastage (%)
It mainly depends on how efficiently you were able to set your patterns on the marker. See the calculations of the area for each component were done considering each component is of rectangular shape. Then, the total area was calculated by combining the areas of these rectangles.
But when you will be placing your patterns on your fabric, some areas of your fabric roll will inevitably remain unutilized.
If you are just getting yourself acquainted with the cutting process, then we recommend setting the values of fabric wastage to at least 20%. And trust us, it’s not a high number.
11. Usable Fabric Width
You won’t be able to use the whole width of your woven fabric for shirt-making. Why? Woven fabrics have selvages on both sides. Those areas need to be discarded during your calculations. Also, you need to give yourself some allowances near the extreme ends of your woven fabric roll.
So, use your best judgment to select how much width of the fabric you’ll actually using. If you have already designed a marker for your shirt cutting process, then your marker width will be equal to the usable fabric width.

