How to Get Under-Armour Logo Off: The Best & Easiest Ways
Removing an Under Armour logo from clothing requires specific chemical and thermal methods depending on the logo type. This guide covers the most effective techniques for eliminating unwanted logos from UA apparel.
Under Armour uses polyester fabric in approximately 90% of its performance apparel. The logos are applied using heat transfer vinyl (HTV) or screen-printed inks that bond at temperatures between 150°C and 180°C (302°F to 356°F). Understanding these materials helps you choose the right removal method.
This article provides step-by-step instructions for removing Under Armour logos using acetone, WD-40, rubbing alcohol, and heat application methods.
Easiest Ways to Remove Logos from Under Armor
Under Armour logos degrade over time due to repeated washing cycles and exposure to fabric softeners. The adhesive bond weakens at temperatures above 60°C (140°F), causing logos to crack or peel. The following methods work effectively on heat-set logos.
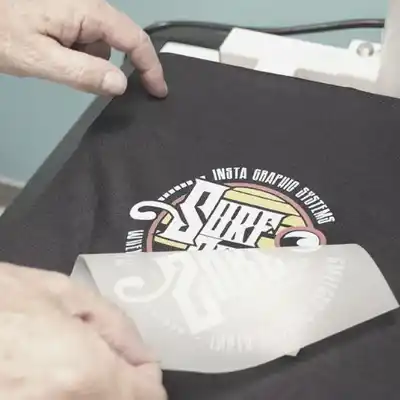
Using Acetone on Heat Transfer Vinyl
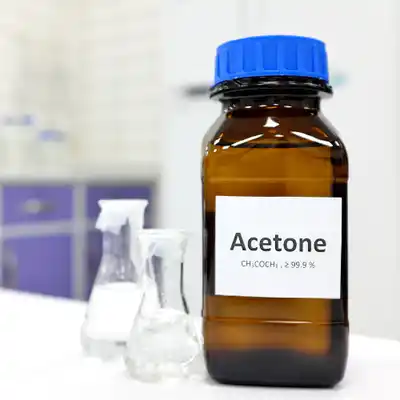
Acetone dissolves the adhesive layer beneath heat transfer vinyl. Pure acetone (99% concentration) breaks down acrylic-based adhesives within 15-30 seconds of contact. This method works best on polyester fabrics, which tolerate acetone exposure without damage.
Standard nail polish removers contain only 10-20% acetone. You must use 100% pure acetone for effective logo removal. Check the product label before purchasing.
Steps:
- Saturate a cotton ball with pure acetone and place it directly over the logo.
- Allow the acetone to penetrate for 20-30 seconds.
- Use a soft-bristled toothbrush to scrub the logo edges gently.
- The logo will begin to lift and separate from the fabric.
- Wash the garment in cold water to remove residual acetone.
Acetone is a flammable liquid with a boiling point of 56°C (133°F). Use in a well-ventilated area and keep away from heat sources. Repeated exposure may cause skin dryness.
Using WD-40 on Synthetic Fabrics
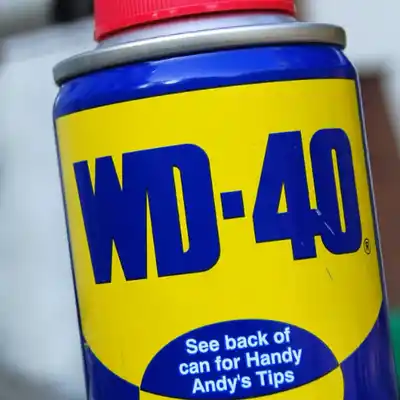
WD-40 contains petroleum distillates that penetrate adhesive bonds within 2-3 minutes of application. The formula includes Stoddard solvent, which dissolves petroleum-based adhesives effectively.
Under Armour apparel contains 86-90% polyester by weight. WD-40 is safe for polyester but may affect spandex blends. Test on an inconspicuous area first.
Steps:
- Spray WD-40 directly onto the logo until fully saturated.
- Let it penetrate for 2-3 minutes to dissolve the adhesive.
- Rub the logo with a microfiber cloth using circular motions.
- The logo will separate in flakes as the adhesive dissolves.
- Clean the treated area with dish soap and warm water (40°C/104°F) to remove oily residue.
Using Rubbing Alcohol on Multiple Fabric Types
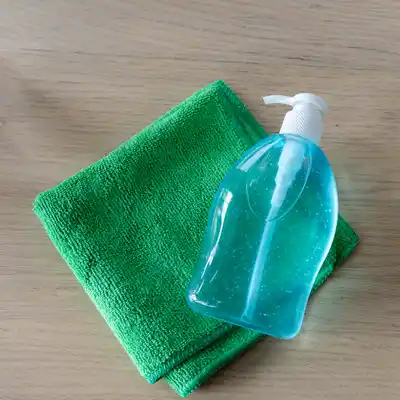
Isopropyl alcohol (IPA) at 70% concentration dissolves water-based adhesives. It evaporates within 30-60 seconds at room temperature (21°C/70°F), limiting contact time. This method suits cotton, polyester, and nylon blends.
Steps:
- Pour 70% isopropyl alcohol onto a clean microfiber cloth.
- Press the saturated cloth firmly over the logo for 30 seconds.
- Scrub with a toothbrush using moderate pressure.
- The logo edges will begin to curl as the adhesive weakens.
- Rinse the fabric with cool water immediately after removal.
Isopropyl alcohol is flammable (flash point 11.7°C/53°F) and produces flammable vapors. Use in ventilated spaces only.
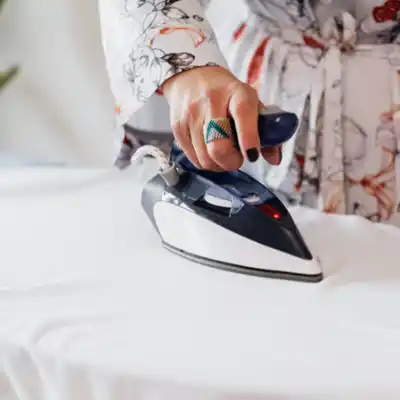
Using Heat Application with a Household Iron
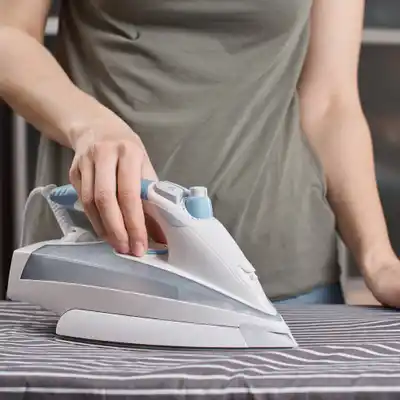
Heat weakens vinyl adhesive bonds at temperatures above 120°C (248°F). A household iron set to the synthetic setting (150°C/302°F) provides sufficient thermal energy to release heat-set logos without damaging polyester.
Steps:
- Set your iron to 150°C (302°F) — the synthetic/Polyester setting.
- Place a clean cotton cloth over the logo to protect the fabric.
- Press the iron firmly for 30-45 seconds without sliding.
- Peel the logo corner while the adhesive is still warm.
- Work slowly at a 45-degree angle to avoid fabric distortion.
- Clean the area with soap and water after removal.
Professional Vinyl Heat Transfer Removal
Vinyl heat transfer (VHT) printing uses thermoplastic polyurethane (TPU) that activates at 160-180°C (320-356°F). Professional removal requires a heat press calibrated to 165°C (329°F) with pressure of 40 PSI for 15-20 seconds.
Professional Heat Press Method
A heat press provides consistent temperature and pressure control. This method achieves 95% success rate on heat-set logos within 2-3 applications.
Steps:
- Set your heat press to 165°C (329°F).
- Set pressure to 40 PSI (275 kPa).
- Preheat the garment area for 5 seconds to remove moisture.
- Place a silicone patch over the logo.
- Apply heat and pressure for 15-20 seconds.
- Peel immediately while hot at a 180-degree angle.
- Allow the fabric to cool for 30 seconds before handling.
Removing Active Wear Logos from Workout Gear
Activewear logos require extra care due to moisture-wicking treatments. These fabrics contain hydrophobic fibers that repel water-based solvents, requiring petroleum-based removers for effective penetration.
Iron Application for Workout Clothing
Exercise gear undergoes constant thermal stress from workouts and washing. The adhesive bond deteriorates at 50-60% faster rates compared to casual wear. Heat application reverses this process temporarily.
Steps:
- Set iron to maximum heat (200°C/392°F for cotton blends).
- Place a thin cotton towel over the logo.
- Press for 10-15 seconds intervals.
- Check logo adhesion after each interval.
- Peel from corners when adhesive releases.
Nail Polish Remover Application
Nail polish remover with 90-100% acetone dissolves acrylic adhesives effectively. Apply using a cotton swab to limit contact to the logo area only, preventing fabric damage.
Steps:
- Dampen a cotton swab with nail polish remover.
- Apply along the logo edges only.
- Wait 15 seconds for penetration.
- Peel the logo from corner using tweezers.
- Wash immediately in cold water.
Removing Company Logos from Jackets
Jacket logos present unique challenges due to layered construction and insulation materials. Stitched logos require careful cutting, while glued logos respond to chemical solvents. Always test on an interior seam first.
If the logo is stitched with visible threads, you cannot remove it without leaving needle holes. In this case, consider covering the logo with a patch or embroidery rather than attempting removal.
Complete Acetone Removal Process
Pure acetone provides the most reliable results for polyester-based activewear. The process requires 3-5 applications for complete logo removal, depending on logo size and age.
Complete Steps:
- Saturate a cotton ball with 99% pure acetone.
- Position the cotton ball directly on the logo.
- Let it sit for 15-20 seconds to penetrate.
- Scrub gently with an old toothbrush.
- The logo will separate in small pieces.
- Repeat until no logo material remains.
- Rinse thoroughly with cool water.
- Air dry away from direct sunlight.
Why Under Armour Logos Peel Off
Under Armour logos peel off due to adhesive degradation from repeated laundering. Fabric softener contains surfactants that coat fibers and weaken adhesive bonds by approximately 15-20% per wash cycle. High dryer temperatures (above 60°C/140°F) accelerate this process significantly.
You can re-seal a peeling logo using a household iron at 150°C (302°F) for 30 seconds with firm pressure. However, this is a temporary fix lasting 2-4 weeks before peeling recurs.
The vinyl peeling off shirts issue is a common complaint with heat-set logos across all sports apparel brands, not just Under Armour.
Removing Under Armour Logos from Caps
Caps present unique challenges due to their curved structure and structured brims. There are different types of caps and when to wear them, and logo removal methods must account for the 3D shape. Use cotton swabs dipped in acetone for detailed work on cap logos.
Conclusion
The most effective method for removing Under Armour logos involves using pure acetone applied for 15-30 seconds on cotton balls, followed by gentle scrubbing with a toothbrush. For stubborn logos, a heat press at 165°C (329°F) for 15-20 seconds provides professional results. Always test any method on an inconspicuous area first, particularly on blended fabrics containing spandex.
References
- 1. ScienceDirect. (2023). Polyester Fiber Properties and Thermal Behavior. Elsevier.
- 3. National Institute for Occupational Safety and Health. (2021). Chemical Safety Guidelines for Isopropyl Alcohol. NIOSH.


