
How to Sew a Hem: Every Hemming Method Explained

How to Sew a Hem: Every Hemming Method Explained
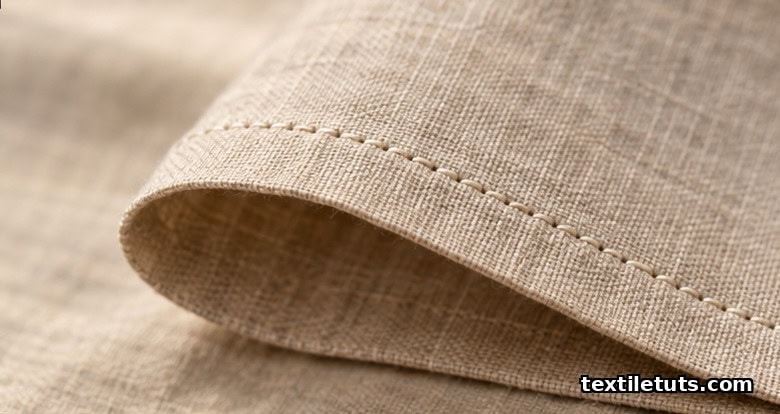
A hem is the finished edge of a garment — folded fabric stitched to prevent fraying and create a clean, professional look. Hems control the length of a garment and add weight and structure to the bottom edge, giving skirts, pants, and dresses their proper drape and silhouette. This comprehensive guide covers five primary hemming methods: hand catch-stitch for invisible finishes on formal garments, machine straight-stitch for durable everyday hems, blind hem for nearly invisible machine-stitched results, serger rolled hem for knit fabrics, and hemming tape for no-sew quick repairs.
What Is a Hem and Why It Matters
A hem serves two essential functions in garment construction: preventing the raw fabric edge from fraying and creating a clean, professional appearance. The hem is one of the last details a sewer completes, but it is one of the first elements that observers notice — especially when light passes through or when the hem swings away from the body. A poorly sewn hem ruins an otherwise well-constructed garment, making the difference between a homemade appearance and professional tailoring.
Fabric type determines which hemming technique works best. Lightweight silk chiffon requires a delicate hand catch-stitch that remains invisible from the right side. Heavy denim needs the strength of a machine straight-stitch with a double-fold construction. Jersey knits and T-shirt fabrics benefit from serger rolled hems that provide stretch recovery without adding bulk. Selecting the correct technique for your fabric is essential for achieving professional results that last through repeated wearing and washing.
Tools and Materials Needed
Gathering the right tools before beginning any hemming project prevents mistakes and ensures a clean, professional finish. The essential equipment falls into three categories: marking and measuring tools, sewing implements, and pressing equipment.
Essential Tools
- Matching thread — Cotton-wrapped polyester thread for natural fibers, 100% polyester for synthetic blends. Thread weight must match fabric weight: lighter threads (60–80 weight) for silks and sheers, standard weight (40–50 weight) for cottons and linens, heavy weight (20–30 weight) for denim and canvas. Consult a thread weight guide for precise matching.
- Hand sewing needles — Sizes 5–7 for heavy fabrics like denim and canvas, sizes 8–10 for medium-weight cottons and linens, sizes 9–12 for delicate fabrics like silk, chiffon, and lace. A needle type guide helps select the correct needle for each fabric.
- Machine needles — Universal needles (sizes 75/11–90/14) for woven fabrics, stretch needles (sizes 75/11–90/14) for jersey and knit fabrics, denim needles (size 90/14–100/16) for heavy denim with a reinforced shaft to prevent skipped stitches.
- Pins or clips — Silk pins (extra-fine, 0.5 mm diameter) for delicate fabrics, standard dressmaker pins (0.6–0.7 mm) for medium weights, Wonder Clips for heavyweight fabrics and vinyl where pins leave visible holes.
- Measuring tape and fabric marker or chalk — For marking consistent hem depth. Hem gauge rulers (typically 12 inches/30 cm long with a sliding guide) ensure uniform depth around the entire hem circumference.
- Seam ripper — An essential tool for removing mistaken stitches without damaging fabric. Always have one within arm’s reach when hemming. A seam ripper techniques guide demonstrates proper use.
- Iron and ironing board — Pressing is half the hemming job. A professional-grade iron with adjustable temperature control and steam function is indispensable. The hem must be pressed flat before sewing to create a crisp, professional edge.
Optional Tools
- Blind hem foot — A specialized presser foot attachment for sewing machines that holds the fabric in a fold and catches only a few threads from the outer fabric with each stitch, creating a nearly invisible hem. Compatible with most modern sewing machines.
- Serger — A 4-thread or 3-thread overlock machine that trims, sews, and finishes edges in one operation. Essential for rolled hems on knits, jersey, and sheer fabrics. The differential feed system prevents stretching of knit fabrics during sewing. Consult a serger setup guide for configuration details.
- Hemming tape — Heat-activated adhesive tape (typically 1/2 inch or 3/4 inch wide) bonded with a household iron. Used for temporary hems, quick alterations, or when sewing equipment is unavailable. Available in white and fusible varieties.
- Hem gauge — A specialized ruler with a sliding marker for maintaining consistent hem depth. Particularly useful when hemming circular skirts where depth varies naturally.
- Walking foot or even-feed foot — A machine attachment with feed dogs on the foot itself that moves the top fabric layer at the same speed as the bottom layer, preventing stretching and puckering on slippery or knit fabrics.
Method 1: Hand Catch-Stitch Hem (Invisible Finish)
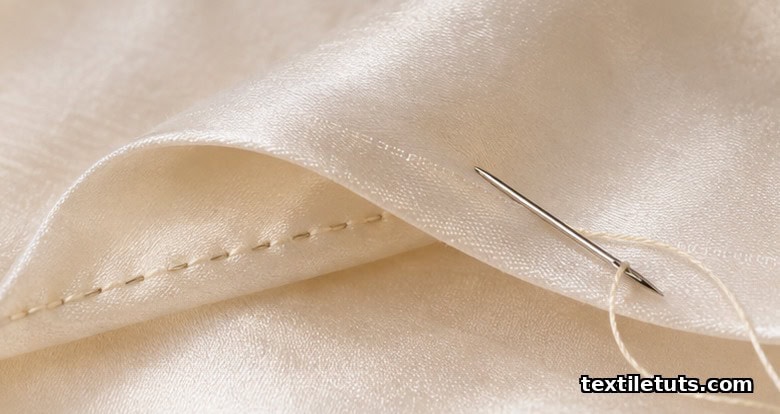
The hand catch-stitch hem produces the most invisible finish of all hemming techniques, making it the preferred method for formal garments, wool trousers, curtains, and anywhere a truly invisible hem is required. The catch-stitch works by folding the hem edge under and catching only a tiny amount of the garment fabric from the inside, keeping all stitching hidden from view.
Best For
- Formal dresses and evening wear where stitch visibility is unacceptable
- Wool suits and trousers that require dry-cleaning (hand stitching doesn’t require water or steam that could shrink wool)
- Curtains and home décor where the hem must be invisible from both sides
- Delicate fabrics like silk and chiffon where machine stitching could damage the material
- Any garment where you need the absolute most discreet finish possible
Step-by-Step Instructions
- Measure and mark the hem depth. Use a measuring tape and fabric chalk to mark the desired hem depth uniformly around the garment. For most garments, the depth ranges from 1.5–5 cm (5/8–2 inches) depending on garment style and fabric weight. Delicate silks use the narrower end of this range; medium-weight cottons and linens use 2.5–5 cm.
- Fold and press the hem. Fold the hem up to the marked depth, then press the fold with an iron set to the appropriate temperature for your fabric. For cotton and linen, use high heat with steam. For wool, use a damp cloth and steam. For silk, use low heat (silk setting) without steam. A crisp, well-pressed edge is essential for an even hand-stitched hem.
- Thread the needle. Cut a length of thread 45–60 cm (18–24 inches) — any longer and the thread will tangle. Thread the needle and knot the end securely. Use a single thread for most work, or double-thread for added strength on heavier fabrics. For silk and delicate fabrics, use fine silk thread or 60-weight polyester.
- Begin stitching from the inside. Insert the needle from inside the hem fold, bringing it up to catch a tiny bite of the outer fabric — approximately 2–3 mm (1/16–1/8 inch) from the folded edge on the garment face. This tiny bite should only catch 1–2 threads of the outer fabric, ensuring invisibility from the right side.
- Create the catch-stitch. Without pulling tight, bring the needle back down through the hem fold approximately 5–8 mm (1/4–5/16 inch) away from the entry point, then reinsert the needle 5–8 mm further along and repeat the tiny bite on the outer fabric. The horizontal catch-stitches on the inside of the hem should be visible, while the stitches on the outer fabric remain invisible.
- Maintain consistent spacing. Continue the catch-stitch pattern, keeping stitches 5–8 mm apart uniformly around the entire hem. Consistent spacing prevents puckering and ensures an even, professional appearance. Use a thimble on your middle finger if hand-stitching causes discomfort.
- Secure the final stitch. When reaching the end of a thread length, make a small backstitch through the previous loop and knot against the inside of the hem. Begin a new thread by inserting the needle adjacent to the last stitch and continue the pattern.
The key to a successful catch-stitch hem is keeping stitches loose enough to avoid pulling the fabric into gathers, yet tight enough to hold the hem securely in place. The stitches should form a gentle horizontal ladder pattern on the inside of the hem that is barely perceptible from the outside of the garment.
Method 2: Machine Straight-Stitch Hem (Durable and Fast)
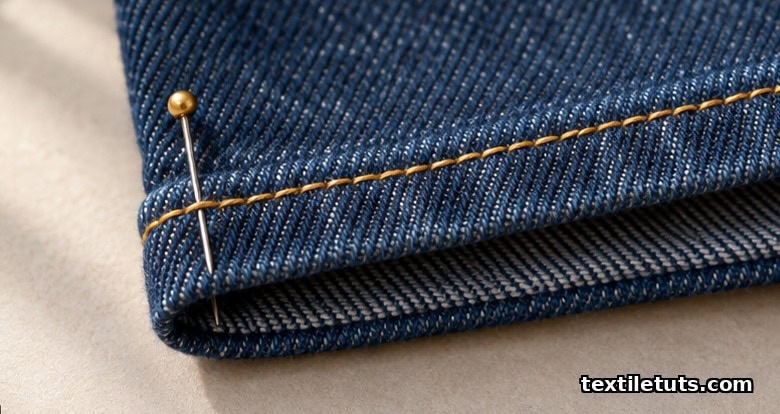
The machine straight-stitch hem is the workhorse of hemming techniques — simple, strong, and efficient. This method produces a durable result ideal for casual garments and denim, cotton shirts, and everyday items where durability matters more than absolute invisibility. The machine straight-stitch is the most common hemming method used in commercial garment production for its speed and reliability.
Best For
- Denim jeans and jackets requiring maximum strength
- Cotton shirts, blouses, and casual dresses
- Household textiles like pillowcases and table linens
- Any project where you need a strong, long-lasting hem quickly
- Beginners learning machine hemming — this is the most forgiving technique
Step-by-Step Instructions
- Measure and fold the hem. Mark the desired hem depth using a measuring tape and chalk. For most woven fabrics, fold the hem up by 2.5–5 cm (1–2 inches). Press the initial fold with an iron.
- Create the double-fold (felled) hem. Fold the hem up again, this time catching the raw edge inside the second fold. This double-fold construction completely conceals the raw fabric edge and creates a neat, professional appearance from both inside and outside the garment. The standard double-fold hem uses a 5/8-inch (15 mm) first fold and a 1/4-inch (6 mm) second fold, though narrower double-folds are appropriate for lighter fabrics.
- Pin or clip the hem in place. Use pins placed perpendicular to the edge (removed as you sew past them) or Wonder Clips for heavy fabrics. For slippery fabrics like satin, pin at close intervals to prevent shifting during sewing.
- Set your machine. Select a straight stitch (zigzag is not needed for straight hems). Set stitch length to 2.5–3 mm for medium-weight fabrics, 2 mm for lightweight fabrics to prevent puckering, and 3.5–4 mm for heavy fabrics like denim and canvas. Thread the machine with a matching thread color and insert the appropriate needle for your fabric type.
- Sew close to the inner fold. Position the fabric under the presser foot so the needle stitches approximately 2–3 mm (1/16–1/8 inch) from the inner folded edge. This proximity to the fold creates a clean, professional appearance. Use the inner fold as your guide rather than the fabric edge.
- Backstitch at beginning and end. Sew 2–3 stitches forward, then reverse 2–3 stitches at both the start and end of your seam to lock the stitches securely. This prevents the hem from unraveling with wear and washing.
Method 3: Blind Hem (Nearly Invisible Machine Hem)
The blind hem combines the invisible finish of hand stitching with the speed of machine sewing. This technique produces a nearly invisible hem that is virtually undetectable from the right side of the garment, making it the professional choice for dress pants, formal skirts, and high-quality curtains. The blind hem requires a specialized blind hem foot attachment and the appropriate stitch setting on your sewing machine.
Best For
- Dress pants and trousers for professional and formal wear
- Formal skirts requiring an invisible finish without hand stitching
- Quality curtains and drapery where invisibility from both sides matters
- Wedding dresses and formal wear when hand-stitching time is limited
- Any garment where you want invisible-machine quality over hand-stitching speed
Step-by-Step Instructions
- Prepare the hem. Fold the hem up to the desired depth (typically 4–5 cm for pants and skirts) and press firmly. The initial fold creates the finished hem depth.
- Create the blind fold. Fold the hem back up toward the wrong side by approximately 1 cm (3/8 inch). This smaller fold is the visible portion from the right side — only the tiny catch-stitches will show. Press this blind fold in place.
- Attach and position the blind hem foot. Install the blind hem foot on your sewing machine according to the manufacturer’s instructions. The foot has a metal guide that sits against the folded edge. Position the fabric so this guide aligns precisely with the blind fold — the fold should rest against the guide from the left side.
- Select the blind hem stitch. Most modern sewing machines have a dedicated blind hem stitch — a combination of a narrow zigzag with long straight stitches. The setting typically creates a stitch that catches the outer fabric on every 4th or 5th stitch, keeping the visible portion to an absolute minimum. If your machine lacks a dedicated blind hem stitch, use a narrow zigzag (width 1–2 mm, length 2–3 mm) as an alternative.
- Sew along the blind fold. Lower the presser foot and begin sewing slowly. The machine needle should swing to the left and catch the outer fabric only 1–2 threads at a time, while the rightward swing stitches within the hem fold. Maintain steady fabric alignment so the guide stays flush against the fold throughout.
- Press the finished hem. After sewing, flip the hem to the right side and press it flat with an iron. The slight tunnel effect created by the stitch will press flat, and the hem will appear to have no visible stitching at all from the right side.
Method 4: Serger Rolled Hem (For Knits and Sheer Fabrics)
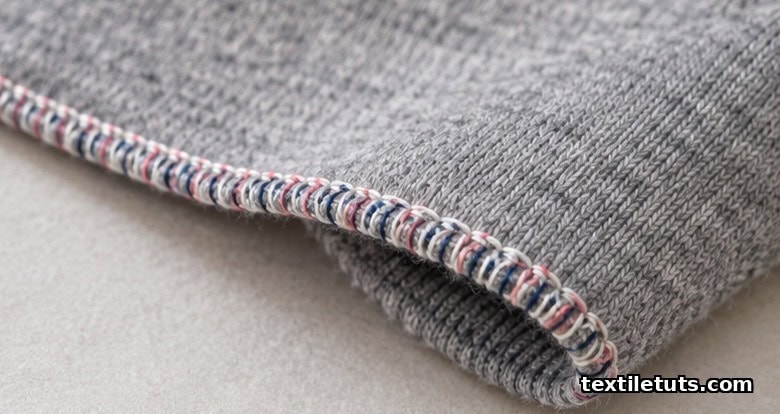
The serger rolled hem is the preferred technique for jersey knits, T-shirts, and all sheer or lightweight fabrics that tend to fray or stretch. A serger creates a clean, narrow rolled edge in a single operation — the knife trims the excess fabric while the overlock stitches encase the edge, preventing fraying entirely. The differential feed system built into quality sergers prevents the fabric from stretching during sewing, which is the primary challenge when hemming knit fabrics.
Best For
- T-shirt and jersey knit hem edges that require stretch recovery
- Chiffon, organza, and other sheer fabrics prone to raveling
- Silk and lingerie requiring fine, delicate edges
- Swimwear and activewear requiring chlorine-resistant edges
- Any fabric where you need a narrow, clean edge without a traditional folded hem
Step-by-Step Instructions
- Set up your serger. Thread the serger with a 3-thread or 4-thread rolled hem configuration. For standard rolled hems on medium knits, a 3-thread configuration (2 needles + 1 looper) provides sufficient strength with a narrow edge. For finer fabrics, a 2-thread configuration reduces bulk. Use polyester or nylon thread for stretch recovery on knit fabrics.
- Adjust the stitch length. Set the stitch length to 2.5–3 mm for a standard rolled hem. Some sergers have a dedicated rolled hem setting that automatically adjusts knife position, stitch length, and tension to the optimal configuration for rolled hems — consult your serger manual.
- Set differential feed. For knit fabrics, set the differential feed to 1.0–1.5 (or the knit setting on your serger) to prevent stretching during sewing. For woven fabrics that don’t stretch, set differential feed to 1.0. The differential feed uses two sets of feed dogs moving at different speeds to control fabric flow.
- Trim hem to depth. Rolled hems work best at 1–2 cm (3/8–3/4 inch) depth. Trim the hem to this width before feeding into the serger — the serger knife will make a final trim as it sews.
- Feed fabric into the serger. Position the fabric so the knife trims the excess as you sew. Hold the fabric taut but not stretched behind the presser foot. The rolled thread edge will wrap around the cut fabric edge, preventing all fraying.
- Test on scrap fabric. Always test the serger settings on a scrap piece of the same fabric before sewing the actual hem. Check that the roll is narrow and even, the differential feed isn’t causing gathers or waves, and the stitch tension is balanced.
Method 5: Hemming Tape (No-Sew Quick Fix)
Hemming tape provides a no-sew solution for temporary hems, emergency repairs, and situations where sewing equipment is unavailable. Heat-activated hemming tape bonds the folded hem using the heat and pressure of a household iron, creating a durable bond on most fabric types. While not as permanent as stitched hems, quality hemming tape bonds can last through multiple wearing and washing cycles.
Best For
- Temporary hems for items awaiting professional alteration
- Emergency hem repairs when a sewing machine is unavailable
- Beginners learning garment construction who want immediate results
- Curtains and home décor that require periodic length adjustments
- Costume and theatrical work requiring quick, reversible alterations
Step-by-Step Instructions
- Clean the fabric surface. Ensure the fabric where the tape will be applied is clean and dry. Remove any lint, dust, or fabric finishes that could prevent bonding. Do not use fabric softener or dryer sheets on the area before hemming.
- Fold the hem to desired depth. Fold the hem to the required depth and press lightly with a dry iron (no steam) just to hold the fold in place. Do not fully press the hem yet — the hemming tape needs to be inserted between the layers before final pressing.
- Insert hemming tape between layers. Open the fold slightly and insert the hemming tape strip between the fold and the garment body. The tape should sit centered within the hem depth. For wide hems, use tape positioned about 1 cm (3/8 inch) up from the raw edge.
- Heat the iron. Set the iron to the appropriate temperature for your fabric type — typically one dot (synthetic) to two dots (wool/silk) on the temperature dial. Do not use steam — moisture can prevent the adhesive from bonding properly. Allow the iron to reach full temperature.
- Press firmly section by section. Apply the hot iron directly over the hem area for 10–15 seconds per section, using firm downward pressure. The heat activates the adhesive. Lift the iron straight up — do not slide it across the hem, which can shift the tape. Work in sections of approximately 10 cm (4 inches) at a time.
- Allow to cool completely. After pressing, allow the hem to cool flat for at least 15–30 minutes before moving. The adhesive continues to bond as it cools and reaches full strength after 24 hours. Do not hang or wear the garment during the cooling period.
- Check all sections. After cooling, check that all sections are fully bonded by gently pressing on the hem. If any sections feel loose, reheat and press those areas. Some fabrics — particularly synthetic fibers with low heat tolerance — may require multiple pressings or may not bond fully with hemming tape alone.
Hemming by Fabric Type
Different fabrics require different hemming approaches due to their unique properties — weight, weave density, stretch, and tendency to fray all influence which method works best. Use this reference table to select the correct technique for your fabric. Consult a fabric selection guide for more details on fabric properties.
| Fabric | Recommended Method | Hem Depth | Needle/Thread Notes |
|---|---|---|---|
| Cotton lawn / quilting cotton | Machine straight-stitch double-fold | 2.5–5 cm (1–2 in) | Universal needle 80/12, cotton or poly thread |
| Linen | Machine straight-stitch or hand catch-stitch | 4–5 cm (1.5–2 in) | Universal needle 80/12, linen needs natural fiber thread |
| Silk / chiffon | Hand catch-stitch or serger rolled | 1.5–2.5 cm (5/8–1 in) | Size 9–10 silk needles, fine silk or polyester thread |
| Wool suiting | Hand catch-stitch | 4–5 cm (1.5–2 in) | Size 5–7 chenille needle, wool thread |
| Denim | Machine straight-stitch (heavy-duty needle) | 2.5–5 cm (1–2 in) | Denim needle 90/14–100/16, heavy-duty thread |
| Jersey / knit T-shirt | Serger rolled hem | 1.5–2.5 cm (5/8–1 in) | Stretch needle 75/11, polyester thread for stretch recovery |
| Sheer fabrics | Serger rolled or hand catch-stitch | 1–2 cm (3/8–3/4 in) | Size 10–12 needle, fine polyester thread |
| Curtains / home décor | Blind hem or machine straight-stitch | 5–10 cm (2–4 in) | Universal needle, matching drapery thread |
Common Hemming Mistakes and How to Fix Them
Even experienced sewers encounter hemming challenges. Recognizing these common mistakes and knowing how to correct them prevents frustration and ensures professional results every time.
Mistake 1: Uneven Hem Depth
Cause: Measuring incorrectly from the floor without accounting for the shoes you will wear, or failing to check the hem depth in a mirror. A hem that appears even at the front may be visibly crooked at the sides or back.
Fix: Always measure from the floor up while wearing the shoes you intend to wear with the garment. Mark the hem depth at multiple points — at center front, center back, and both sides — and connect these marks smoothly. Use a hem gauge with a sliding marker to maintain consistent depth as you work around the garment. For circular skirts, have someone help you check the hem from behind while you stand naturally.
Mistake 2: Wavy or Puckered Hem
Cause: Fabric was stretched while being sewn, using the wrong needle for the fabric type, or machine tension set too high. Puckering most commonly occurs on lightweight fabrics like chiffon and organza, and on slippery fabrics like satin.
Fix: Use a walking foot or even-feed foot to keep the top fabric layer moving at the same rate as the bottom. Reduce machine top tension slightly (try lowering by 5–10 units). Always test on scrap fabric first. For puckering on lightweight fabrics, reduce stitch length to 2 mm and increase presser foot pressure slightly if your machine allows. Never pull or stretch fabric as it feeds through the machine — let the feed dogs pull it through evenly.
Mistake 3: Visible Stitches on the Right Side
Cause: For invisible hem techniques, stitches catching too much fabric on the outer layer or stitches placed too far from the folded edge. With hand catch-stitch, the stitches are too deep (more than 3–4 mm from the fold). With blind hem, the needle is catching too much of the outer fabric with each stitch.
Fix: For hand catch-stitch, take smaller bites of the outer fabric — only 1–2 threads, approximately 2–3 mm from the fold edge. Use a magnifying lamp to inspect your stitches from the right side as you work. For machine blind hem, adjust the blind hem foot depth — the fold should sit more snugly against the foot guide so the needle catches less fabric. Make test stitches on a scrap before sewing the actual hem.
Mistake 4: Hem Tunneling on Lightweight Fabrics
Cause: Too many layers of fabric bunching at the hem seam, creating visible ridges or tunnels across the hem. This is especially problematic with thin fabrics like organza, voile, and lawn where the folded layers create too much bulk at the seam line.
Fix: Use a single-fold narrow hem with a serger instead of a double-fold hem, which halves the bulk. Alternatively, reduce the hem depth to the minimum (1–1.5 cm) for lightweight fabrics. Use a roller foot or teflon foot to help fabric glide under the presser foot without shifting. Reduce presser foot pressure if your machine allows. You can also grade the seam allowances (trim one layer shorter than the other) to reduce bulk at the hem edge.
When to Use Each Hemming Method vs. Alternatives
Choosing the right hemming method is a decision based on your fabric, equipment, time constraints, and the level of finish quality required. Use this comparison to make the best choice for your specific project.
| Method | Choose When | Avoid When |
|---|---|---|
| Hand catch-stitch | You need an invisible finish; working with formal wear or wool; you have time for hand work; the fabric cannot tolerate machine stitching | You’re in a hurry; working with thick fabric difficult to hand-penetrate; you lack patience for slow stitching |
| Machine straight-stitch | You need maximum durability; working with casual garments and denim; you have a standard sewing machine; speed is important | You need an invisible finish; the fabric is too thick for a standard machine to penetrate cleanly |
| Blind hem | You want an invisible finish without hand sewing; working with dress pants or formal skirts; you have a blind hem foot attachment | Working with thin sheer fabric where machine needles may leave visible holes; you don’t have a blind hem foot |
| Serger rolled | Working with jersey knits, T-shirt fabrics, or sheer fabrics; you own a serger; you need stretch recovery in the hem | You don’t own a serger; working with heavy woven fabric that requires a wider, stronger hem |
| Hemming tape | You need a temporary or emergency hem; no sewing equipment available; you are a beginner wanting immediate results; hemming curtains that may need future adjustments | You need a permanent, durable hem; the fabric cannot tolerate heat; working with very heavy fabric that won’t bond with tape alone |
Choosing the Right Stitch Length for Hemming
Stitch length directly affects the appearance, strength, and flexibility of your hem. Using the correct stitch length for your fabric weight prevents puckering, breakage, and inadequate security.
| Fabric Weight | Recommended Stitch Length | Effect of Too Long | Effect of Too Short |
|---|---|---|---|
| Very lightweight (silk, chiffon) | 2 mm (70–80 stitches per 15 cm) | Inadequate strength, fabric may pull out of stitches | Puckering, visible perforations in fabric |
| Lightweight (cotton lawn, voile) | 2–2.5 mm (60–70 stitches per 15 cm) | Weak seam that can pull apart | Slight puckering, fabric may show needle marks |
| Medium weight (cotton, linen, rayon) | 2.5–3 mm (50–60 stitches per 15 cm) | Standard appearance, slightly less strength | Puckering, especially on synthetics |
| Heavy (denim, canvas, wool coating) | 3.5–4 mm (40–50 stitches per 15 cm) | May not hold through heavy use | Visible ridge, difficult to sew through multiple layers |
Frequently Asked Questions
What is the easiest hemming method for beginners?
Machine straight-stitch with a double-fold hem is the easiest method for beginners — it requires only a basic sewing machine, produces a clean durable result, and the double-fold conceals the raw edge completely. Hemming tape is also beginner-friendly but produces a less permanent result.
How do you hem a skirt without a sewing machine?
Hand catch-stitch is the best no-machine method for skirts. Thread a needle with matching thread, fold the hem to desired depth, and sew tiny stitches that catch the outer fabric from inside the hem fold. The stitches should be 5–8 mm apart and nearly invisible from the right side.
What stitch length should I use for hemming?
Use a standard stitch length of 2.5–3 mm for most machine hems on medium-weight fabrics. For lightweight fabrics, reduce to 2 mm to prevent puckering. For heavy denim or canvas, increase to 3.5–4 mm to prevent breaking.
How do you hem silk fabric without it showing?
Silk requires the hand catch-stitch method with fine needles (size 9 or 10) and fine silk thread or polyester thread. Fold the hem with tiny 1.5–2 cm depth, press carefully with a cool iron, and take very small bites (2–3 mm) of the outer fabric to keep stitches invisible.
References
- Cole, D. and Czachor, J. (2014). Professional Sewing Techniques for Designers. Fairchild Books. Fairchild Books
- Threading Techniques LLC. (2023). The Complete Guide to Industrial Sewing Machine Settings. The Threading Company
- Wikipedia. (2024). Blind Stitch. Wikipedia


