
How to Sew a Seam: Types, Allowances, and Finishing Methods

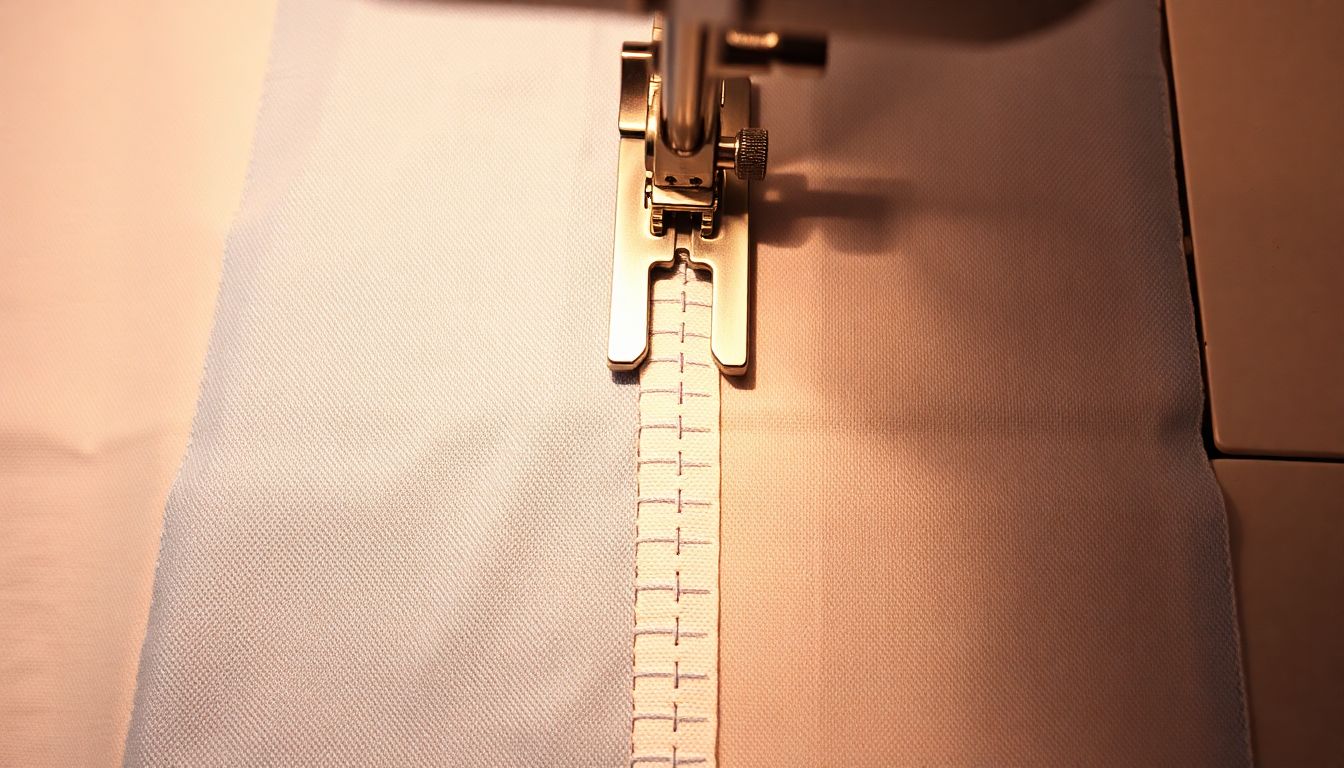
Seam allowance of 5/8 inch (1.5cm) is the standard distance from the raw edge for stitching seams in most garment construction. This measurement provides enough fabric for adjustments, finishing, and structural strength. The three core seam types are plain seams (lightweight fabrics), French seams (sheer fabrics), and flat-felled seams (durable garments), each requiring specific finishing methods to prevent fraying and extend garment life.
What Is a Seam and Why Does It Matter?
Seams are the structural joins between two fabric pieces — the backbone of garment construction. Every garment uses multiple seam types for different structural requirements, from side seams holding a shirt together to princess seams shaping a fitted bodice. Seam quality determines garment durability, appearance, and longevity. Poor seams result in unraveling threads, fabric separation, and premature garment failure that can cut a garment’s usable life by 50–80% according to industry quality standards.
Seam construction must match fabric weight and garment type. A delicate silk blouse requires different seam construction than heavy denim jeans, and a child’s garment needs seams that withstand repeated washing and wear. Understanding which seam type to use — and how to finish it properly — separates professional-quality construction from amateur results that fall apart after just a few wear cycles.
Essential Tools and Materials
These tools are essential before sewing your first seam:
- Sewing machine with all-purpose foot or specialized feet (zipper foot, seam guide foot)
- Matching or contrasting thread — polyester thread provides stretch and durability for synthetic fabrics, while cotton thread is ideal for natural fibers and creates a softer hand
- Fabric pieces cut with proper grain alignment (cutting against the grain weakens the fabric and causes distortion)
- Seam ripper for corrections — a sharp seam ripper prevents fabric damage during corrections
- Iron for pressing seams open or to one side — pressing sets the seam and shapes the fabric in quality construction
- Measuring tools: seam gauge, ruler, or sewing gauge for accurate seam allowance measurement
- Pins or clips to hold fabric layers steady — use pins perpendicular to the seam line for easy removal, or clips for bulky or slippery fabrics
Standard Seam Allowance Sizes
Seam allowance is the distance between the raw edge and the stitched seam line. Industry standards vary by garment type and construction method:
| Garment Type | Seam Allowance | Common Use |
|---|---|---|
| Commercial patterns | 5/8 inch (1.5cm) | Most modern sewing patterns |
| Tailored suits | 1 inch (2.5cm) | Adjustable for fitting alterations |
| Denim/utility | 5/8–3/4 inch | Jeans, workwear, heavy canvas |
| Children’s clothing | 3/8 inch (1cm) | Quick construction, smaller sizes |
| Serged/Coverstitch | 1/4 inch (0.6cm) | Activewear, knit fabrics |
The standard 5/8 inch (1.5cm) seam allowance used in most commercial patterns provides sufficient fabric between the seam line and cut edge to ensure fabric is safely caught during joining while allowing for finishing treatments and future alterations. Curved areas like necklines and armholes typically use a narrower 1/4 inch (6.4mm) allowance, while areas requiring extra fabric for fitting — such as center back seams — often have 1 inch (25mm) or more built in.
How to Sew a Basic Straight Seam (Step-by-Step)
The straight seam is the foundation of all garment construction. Master this technique first before moving to more complex seam types.
- Prepare fabric: Cut fabric pieces with scissors or rotary cutter along true grain; mark notches with tailor’s chalk or clips to indicate pattern matching points. Accurate cutting is essential — a poorly cut edge cannot be corrected by stitching.
- Pin fabric layers: Place right sides together; pin perpendicular to seam line at 2–3 inch intervals. The pins hold layers aligned while you sew, preventing the shifting that causes uneven seams.
- Set machine stitch: Select straight stitch with a length of 2.5–3.0mm for medium-weight fabrics. Test on a scrap of your actual fabric before stitching the final seam — tension adjustments may be needed for different fabric types.
- Position fabric: Align fabric edge with the desired seam allowance guide on the machine throat plate. The groove or mark on your machine indicates standard measurements from the needle.
- Begin stitching: Hold thread tails behind the presser foot; stitch forward 3–4 stitches, then reverse 1–2 stitches to lock the seam beginning. This backstitching prevents the seam from unraveling at the start.
- Stitch seam line: Guide fabric gently — let the feed dogs pull the fabric through naturally. Pulling or pushing causes irregular stitch length and puckering. Maintain steady pressure on the fabric edges to keep them aligned.
- Lock stitches at end: Stitch forward 3–4 more stitches, then reverse briefly, or use your machine’s backstitch button to lock the seam end. Never stop in the middle of a seam without locking — this creates a weak point.
- Press seam: Set iron to appropriate heat for your fabric type (cotton settings for cotton, lower heat for synthetics); press seam open or to one side depending on the garment design and fabric bulk. Use a pressing cloth for delicate fabrics.
Types of Seams and When to Use Each
Plain Seam (Standard)
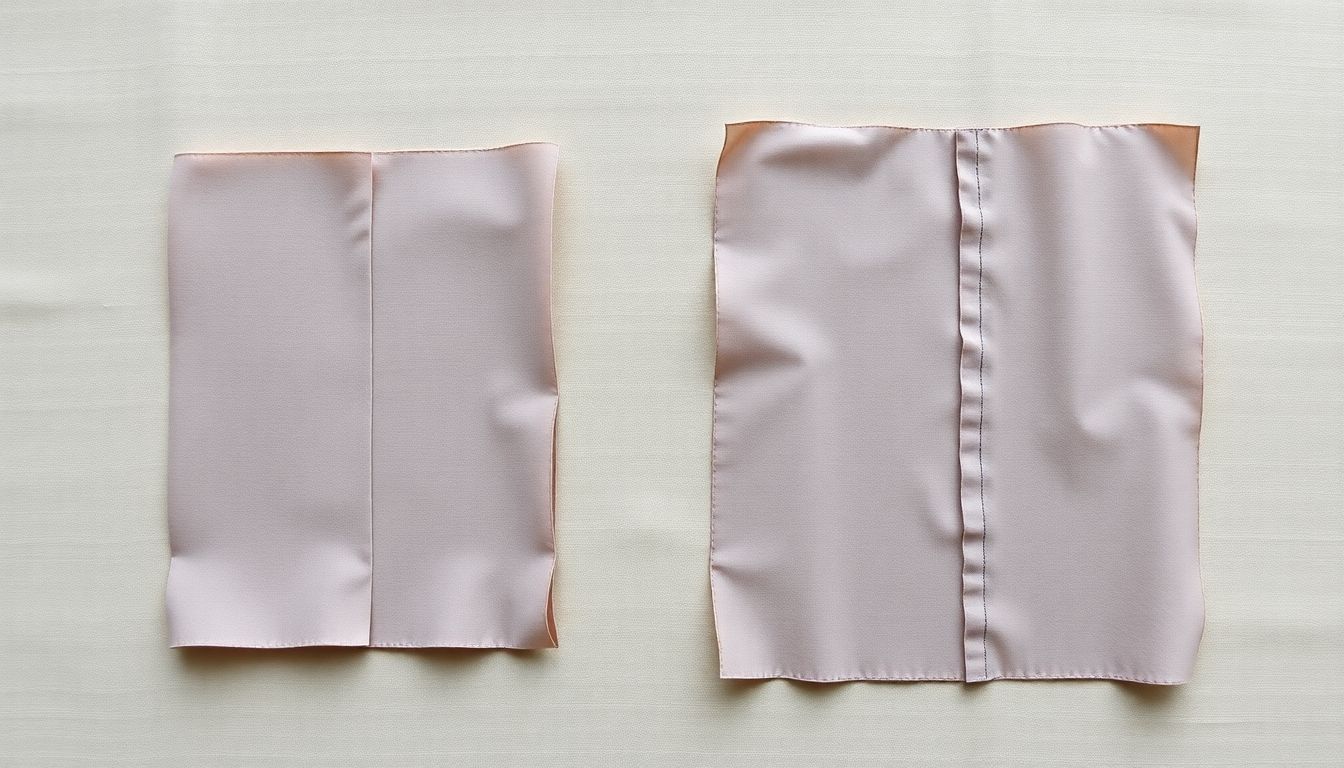
The plain seam is the most common machine-sewn seam type, joining fabric face-to-face with raw edges contained inside the work. It’s the workhorse of garment construction, suitable for blouses, shirts, skirts, and lined garments made from lightweight to medium-weight woven fabrics. Stitched with right sides together and pressed either open or to one side, the plain seam is the foundation from which all other seam variations derive.
French Seam (Enclosed)
The French seam completely encloses raw edges within a second stitching line, creating a clean, professional finish essential for sheer and lightweight fabrics where exposed seams would be visible. This seam requires cutting two seam allowances instead of one. The construction sequence is specific: first, join fabric with wrong sides together at a narrow 1/4-inch (6mm) seam allowance, trim the seam allowance to approximately 1/8 inch (3mm), press the seam to one side, then fold and stitch again with right sides together using a wider allowance to encase the first stitching completely. French seams are the gold standard for sheer curtains, blouses, lingerie, and fine silks where interior quality matters as much as exterior appearance.
Flat-Felled Seam (Double-Stitched)
The flat-felled seam is the strongest construction seam available, engineered to withstand extreme stress without failure. This is why it is the mandatory seam type in denim jeans, work shirts, and military uniforms. Construction involves joining fabric with wrong sides together, then trimming one seam allowance to approximately 1/4 inch while leaving the other full. The wider allowance is folded over the trimmed side, and a second row of stitching — visible on the right side of the garment — secures everything in place. The result encloses all raw edges completely while creating the distinctive double-stitched look that defines quality denim construction. Flat-felled seams provide approximately three times the tensile strength of a standard plain seam according to garment industry quality standards.
Serge/Overlock Seam
The serge or overlock seam uses a specialized serger machine that cuts, stitches, and finishes fabric edges in a single operation, wrapping 3–5 threads around the raw edge to prevent fraying while joining layers. This efficiency makes it indispensable in activewear manufacturing, where knits and stretch fabrics require seams that can move with the fabric without breaking stitches. The serger requires only a 1/4 inch (0.6cm) minimum seam allowance, making it ideal for fitted garments where fabric economy matters. A standard 2-thread overlock provides the most common edging and seaming function, while 4-thread overlock adds extra strength for high-stress areas like inseams and crotch seams.
Hidden Seam / Slot Seam
The hidden seam, also called a slot seam, is stitched in a channel or “slot” created by folding fabric, producing a decorative channel effect visible on the right side while the stitching is concealed. This seam type is common in tailored jackets, coats, and decorative home textiles where a clean, architectural line is desired. The construction requires careful pressing and precise folding, but the result is a refined detail that elevates garment quality perception.
Seam Finishing Methods: Preventing Fraying
Unfinished raw edges fray within 2–5 wear cycles, which can shorten a garment’s usable life by 50–80%. Every seam requires finishing — even in lined garments where the lining theoretically covers the interior, seam finish provides structural integrity and prevents the layers from separating during wear and washing. The finishing method must match the fabric type, garment construction, and intended use.
| Finishing Method | Best For | Durability |
|---|---|---|
| Zigzag stitch | Light knits, synthetics | Medium |
| Overlock/serger | Knits, stretch fabrics | High |
| Pinking shears | Cotton, woven fabrics (notch cuts) | Low-medium |
| Bias binding | Curves, sheer fabrics | High |
| French seam | Sheer, fine fabrics | High |
| Turn and stitch | Lightweight only | Low |
Zigzag finishing involves setting your machine to a zigzag width of 2.5–3.0mm and stitch length of 1.5–2.0mm, then stitching directly over the raw edge while the zigzag bridges the fabric. This method works well for medium-weight knits and synthetic fabrics but is not recommended for loosely woven fabrics where the zigzag can cause further fraying. Pinking shears create angled notches along the raw edge that resist raveling in tightly woven fabrics like quilting cotton, but this method is ineffective on knits, bias-cut fabrics, or loosely woven materials.
Bias binding encloses the raw edge in a strip of bias-cut fabric, making it ideal for curved seams where other methods would not lie flat. The Hong Kong finish is a variation where each raw edge is encased separately before the seam is joined. For the strongest finish without specialized equipment, trim the seam allowance to 1/4 inch after stitching, then stitch again 1/8 inch from the first line and fold the first allowance under the second — this creates a faux flat-felled finish that provides excellent durability and fraying resistance on woven fabrics.
Common Seam Mistakes and How to Fix Them
Puckered Seams
Puckered seams are wavy, gathered wrinkles adjacent to the stitching — caused by fabric tension that is too tight, a stitch length that is too short for the fabric weight, or iron pressing at temperatures that damage the fabric fibers. The fix involves re-stitching with adjusted top thread tension (reduce by 5–10% increments), switching to a longer stitch length of 3.0–3.5mm, and ensuring your iron temperature is appropriate — use a pressing cloth when in doubt. On lightweight fabrics, a walking foot or even feed foot prevents the top fabric from feeding faster than the bottom.
Uneven Stitching
Uneven stitching wobbles off the seam allowance line — resulting from not following the seam allowance guide consistently. The fix is practical: apply a strip of painter’s tape along the throat plate at your desired seam allowance width to create a visual guide, or invest in a seam guide foot that has a built-in fence to keep fabric at consistent distance from the needle. Consistent seam allowance is non-negotiable for professional results and structural integrity.
Gaping Seams
Gaping seams occur when fabric layers shift and the seam line becomes wavy or the layers no longer align at the edges — caused by inadequate securing during stitching or stitching at excessive speed through difficult areas like curves and slippery fabrics. Fix this by pinning more frequently (every 1–2 inches on slippery fabrics), reducing your stitching speed on curves, and using fabric clips instead of pins for multiple thick layers. On very slippery synthetics, a spray adhesive baste or tissue paper underlay can hold layers steady.
Thread Bunching on Underside
Thread bunching forms nests of thread on the underside of your fabric — indicating a tension imbalance, almost always because the top thread tension is too tight, the bobbin is inserted incorrectly, or the bobbin case tension needs adjustment. Before reaching for the tension dials, rethread both the top thread and bobbin completely with the presser foot raised (this opens the tension discs), and verify the bobbin is seated correctly in its case with thread unwinding counterclockwise. If the problem persists after rethreading, the bobbin case tension may need adjustment — consult your machine manual for the correct procedure.
When to Use Each Seam Type: Quick Reference
- Lightweight fabrics (chiffon, organza, voile): French seam or narrow plain seam with zigzag finish. The enclosed French seam is non-negotiable for sheer fabrics where exposed raw edges would be visible.
- Medium-weight cottons, linens: Plain seam pressed open with zigzag or overlock finish. Standard 5/8-inch allowance provides room for finishing while keeping the garment lightweight.
- Heavy fabrics (denim, canvas, upholstery): Flat-felled seam or serged seam with multiple rows. The flat-felled seam is the only choice for denim — it provides the durability and stress resistance that heavy-use garments demand.
- Stretch/knit fabrics: Overlock seam or narrow zigzag. The seam must stretch with the fabric without breaking stitches — conventional straight stitching will pop when the fabric stretches. Use a ballpoint or stretch needle with your serger or zigzag machine.
- Delicate/sheer fabrics: French seam exclusively. French seams enclose all raw edges completely and provide the clean interior that sheer fabrics demand.
For more details on machine setup and basic operation, see our guide on how to use a sewing machine for beginners. If you’re troubleshooting puckered seams or thread bunching issues, our article on common sewing mistakes and how to fix them covers these problems in depth. Proper pressing technique is equally important as stitching — learn professional methods in our guide to how to press seams like a professional.
Frequently Asked Questions
What is the standard seam allowance for most sewing patterns?
The standard seam allowance is 5/8 inch (1.5cm) for most commercial patterns. However, this varies: children’s patterns often use 3/8 inch (1cm), tailored suiting uses 1 inch (2.5cm), and serged seams require only 1/4 inch (0.6cm). Always check your pattern before cutting.
What is the strongest type of seam?
The flat-felled seam is the strongest construction seam — used in denim jeans and workwear because the double-stitched line distributes stress across two parallel rows and encloses the raw edge completely. For sheer fabrics, the French seam provides comparable strength through enclosed construction.
How do you finish seams without a serger?
Without a serger, finish seams using zigzag stitch (set width 2.5–3.0mm, length 1.5–2.0mm along raw edge), pinking shears (for woven cottons only), bias binding (hand-stitched or machine-stitched), or by trimming to 1/4 inch and stitching a second line 1/8 inch from the first to create a faux-flat-felled finish.
Why do my seams keep unraveling?
Seams unravel when the lock stitches at the beginning or end are not secured, when thread tension is incorrect causing weak stitches, or when the seam is placed under stress without adequate seam allowance. Always backstitch or lock stitches at seam start and end, use appropriate thread weight for fabric, and ensure seam allowance is sufficient (minimum 3/8 inch for most garments).
References
- Wikipedia contributors. (2024). Seam (sewing). Wikipedia, The Free Encyclopedia.
- Wikipedia contributors. (2024). Seam allowance. Wikipedia, The Free Encyclopedia.
- Wikipedia contributors. (2024). Overlock. Wikipedia, The Free Encyclopedia.


