
Can A Tailor Make A Shirt Smaller: Way To A Flattering Fit
Yes — a skilled tailor can make a shirt smaller, though the amount depends on the garment’s original size, fabric, and construction. Most dress shirts have only 1–2 inches (2.5–5 cm) of excess fabric along side seams, and some fabrics and designs limit how much alteration is possible without compromising the shirt’s structure.
The amount of fabric available for alteration sets a hard limit on how much a shirt can be reduced. If a shirt is already too small, there is simply not enough material to work with. This guide explores the alteration process, the factors that determine how much a shirt can be reduced, common mistakes to avoid, and typical costs involved.
How a Tailor Reduces the Size of a Shirt
Tailors are trained professionals who specialize in altering, repairing, and modifying garments to fit the wearer’s body precisely. They use a set of standard techniques to reduce a shirt’s dimensions.
A tailor reduces a shirt’s size through several targeted techniques. Taking in the side seams is the most common method — this typically removes 1–2 inches (2.5–5 cm) per side, depending on available fabric. Shoulder width adjustments usually involve removing 0.5–1 inch (1.3–2.5 cm) of fabric from each shoulder seam. Sleeve length shortening is achieved by cutting 0.5–2 inches (1.3–5 cm) above the original hem, then re-hemming. Body length reduction is done by cutting 1–3 inches (2.5–7.6 cm) above the bottom hem and re-securing the seam.
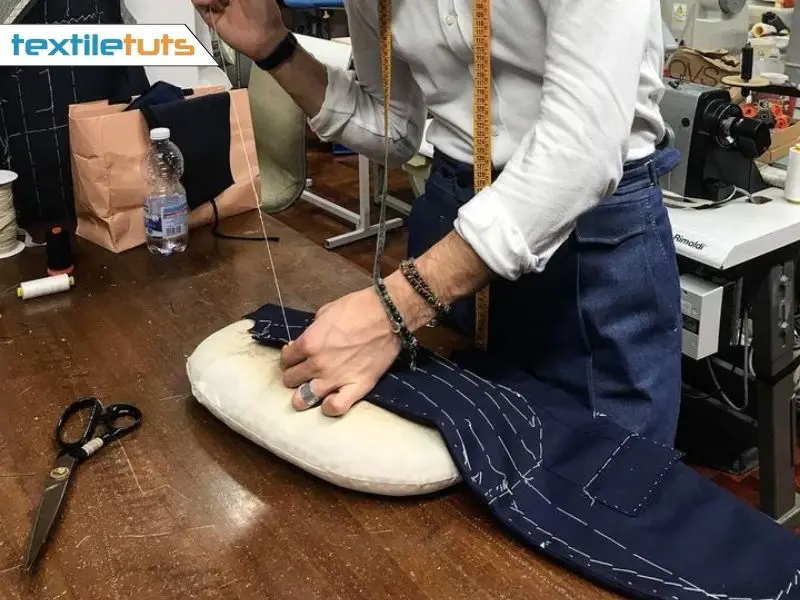
The tailor begins by measuring the client’s body and identifying the specific areas that require alteration. They then mark the fabric with chalk or pins before cutting and sewing. Professional tailors use a standard seam allowance of 5/8 inch (1.6 cm) for dress shirts, which provides enough material for future alterations if needed.
Not all shirts respond well to reduction. Shirts made from stretchy knits, bonded fabrics, or delicate materials like pure silk require specialized handling. Pattern-matched shirts (stripes, checks, or plaids) demand extra fabric to maintain pattern alignment during alteration, which limits how much the tailor can reduce the overall dimensions. Shirts with complex construction — such as those with yokes, pleats, or attached collars — may resist certain types of modification.
Consulting a professional tailor before purchasing a shirt is the best way to determine whether it can be altered to fit. Bring the shirt and your measurements; a qualified tailor will tell you immediately what is and is not possible.
DIY Solutions for Making a Shirt Smaller
Making a shirt smaller at home without a tailor is possible using basic sewing supplies. These DIY methods work best for casual shirts and produce less precise results than professional tailoring.
Follow this step-by-step process:
Materials You’ll Need
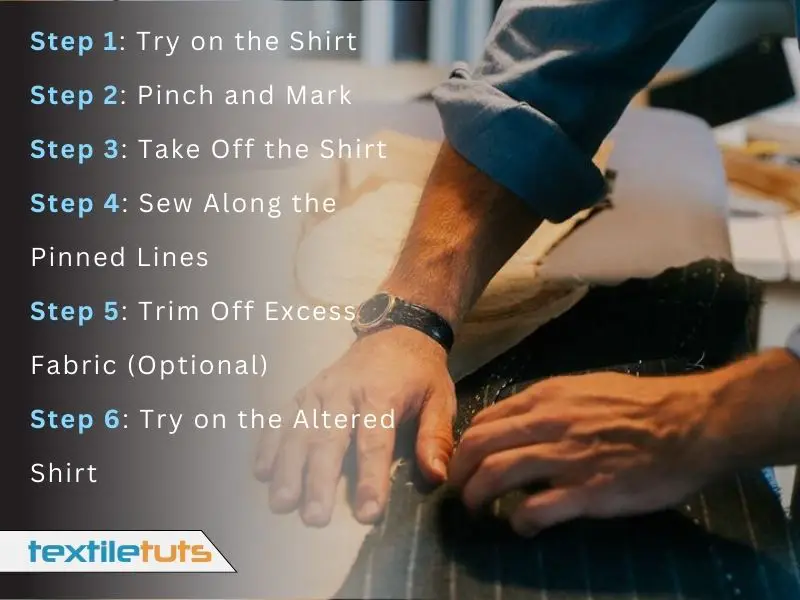
Try on the Shirt
Put on the shirt and determine exactly how much smaller you want it to be. Pinpoint the areas where excess fabric must be removed: typically the sides, sleeves, and shoulders.
Pinch and Mark
Use pins to pinch excess fabric along the side seams and sleeves until you achieve the desired fit. Use chalk or a fabric marker to mark the adjustment lines clearly.
Remove the Shirt
Carefully take off the shirt without disturbing the pins. Lay it flat on a table or work surface.
Sew Along the Pinned Lines
Using a sewing machine or hand stitching, sew directly along the pinned lines to secure the new seam. Backstitch at the beginning and end of each seam for reinforcement. Use a stitch length of 2.5–3.0 mm for dress shirts.
Trim Excess Fabric (Optional)
If the excess fabric is substantial, trim it with scissors, leaving a seam allowance of exactly ¼ inch (0.6 cm) to prevent fraying.
Try on the Altered Shirt
Put the shirt back on to check the fit. Make any additional adjustments as needed.
Professional Tailoring vs. DIY: Which Should You Choose?
| Factor | Professional Tailoring | DIY Alteration |
|---|---|---|
| Best for | Dress shirts, delicate fabrics, pattern-matched shirts, major alterations | Casual shirts, minor adjustments, experimentation |
| Cost | $10–$50 per alteration | Minimal (thread, pins, chalk) |
| Precision | High — symmetric, clean seams | Moderate — results vary by skill level |
| Turnaround | 3–5 business days (or same-day for rush) | 1–3 hours per shirt |
| Reversibility | Limited — some cuts are permanent | Limited — same caveat applies |
| Risk of damage | Low — trained professional handles fabric | Moderate — incorrect cuts or stitches can ruin the garment |
Common Mistakes to Avoid When Tailoring a Shirt Smaller
Several recurring mistakes undermine tailoring results. Avoiding these pitfalls produces a better-fitting shirt and extends the garment’s life.
Taking In Too Much Fabric at Once
Making drastic reductions in a single alteration often produces a shirt that is too tight or hangs incorrectly. Tailors recommend removing no more than 1–2 inches (2.5–5 cm) per side seam in any single session. Make small changes and assess the fit before continuing.
Not Measuring Properly
Accurate measurements are the foundation of every successful alteration. Measure the chest, waist, shoulder width, sleeve length, and back length using a fabric measuring tape. Compare these to the shirt’s current dimensions before marking any cuts. Incorrect measurements produce uneven or lopsided results that cannot be undone.
Use a fabric measuring tape (not a metal ruler) and measure while the fabric lies flat. The House of Embroidery recommends measuring at least twice before cutting. Our shirt fabric consumption calculator explains proper measurement techniques in detail.
Ignoring the Fabric Type
Every fabric responds differently to alteration. Woven cotton and linen hold pressed creases and new seams well. Polyester blends resist wrinkling but may pucker under heavy stitching. Stretch knits require a zigzag or serged seam to maintain flexibility. Delicate fabrics like linen or silk need finer needles (size 60/8 to 70/10) and shorter stitch lengths (1.5–2.0 mm) to avoid damaging the fibers.
Skipping the Test Fit
Always try the shirt on during the alteration process — at minimum after step 2 (pinning) and again after step 4 (sewing). Skipping intermediate fittings leaves no room to correct errors before the seam is permanently stitched.
Not Checking Symmetry
Side seam adjustments must be identical on both the left and right of the shirt. After pinning, lay the shirt on a flat surface and check that the front placket is centered and the hem is level. Even a ¼-inch (0.6 cm) discrepancy between sides creates a visible twist when worn.
Neglecting the Shirt’s Design Elements
Shirts with patterns, prints, pockets, or pleats require extra planning. Altering through a patterned area disrupts the visual continuity. Pockets shift position if side seams are taken in more than 1.5 inches (3.8 cm). Box pleats in the back may need to be partially removed to maintain a clean silhouette.
Forgetting About the Armholes
Taking in the side seams without adjusting the armhole circumference restricts shoulder mobility. For every 1 inch (2.5 cm) removed from the side seam, the armhole opening shrinks by approximately ½ inch (1.3 cm). If you narrow the body significantly, you must widen the armhole by cutting into and re-securing the sleeve cap seam.
Using the Wrong Stitch Type
Use a straight stitch (stitch length 2.5–3.0 mm) for permanent seams on woven fabrics. A zigzag stitch (width 2–3 mm, length 1.5–2.0 mm) is appropriate for stretch fabrics. Blind hem stitches produce an invisible finish on dress shirts. Our guide to types of sewing stitches covers the correct applications for each stitch type.
Not Reinforcing the Seams
New seams undergo stress during wear and washing. Reinforce alteration seams with a second row of stitching or a zigzag finish along the raw edge to prevent unraveling. Bar tacks (a dense zigzag over a small area) reinforce points of maximum stress such as the corners of darts and the base of placket seams.
Rushing the Process
Professional tailors allow 1–3 hours per shirt for quality alterations. Rushing leads to crooked seams, inaccurate measurements, and damaged fabric. Work methodically and stop to re-check measurements before every cut.
Cost and Time Considerations for Tailoring a Shirt
Tailoring costs depend on the type and number of alterations, the tailor’s experience, the fabric, and local market rates. Understanding these factors helps you budget accurately.
Factors That Affect Cost
- Type and Number of Alterations: Each distinct alteration — side seams, sleeves, shoulders, hem — is priced separately. Combining multiple alterations on one shirt typically reduces the per-alteration rate by 10–20%.
- Fabric Type: Delicate or challenging fabrics (silk, linen, cashmere blends) require more time and specialized techniques, increasing the price by $5–$15 per alteration.
- Tailor’s Experience: Master tailors with decades of experience charge 20–50% more than junior tailors or dry-cleaning counter alteration services.
- Geographical Location: Tailoring services in major metropolitan areas run 30–60% higher than in smaller cities and rural areas.
Factors That Affect Time
- Complexity of Alterations: Simple hem adjustments take 30 minutes. Multi-area alterations (sides, sleeves, and shoulders) require 2–3 hours of hands-on work.
- Tailor’s Workload: Standard turnaround is 3–5 business days. Rush service (same-day or 24-hour) typically adds a 50% surcharge.
- Fittings: Complex alterations may require two fitting sessions, adding 1–2 weeks to the overall timeline.
Average Costs and Timeframes
The table below shows typical alteration costs and time estimates for common shirt modifications, based on 2024 survey data from independent tailoring shops in the United States.
| Type of Alteration | Cost Range | Typical Time |
|---|---|---|
| Shortening sleeves (simple hem) | $10–$20 | 30–45 minutes |
| Lengthening sleeves (add fabric) | $15–$30 | 1–2 hours |
| Narrowing the body (per side seam) | $15–$25 | 45–60 minutes |
| Taking in or letting out the waist | $20–$40 | 1–2 hours |
| Hemming the bottom (straight hem) | $10–$20 | 30–45 minutes |
| Adding or removing buttons | $5–$10 | 15–30 minutes |
| Changing or reshaping the collar | $20–$45 | 1–2 hours |
| Adjusting shoulder width | $25–$50 | 1.5–3 hours |
Tailoring and Clothing Fit: What a Skilled Tailor Can Do
A skilled tailor transforms a shirt that does not fit into one that looks custom-made. Beyond basic size adjustments, tailors restructure shoulder angles, reform collar shapes, add or remove darts, and reposition pockets.
Whether it involves letting out a waist, lengthening hems, or reshaping shoulders, a qualified tailor delivers results that improve both appearance and comfort. A well-fitted shirt enhances posture and confidence — investing in professional tailoring is a proven way to extend the life of quality garments.
Final Words
A skilled tailor makes a shirt smaller when the alteration falls within the limits of the garment’s construction. The existing fit and the amount of available fabric are the primary constraints. Shirts with minimal seam allowance, stretch fabrics, or complex pattern matching may not be suitable candidates.
Always consult a professional tailor before committing to alterations. Bring the shirt, know your measurements, and discuss realistic expectations. A well-fitted shirt elevates appearance and confidence — professional tailoring is a worthwhile investment in quality clothing.
References
- The following sources provided information for this article:
- House of Embroidery. (2024). Measuring for Alterations: A Tailor’s Guide. House of Embroidery.
- Threads Magazine. (2023). Alteration Guidelines: How Much Can You Take In?. Taunton Press.
- Singer. (2024). Common Garment Alterations and Alteration Limits. Singer Corporation.
- The Gentleman’s Gazette. (2023). Professional Tailoring: What Alterations Can and Cannot Do. Gentleman’s Gazette LLC.
- Mood Fabric. (2024). Tailoring Tips: Working with Different Fabric Types. Mood Designer Fabrics.


