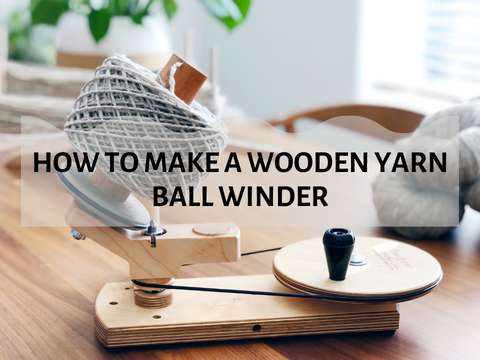
How to Make a Wooden Yarn Ball Winder
Building a DIY wooden yarn ball winder involves cutting a wooden blank, creating a stable base, and assembling a 45-degree spin stabilizer that distributes yarn evenly into balanced center-pull balls. This guide provides precise step-by-step instructions for constructing a durable wooden yarn ball winder using basic woodworking tools—completed in 3-4 hours by experienced makers.
The winder produces consistent center-pull balls up to 100mm in diameter, eliminating tangled yarn and preserving fiber elasticity during knitting and crocheting. A paired DIY yarn swift delivers completely trouble-free handling of yarn balls.
Quick-Reference Specifications
| Base Dimensions | 300mm × 150mm × 20mm |
| Base-to-Cylinder Ratio | 3:1 (for stability) |
| Cylinder Diameter | 50mm |
| Winder Disc Diameter | 60mm |
| Max Ball Diameter | 100mm |
| Yarn Capacity | 50–60g worsted-weight per 100mm ball |
| Winding Speed | ~60 RPM |
| Construction Time | 3–4 hours (experienced) / 6–8 hours (first build) |
| Cure Time Before Use | 24 hours at 18–22°C |
How to Make a Wooden Yarn Ball Winder
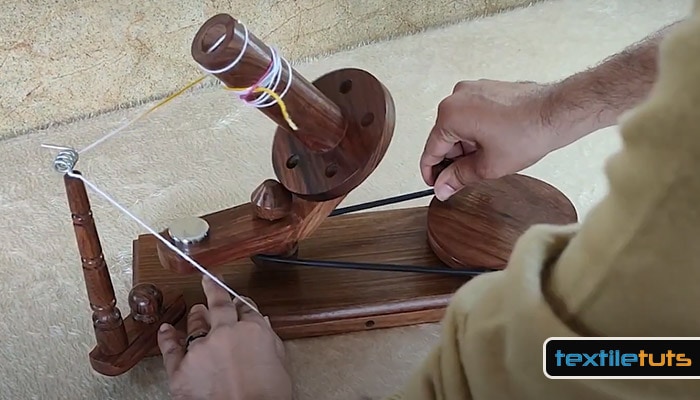
A yarn ball winder works by wrapping yarn into a center-pull ball that clamps tightly onto a table surface. The center spool holds yarn securely during knitting or crocheting, preventing rolling and tangling.
The spin stabilizer consists of two cylinders mounted with a 45-degree angled disc between them. This design causes the yarn to wrap evenly around the core as the angled surface rotates.
Construction time for this project ranges from 3-4 hours for experienced woodworkers. First-time builders should allow 6-8 hours including drying time for glue joints.
The following steps produce a functional wooden yarn ball winder capable of creating consistent center-pull balls up to 100mm in diameter.
Step 1: Gathering the Necessary Materials
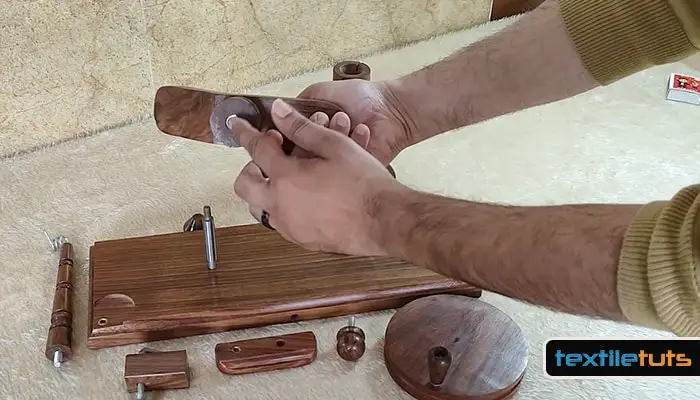
Collect all materials before beginning construction. Using quality materials ensures the finished winder performs reliably for years of regular use.
- Hardwood blank (minimum 50mm x 50mm x 250mm)
- Hole saw set including 25mm and 60mm diameters
- PVA wood glue (waterproof formulation recommended)
- Cutting mat (300mm x 450mm minimum)
- Sharp scissors and wire cutters
- Steel ruler (300mm) and carpenter’s compass
- Duct tape and pencil for marking
- Needle-nose pliers and small C-clamps (2-3)
Step 2: Measuring Sizes and Dimensions
Draw the complete design on graph paper before cutting any wood. Include all dimensions with tolerances of ±0.5mm for precision fitment of moving parts.
The critical ratio is base width to cylinder diameter of 3:1. A base measuring 300mm x 150mm accommodates a 50mm diameter cylinder assembly, creating a stable 6:1 height-to-width ratio when fully assembled.
Mark all hole centers with an awl or punch to prevent drill bit walking. Verify all measurements twice before making any cuts.
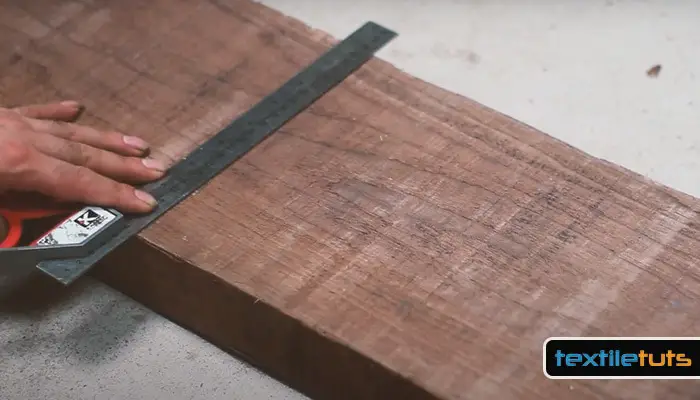
Step 3: Cutting the Wooden Blank
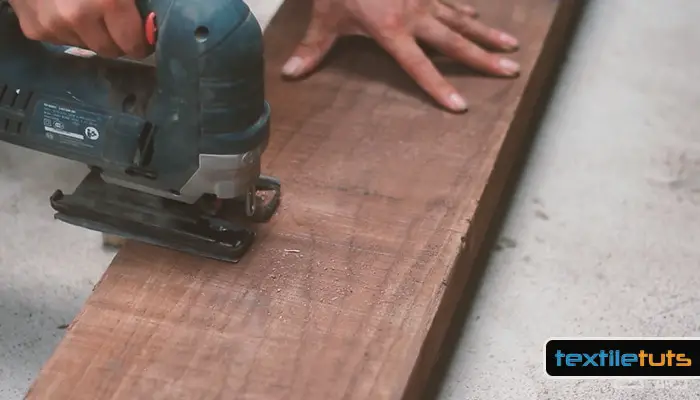
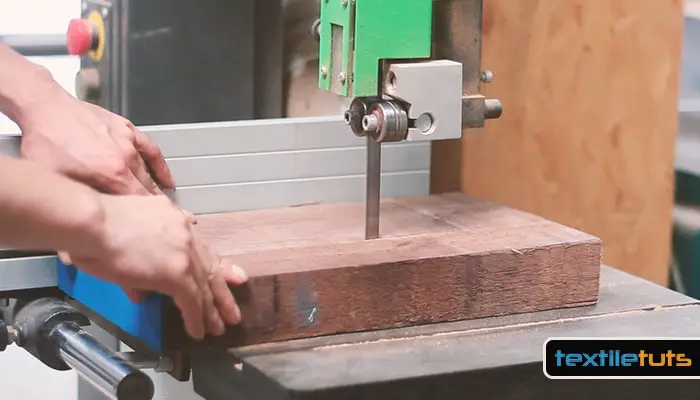
Spindle turning on a lathe produces the most accurate cylindrical pieces. Secure the wooden blank between the headstock and tailstock with the grain running parallel to the axis of rotation.
Create the spin stabilizer cylinder first: turn a 50mm diameter cylinder, 200mm in length. Use a parting tool to cut to length, leaving 2mm for final trimming.
Create the second cylinder at 50mm diameter and 150mm length. Cut one end at exactly 45 degrees using a skew chisel while the piece rotates at 800-1000 RPM.
Sand all turned surfaces to 220-grit finish before removing from the lathe. This prevents ovality and ensures smooth yarn winding without snagging.
Step 4: Creating the Wooden Base
The base provides stability and prevents the winder from tipping during use. Hardwoods such as maple, beech, or ash provide optimal durability.
Cut the base blank to 300mm x 150mm x 20mm using a table saw or circular saw. Rout a 3mm roundover on all top edges to prevent yarn snagging.
Drill the cylinder mounting hole (25mm diameter) centered 75mm from one end and 75mm from each side. Drill through the complete base thickness.
Counterbore four 5mm holes, 10mm deep, at the corners for optional bolt mounting to a workbench. This upgrade prevents movement during high-speed winding.
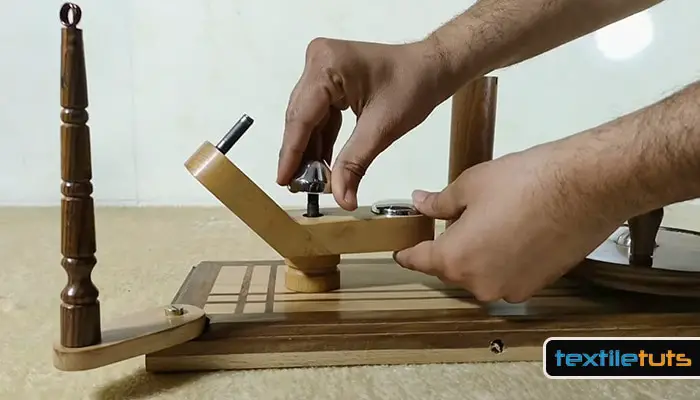
Step 5: Making the Winder

The winder disc mounts between the two cylinders and creates the angled spinning surface that distributes yarn evenly.
Use a 60mm hole saw to cut a 15mm thick disc from hardwood. Bore a 25mm center hole precisely on the disc’s center point.
Mark the exact center by drawing two intersecting diagonals. The intersection point indicates where the 25mm hole must be drilled for proper cylinder alignment.
Sand the disc surfaces to 320-grit for smooth yarn passage. Any roughness will catch and break delicate fibers during winding.
Step 6: Adding the Wire Guide
The wire guide directs yarn from the skein into the center of the spinning winder. Stainless steel wire (2mm diameter) provides durability and smooth yarn passage.
Cut a 120mm length of stainless steel wire using precision wire cutters. Form a small spiral (15mm diameter) at one end using needle-nose pliers.
Bend the straight portion to form a 30-degree angle at the top. This angle matches the yarn entry angle for smooth flow into the rotating disc.
Secure the wire guide with PVA glue in a pre-drilled 3mm hole in the base. Allow 24 hours curing time before applying any tension to the wire.
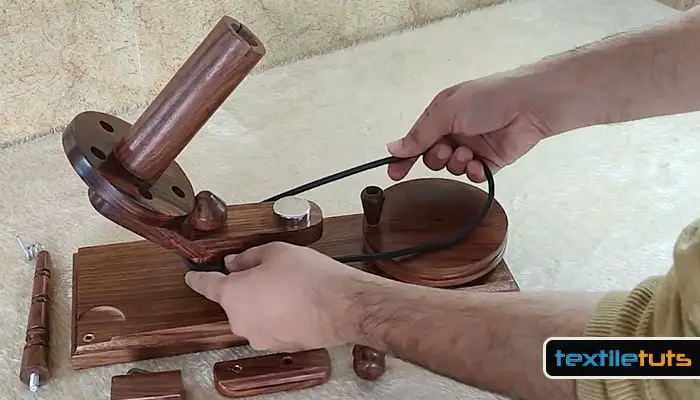
Step 7: Assembling the Yarn Ball Winder
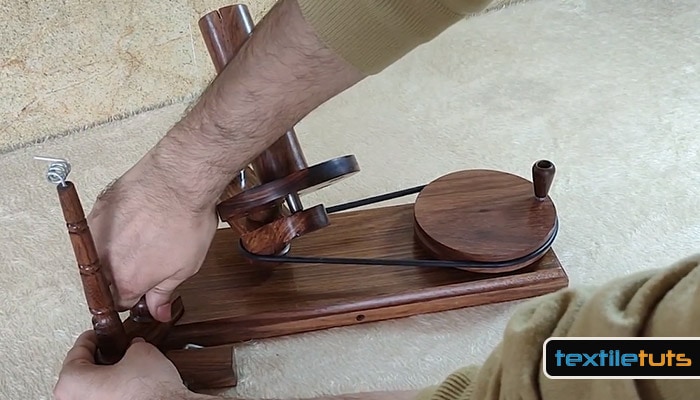
Dry-fit all components before applying glue. Verify the 45-degree angled cut faces the mounting disc and that all cylinder ends seat properly in their respective holes.
Apply PVA glue to all contact surfaces between cylinders and mounting disc. Use enough glue to create a thin squeeze-out line around joints, indicating complete coverage.
Clamp the assembly using two C-clamps at opposite corners. Do not overtighten—glue needs space to spread evenly across the joint.
Allow the assembled winder to cure for 24 hours at room temperature (18-22°C) before handling. Cold temperatures extend curing time and may weaken the bond.
Step 8: Winding the Yarn
Secure the winder base to a table surface using the integrated clamp or optional bolt holes. The winder must not move during operation.
Thread the yarn end through the wire guide and down through the spin stabilizer cylinder. Pull approximately 100mm of yarn through before starting.
Hold the yarn at a 20-degree angle from vertical while turning the winder clockwise at approximately 60 RPM. This angle creates the proper helix distribution for center-pull retrieval.
Stop every 20-30 turns to shift the yarn position by 15-20mm along the disc perimeter. This redistribution prevents buildup on one side and creates a perfectly round ball.
Complete winding with 50-60 grams of worsted-weight yarn per 100mm diameter ball. The resulting center-pull maintains its shape through multiple knitting sessions.
Bottom Line
A well-built wooden yarn ball winder eliminates yarn tangling and preserves fiber elasticity during storage. The 45-degree spin stabilizer design distributes yarn evenly into balanced balls with accessible center pulls.
Quality construction with proper curing times ensures the winder performs reliably for decades. Regular maintenance includes checking all glue joints annually and replacing the wire guide if bending occurs.
References
- Woodworking specifications and measurements based on standard craft industry practices for spindle turning and small project construction.


